VCF 安装截图
目录
- VCF 安装截图
- 1. 通过Cloud Builder初始化VCF
- 2. 环境升级
- 3. 排错
1. 通过Cloud Builder初始化VCF
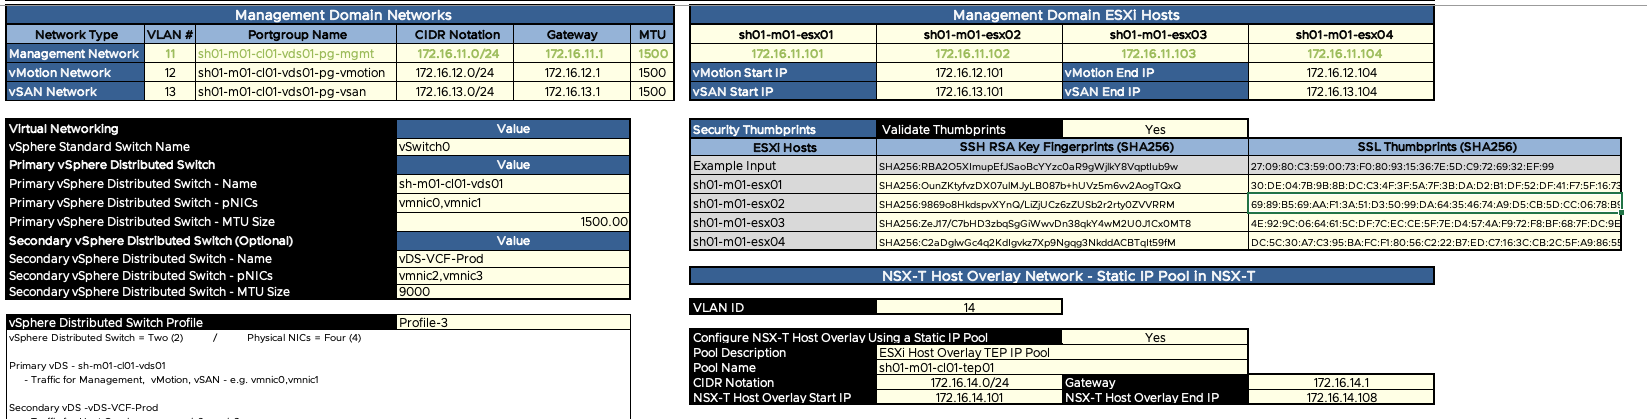
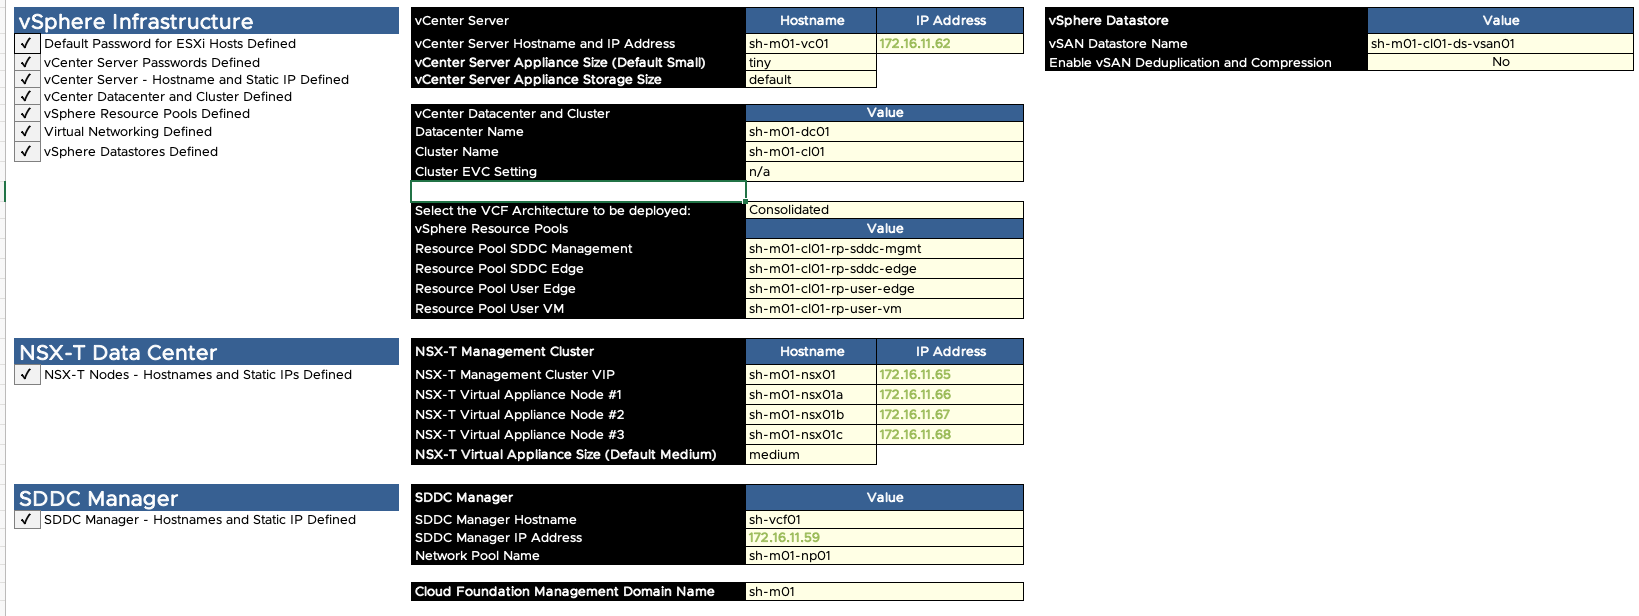
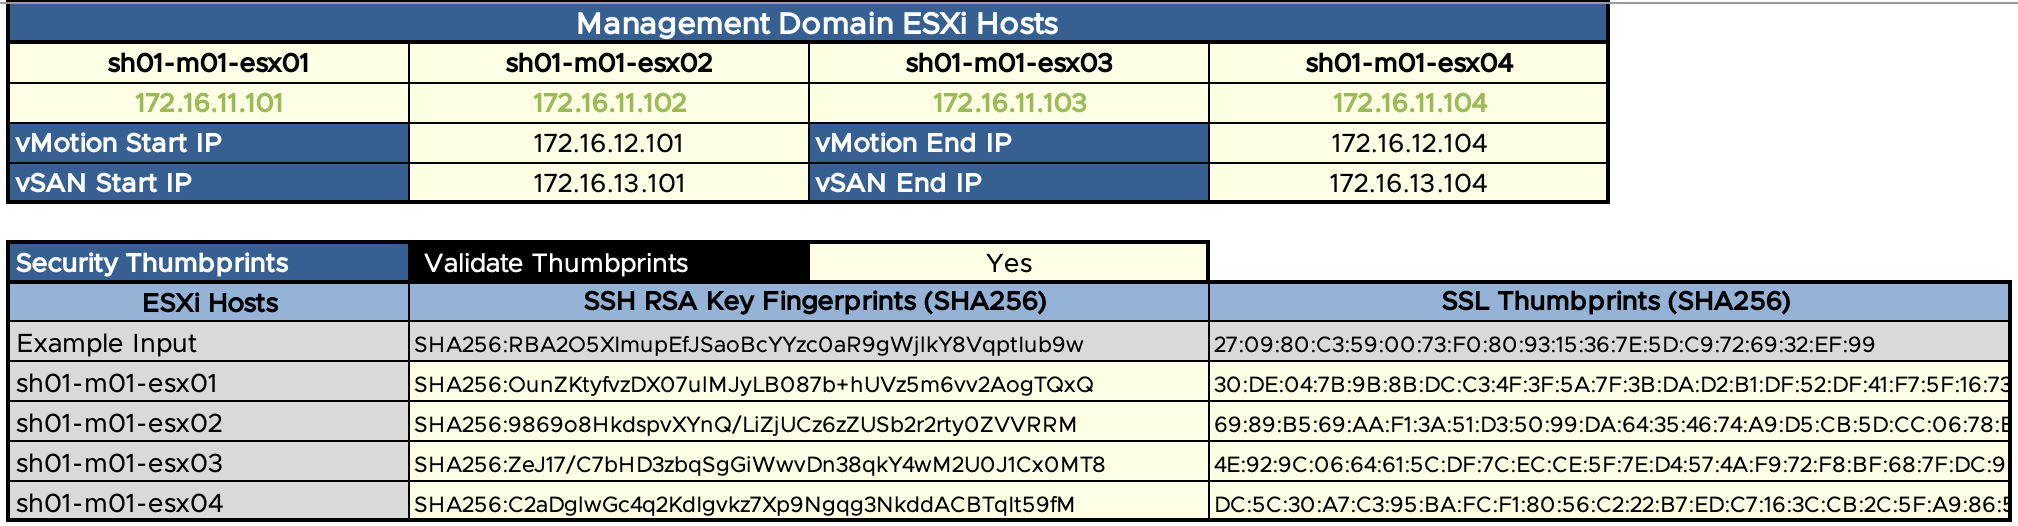
1.1. VCF部署规划
注意:其中ESXi主机的SSH Fingerprint和SSL Thumbprint参考第三章节获取。
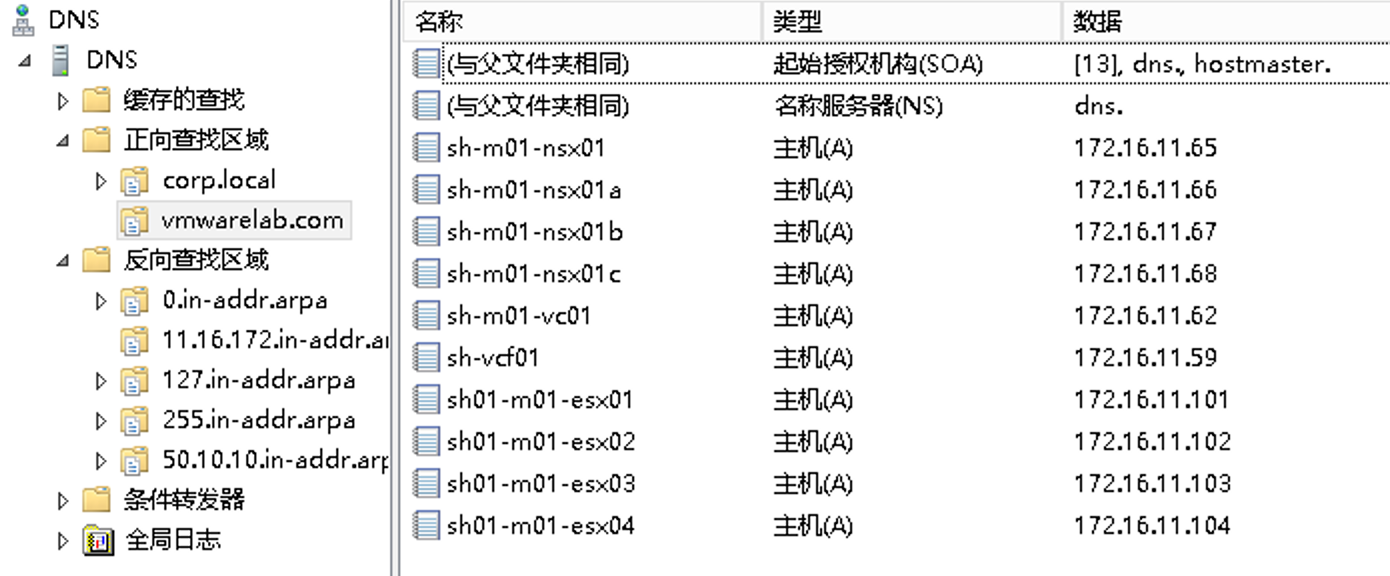
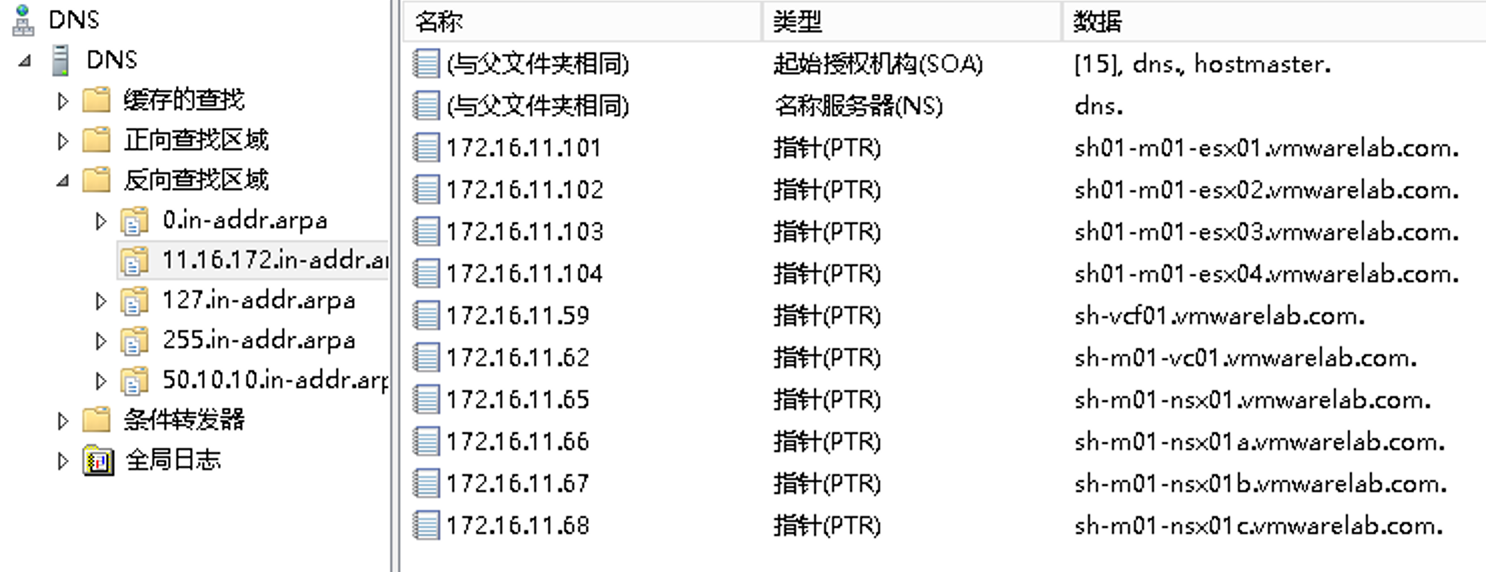
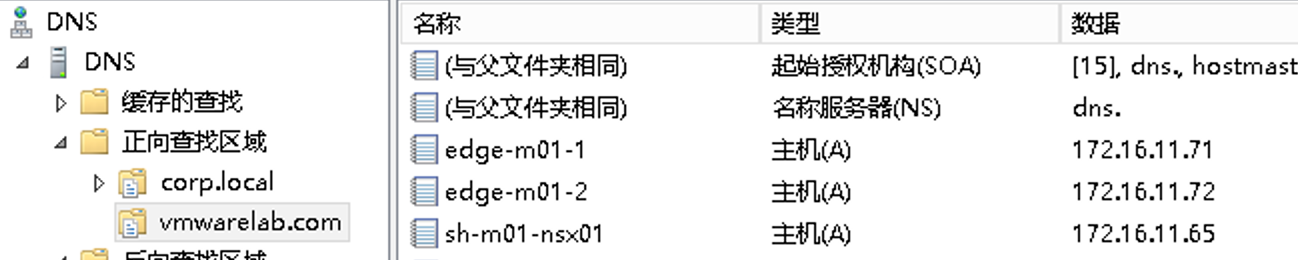
1.2. 批量创建A记录
在Windows AD中批量添加A记录和PTR记录:
DnsCmd . /RecordAdd vmwarelab.com sh-m01-nsx01 A 172.16.11.65
DnsCmd . /RecordAdd vmwarelab.com sh-m01-nsx01a A 172.16.11.66
DnsCmd . /RecordAdd vmwarelab.com sh-m01-nsx01b A 172.16.11.67
DnsCmd . /RecordAdd vmwarelab.com sh-m01-nsx01c A 172.16.11.68
DnsCmd . /RecordAdd vmwarelab.com sh-m01-vc01 A 172.16.11.62
DnsCmd . /RecordAdd vmwarelab.com sh-vcf01 A 172.16.11.59
DnsCmd . /RecordAdd vmwarelab.com sh01-m01-esx01 A 172.16.11.101
DnsCmd . /RecordAdd vmwarelab.com sh01-m01-esx02 A 172.16.11.102
DnsCmd . /RecordAdd vmwarelab.com sh01-m01-esx03 A 172.16.11.103
DnsCmd . /RecordAdd vmwarelab.com sh01-m01-esx04 A 172.16.11.104
1.3. ESXi指纹准备
所有主机开启SSH。
运行下列命令获取SSH thumbprint:
ssh-keygen -lf <(ssh-keyscan sh01-m01-esx01.vmwarelab.com 2>/dev/null)

ssh-keygen -lf <(ssh-keyscan sh01-m01-esx02.vmwarelab.com 2>/dev/null)

ssh-keygen -lf <(ssh-keyscan sh01-m01-esx03.vmwarelab.com 2>/dev/null)

ssh-keygen -lf <(ssh-keyscan sh01-m01-esx04.vmwarelab.com 2>/dev/null)
记录 RSA 的输出结果:

运行下列命令获取SSL thumbprint,记录结果:
openssl s_client -connect sh01-m01-esx01.vmwarelab.com:443 < /dev/null 2> /dev/null | openssl x509 -sha256 -fingerprint -noout -in /dev/stdin

openssl s_client -connect sh01-m01-esx02.vmwarelab.com:443 < /dev/null 2> /dev/null | openssl x509 -sha256 -fingerprint -noout -in /dev/stdin

openssl s_client -connect sh01-m01-esx03.vmwarelab.com:443 < /dev/null 2> /dev/null | openssl x509 -sha256 -fingerprint -noout -in /dev/stdin

openssl s_client -connect sh01-m01-esx04.vmwarelab.com:443 < /dev/null 2> /dev/null | openssl x509 -sha256 -fingerprint -noout -in /dev/stdin

将上述记录填入VCF规划表格中:
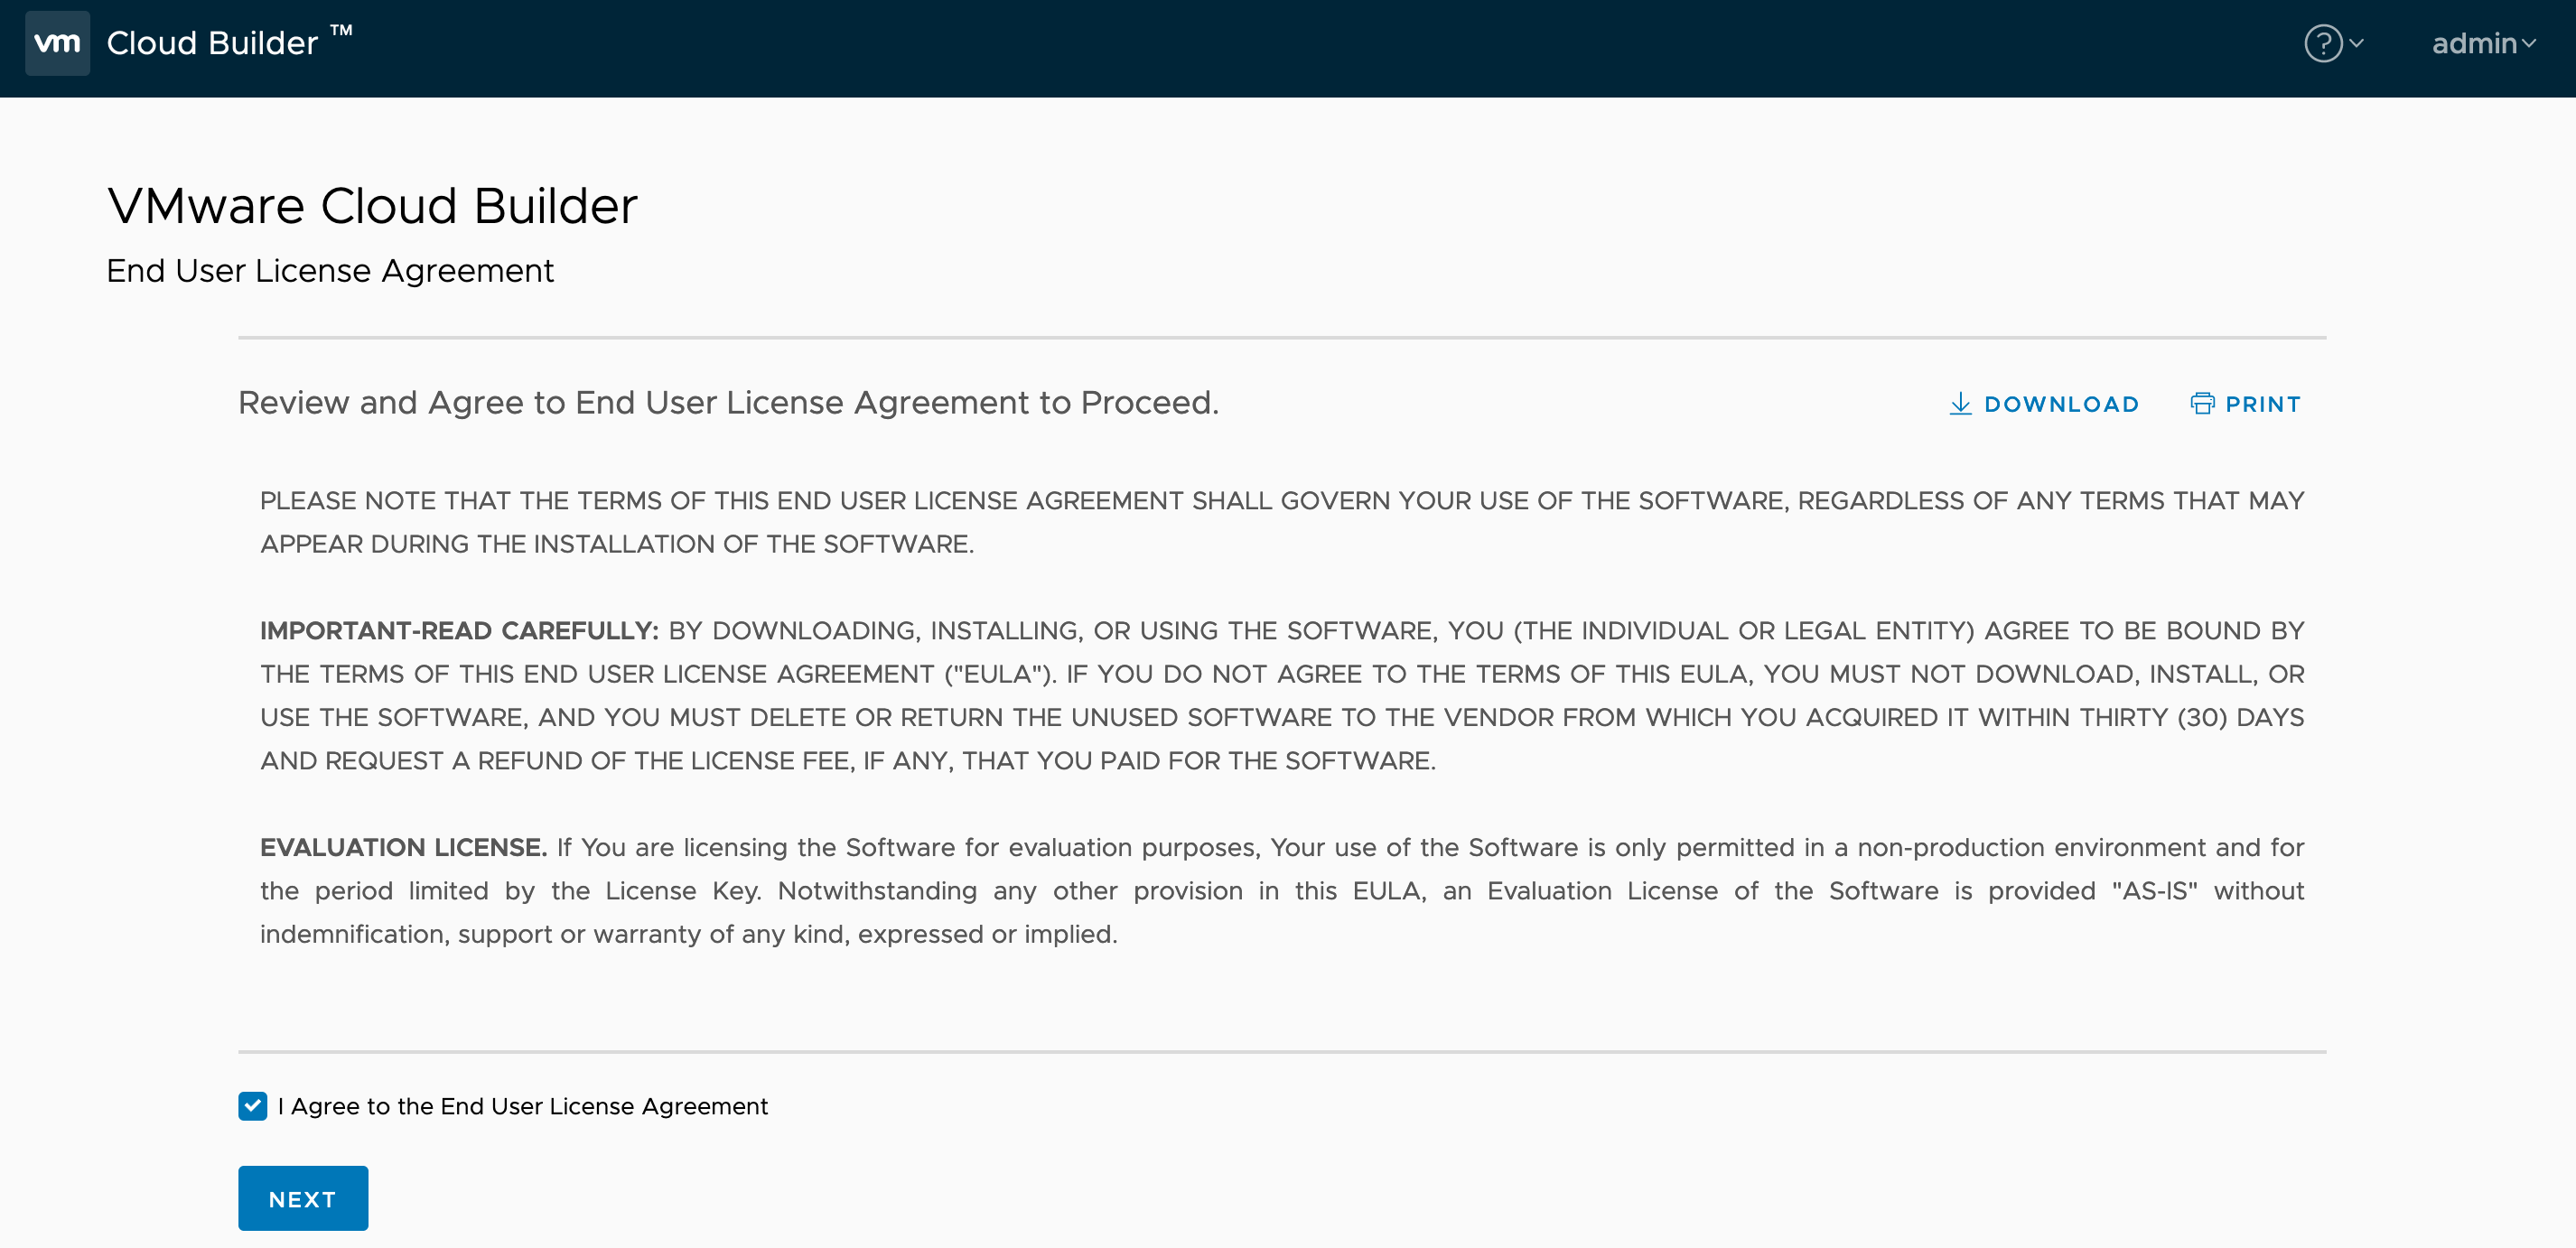
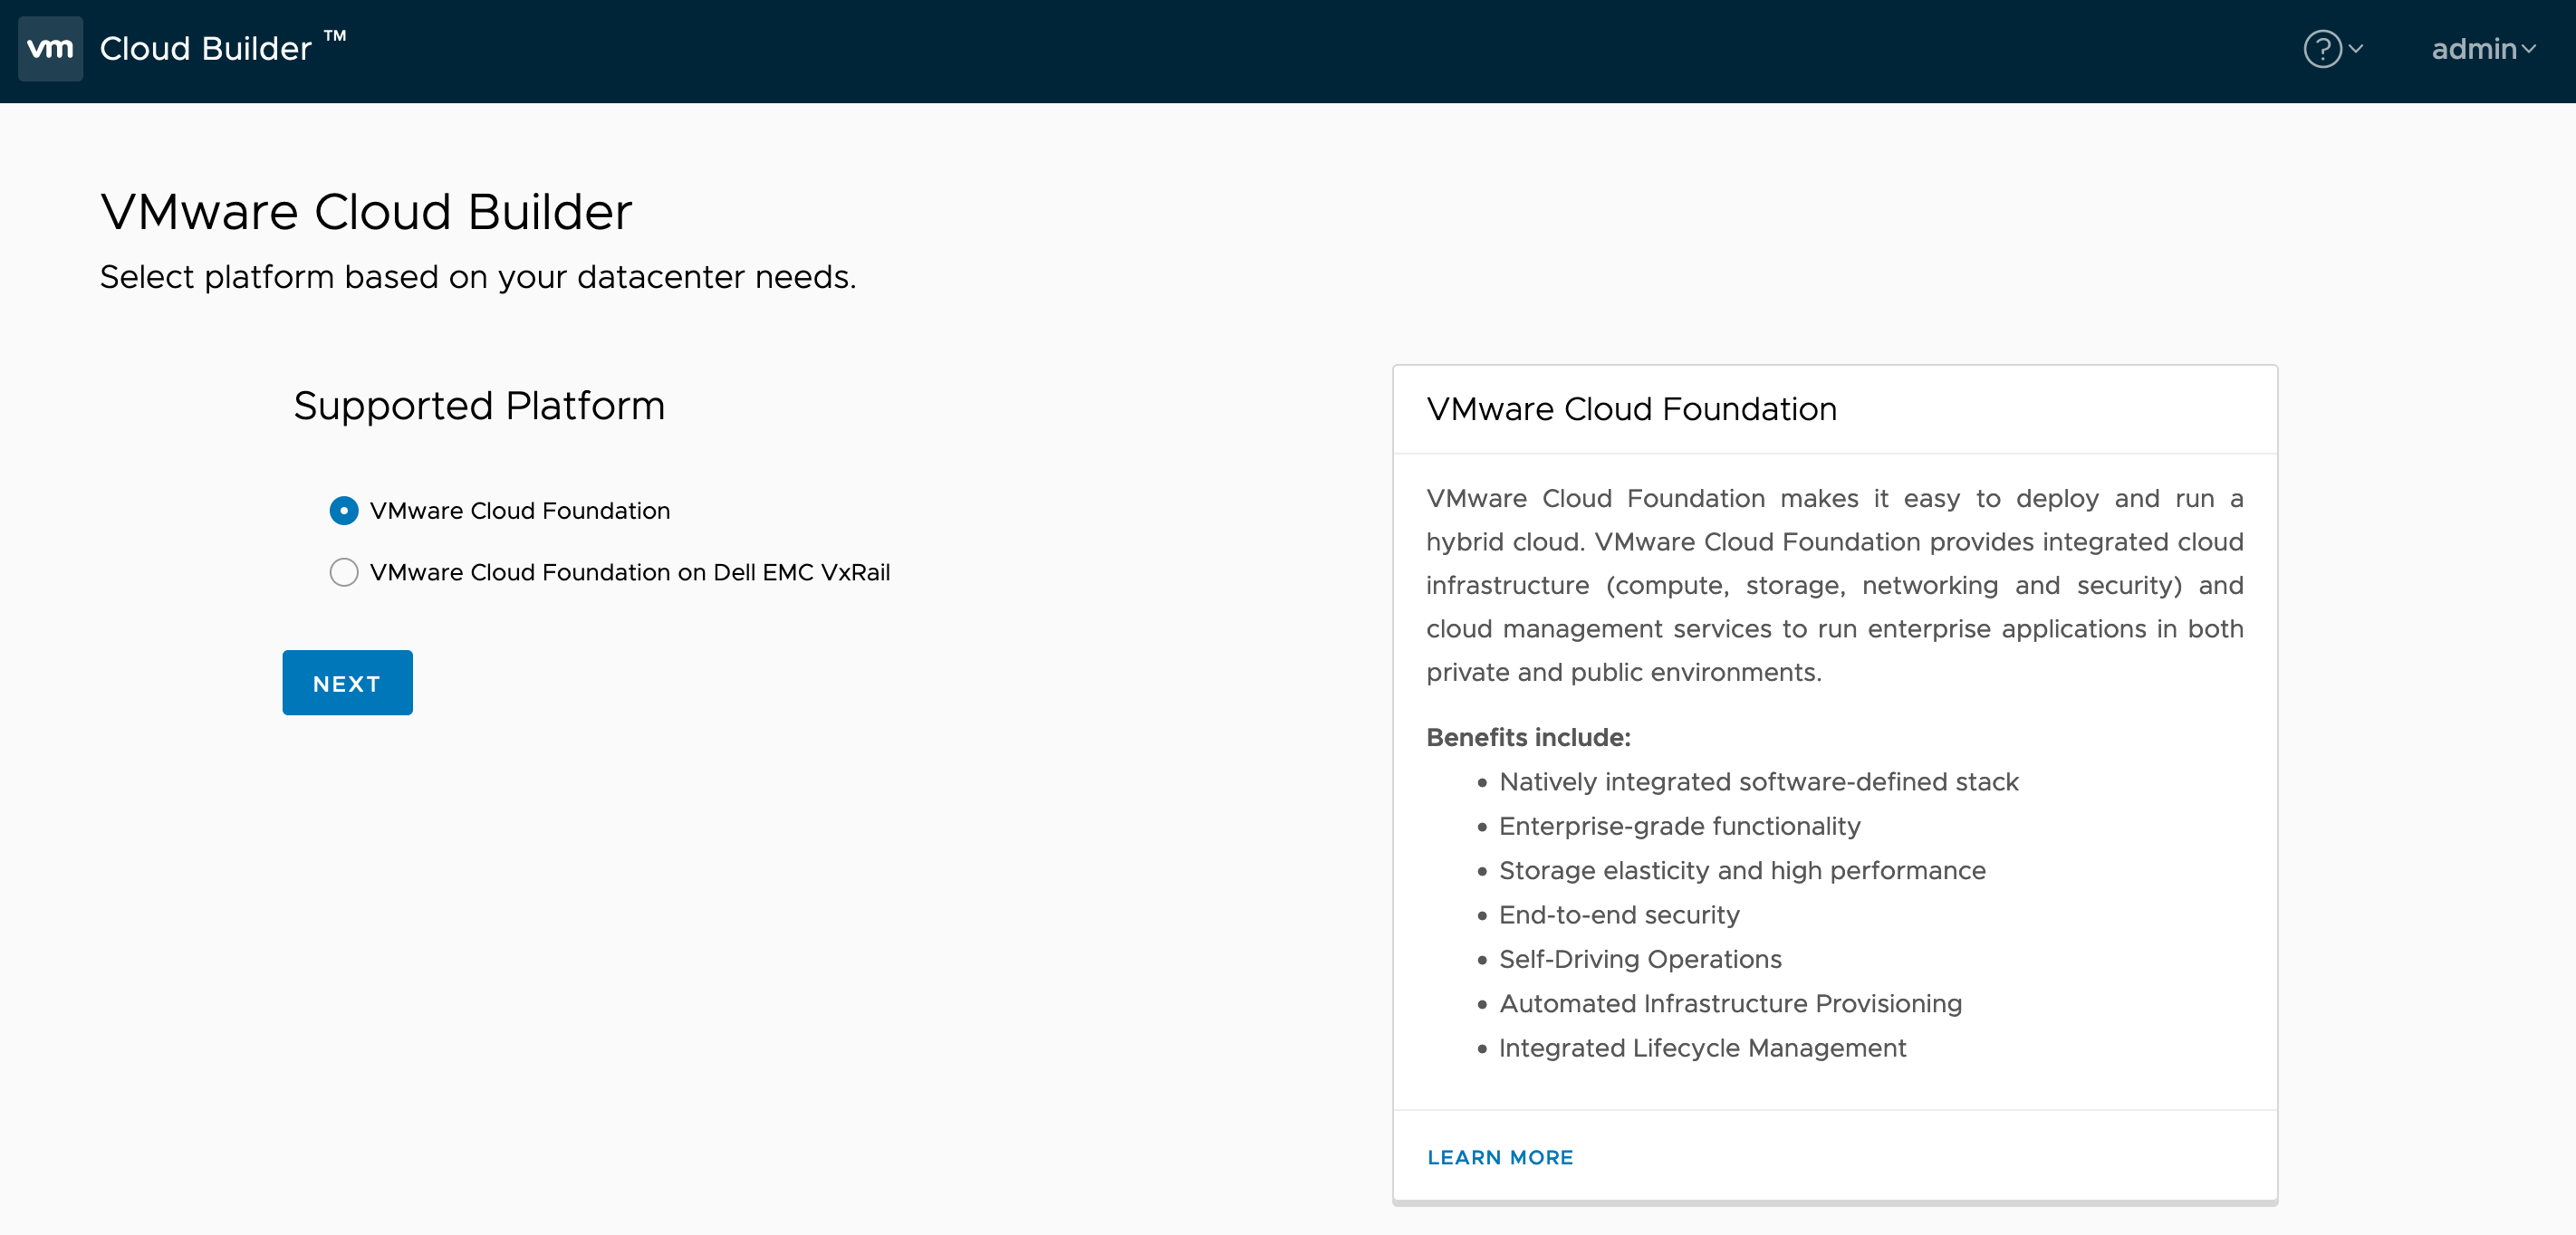
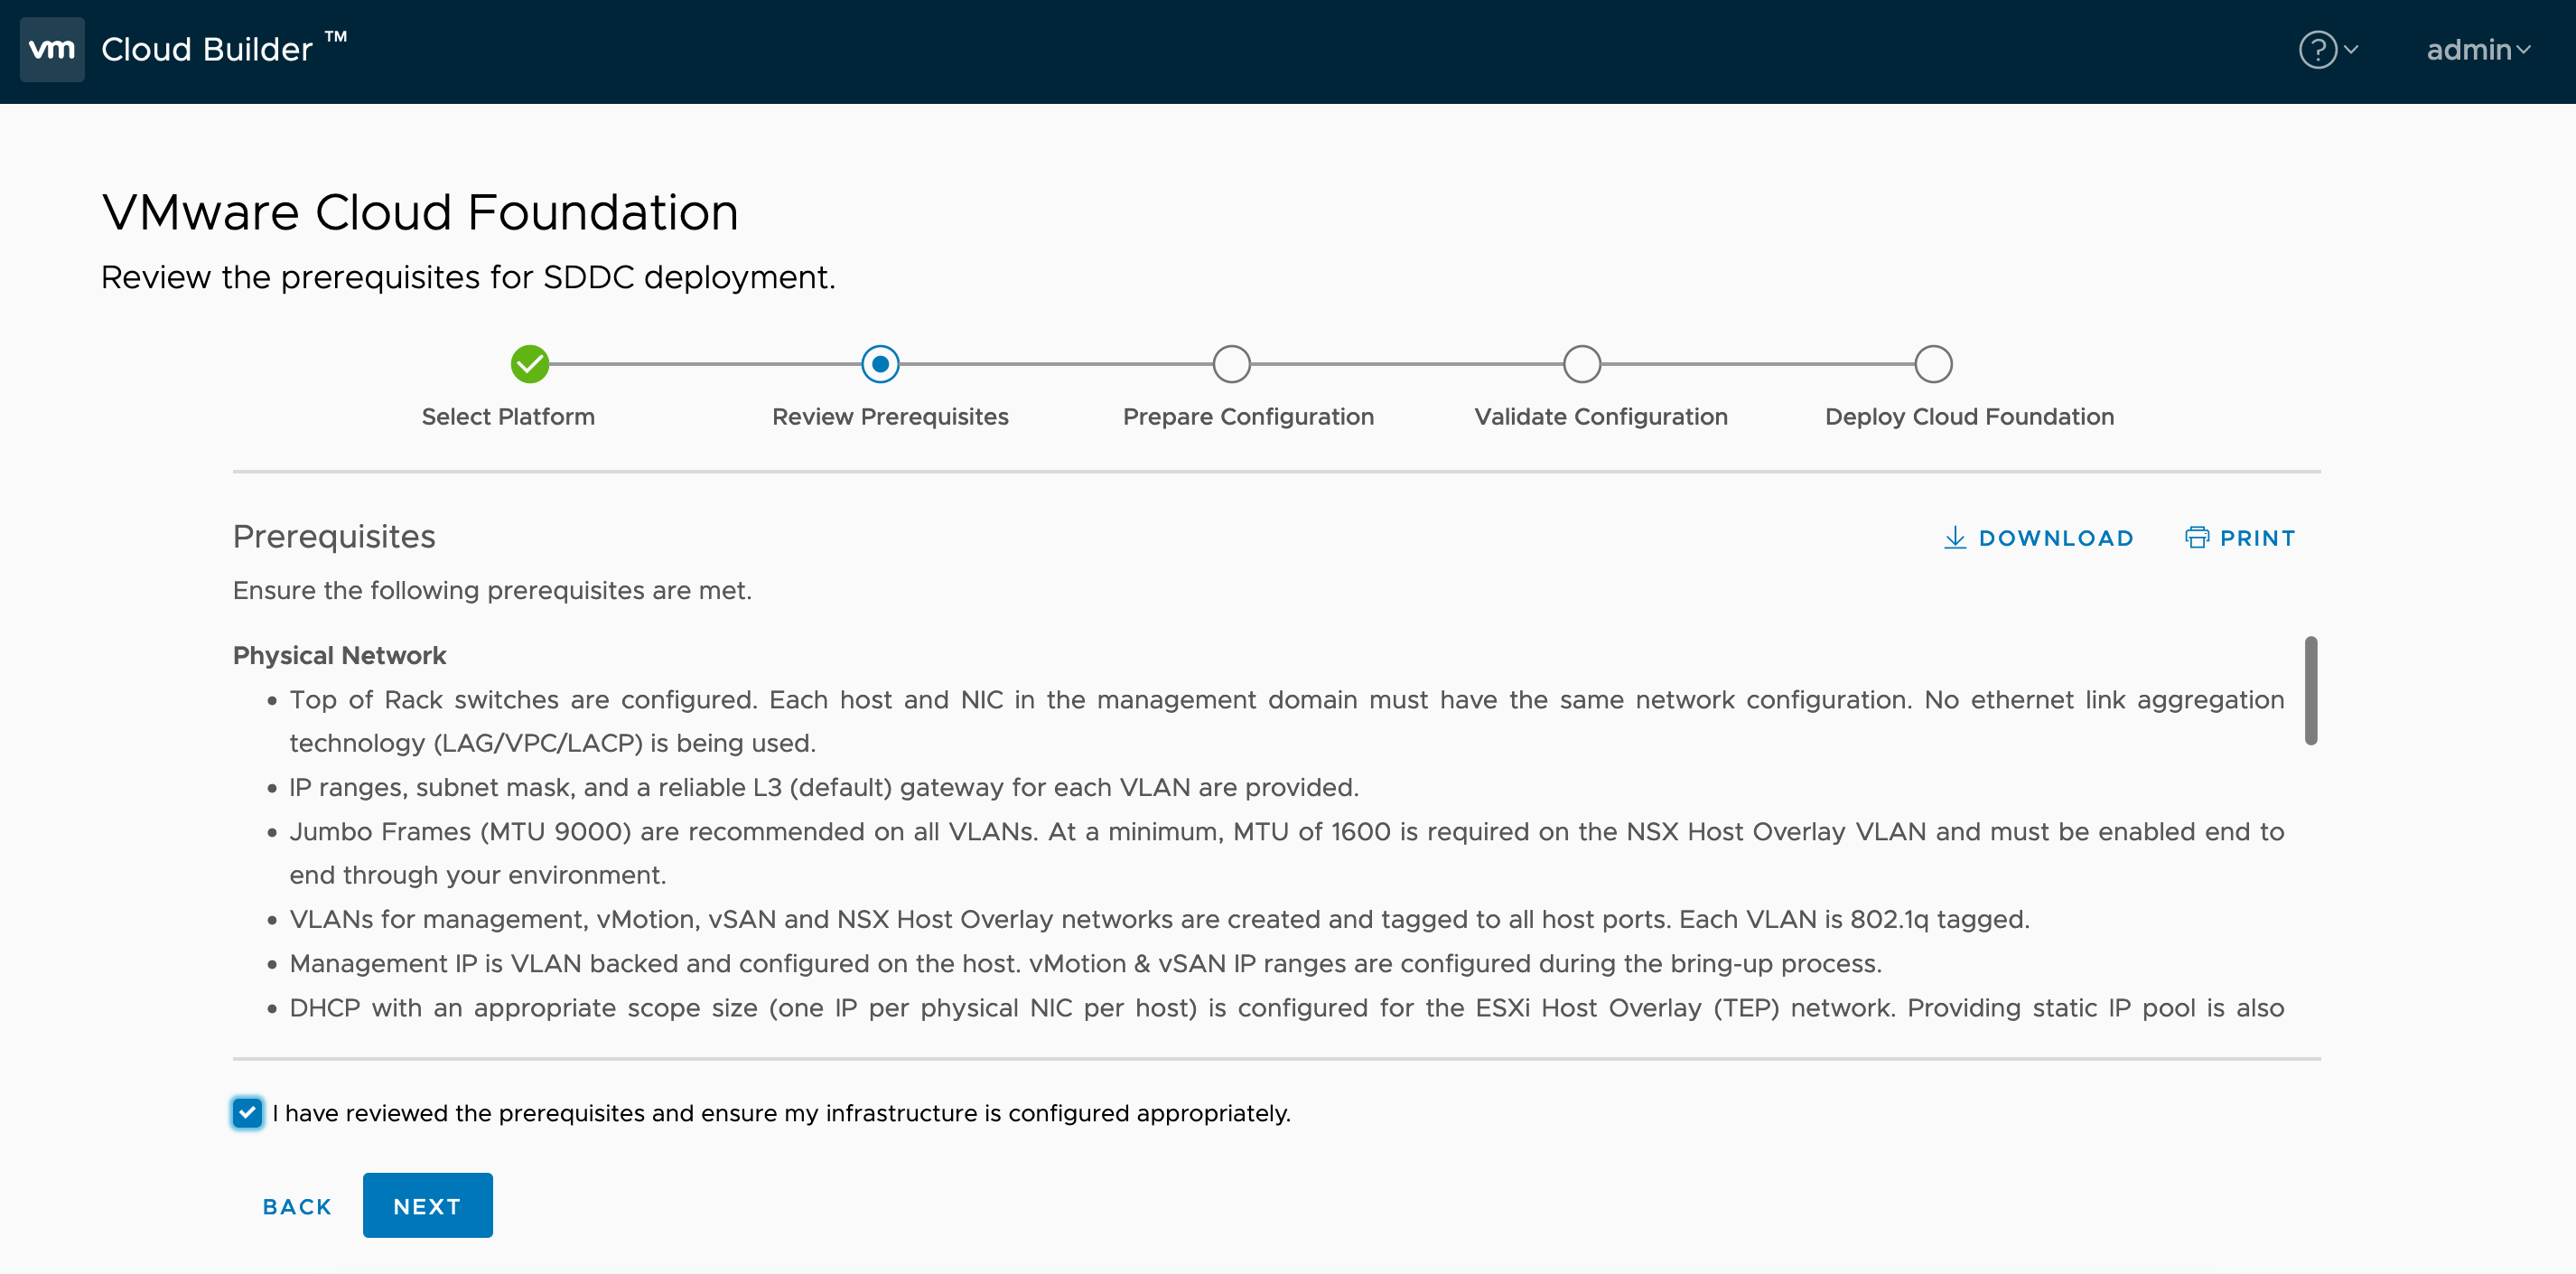
1.4. 启动Cloud Builder向导
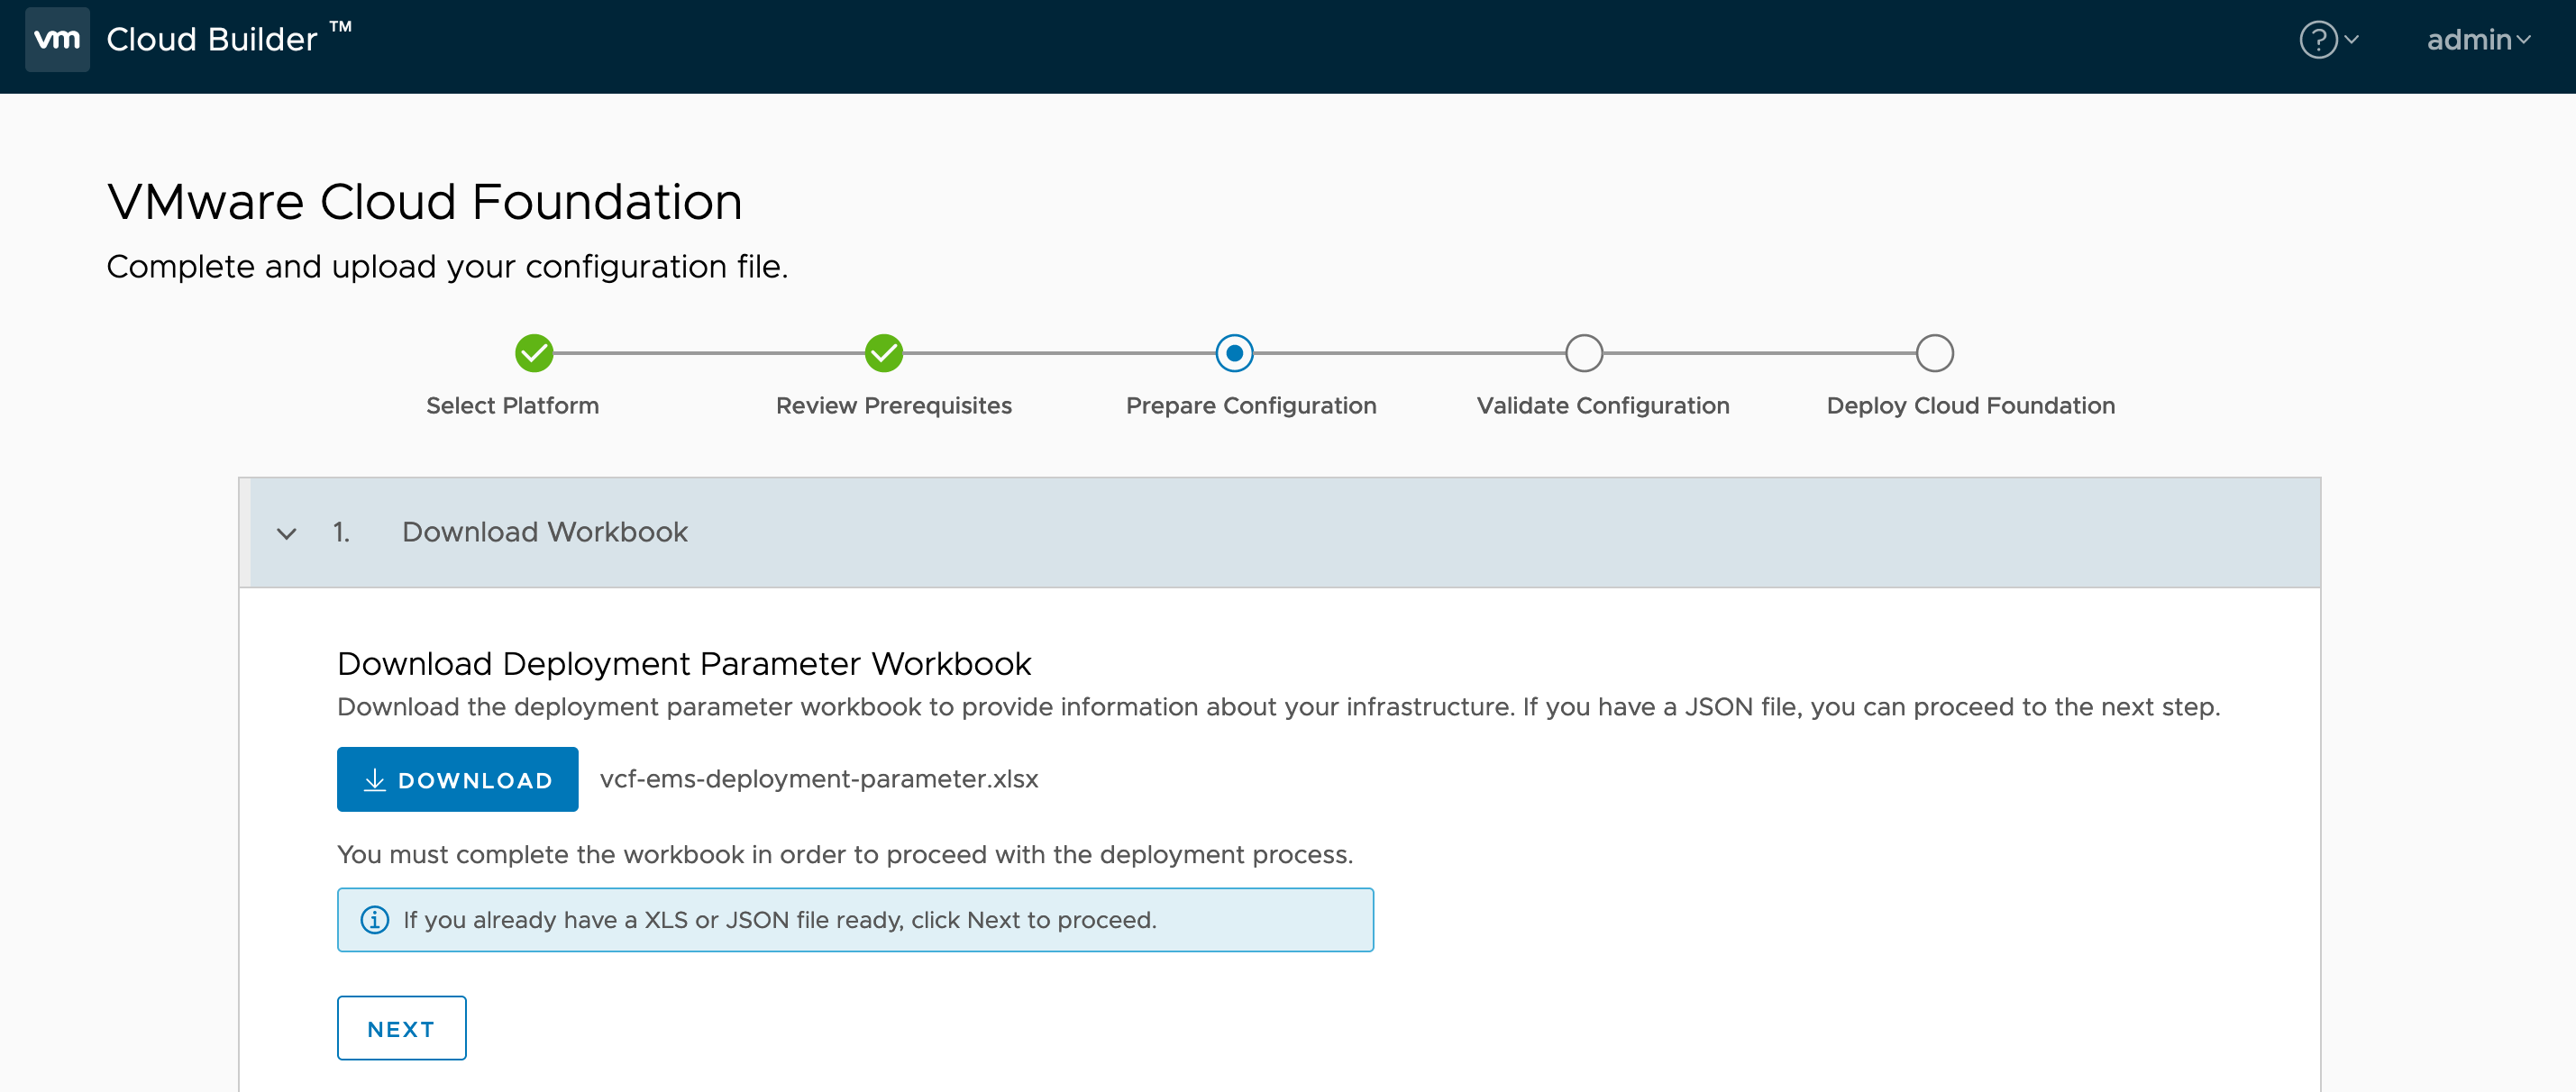
下载Excel,填写完成后再上传:

通过scp将vcf-ems-deployment-parameter.xlsx上传到Cloud Builder虚拟机,然后ssh登录到Cloud Builder,通过下列命令将Excel转换为JSON
/opt/vmware/sddc-support/sos –jsongenerator –jsongenerator-design vcf-ems –jsongenerator-input vcf-ems-deployment-parameter.xlsx
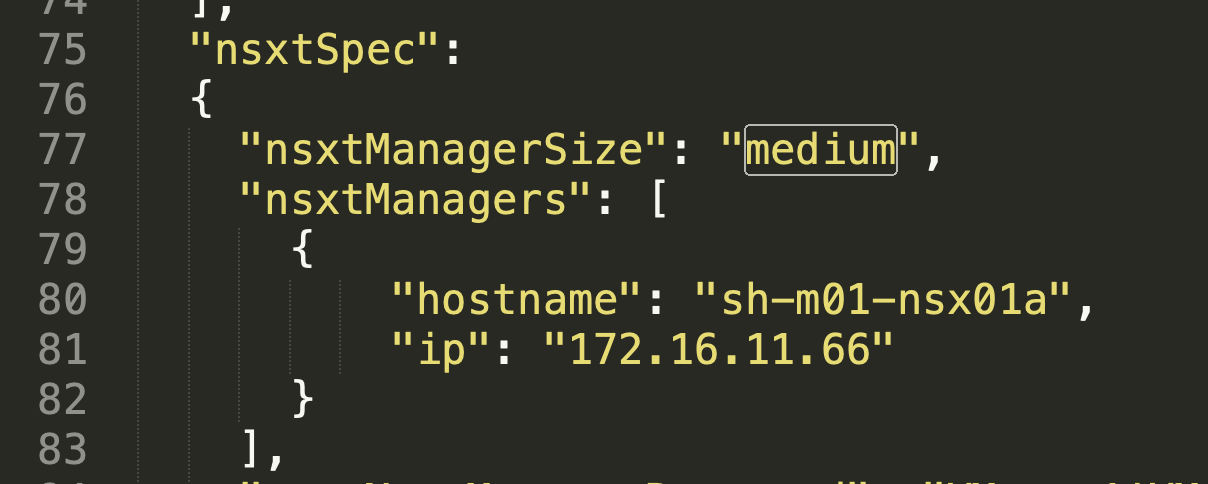
修改JSON文件,只保留一个NSX Manager的信息(这里是因为测试环境资源较少,将默认的3节点NSX Manager改为单节点,生产环境可以不改):
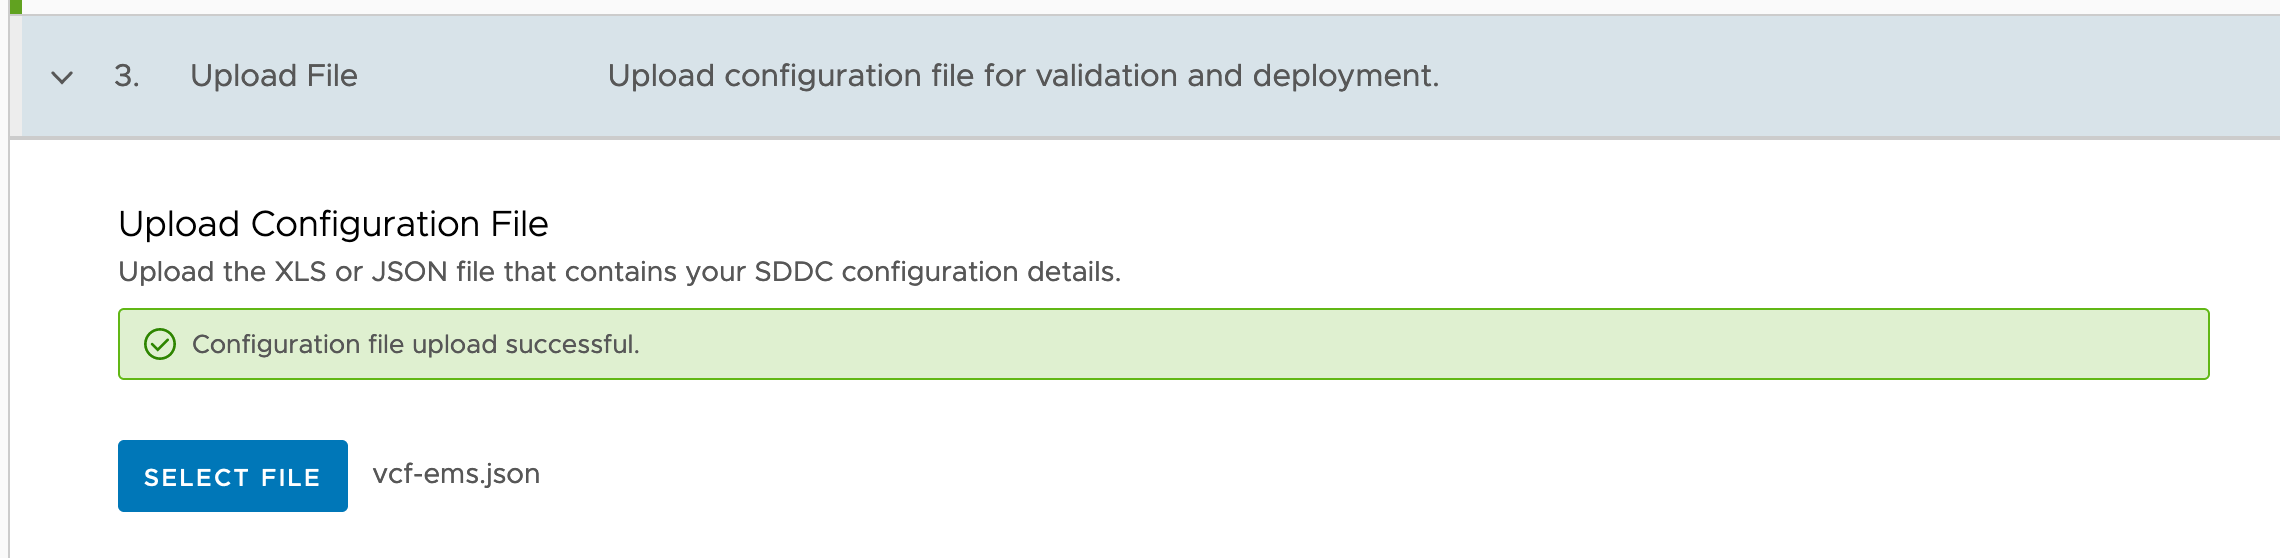
将修改后的json SCP出来,再上传到Cloud Builder:
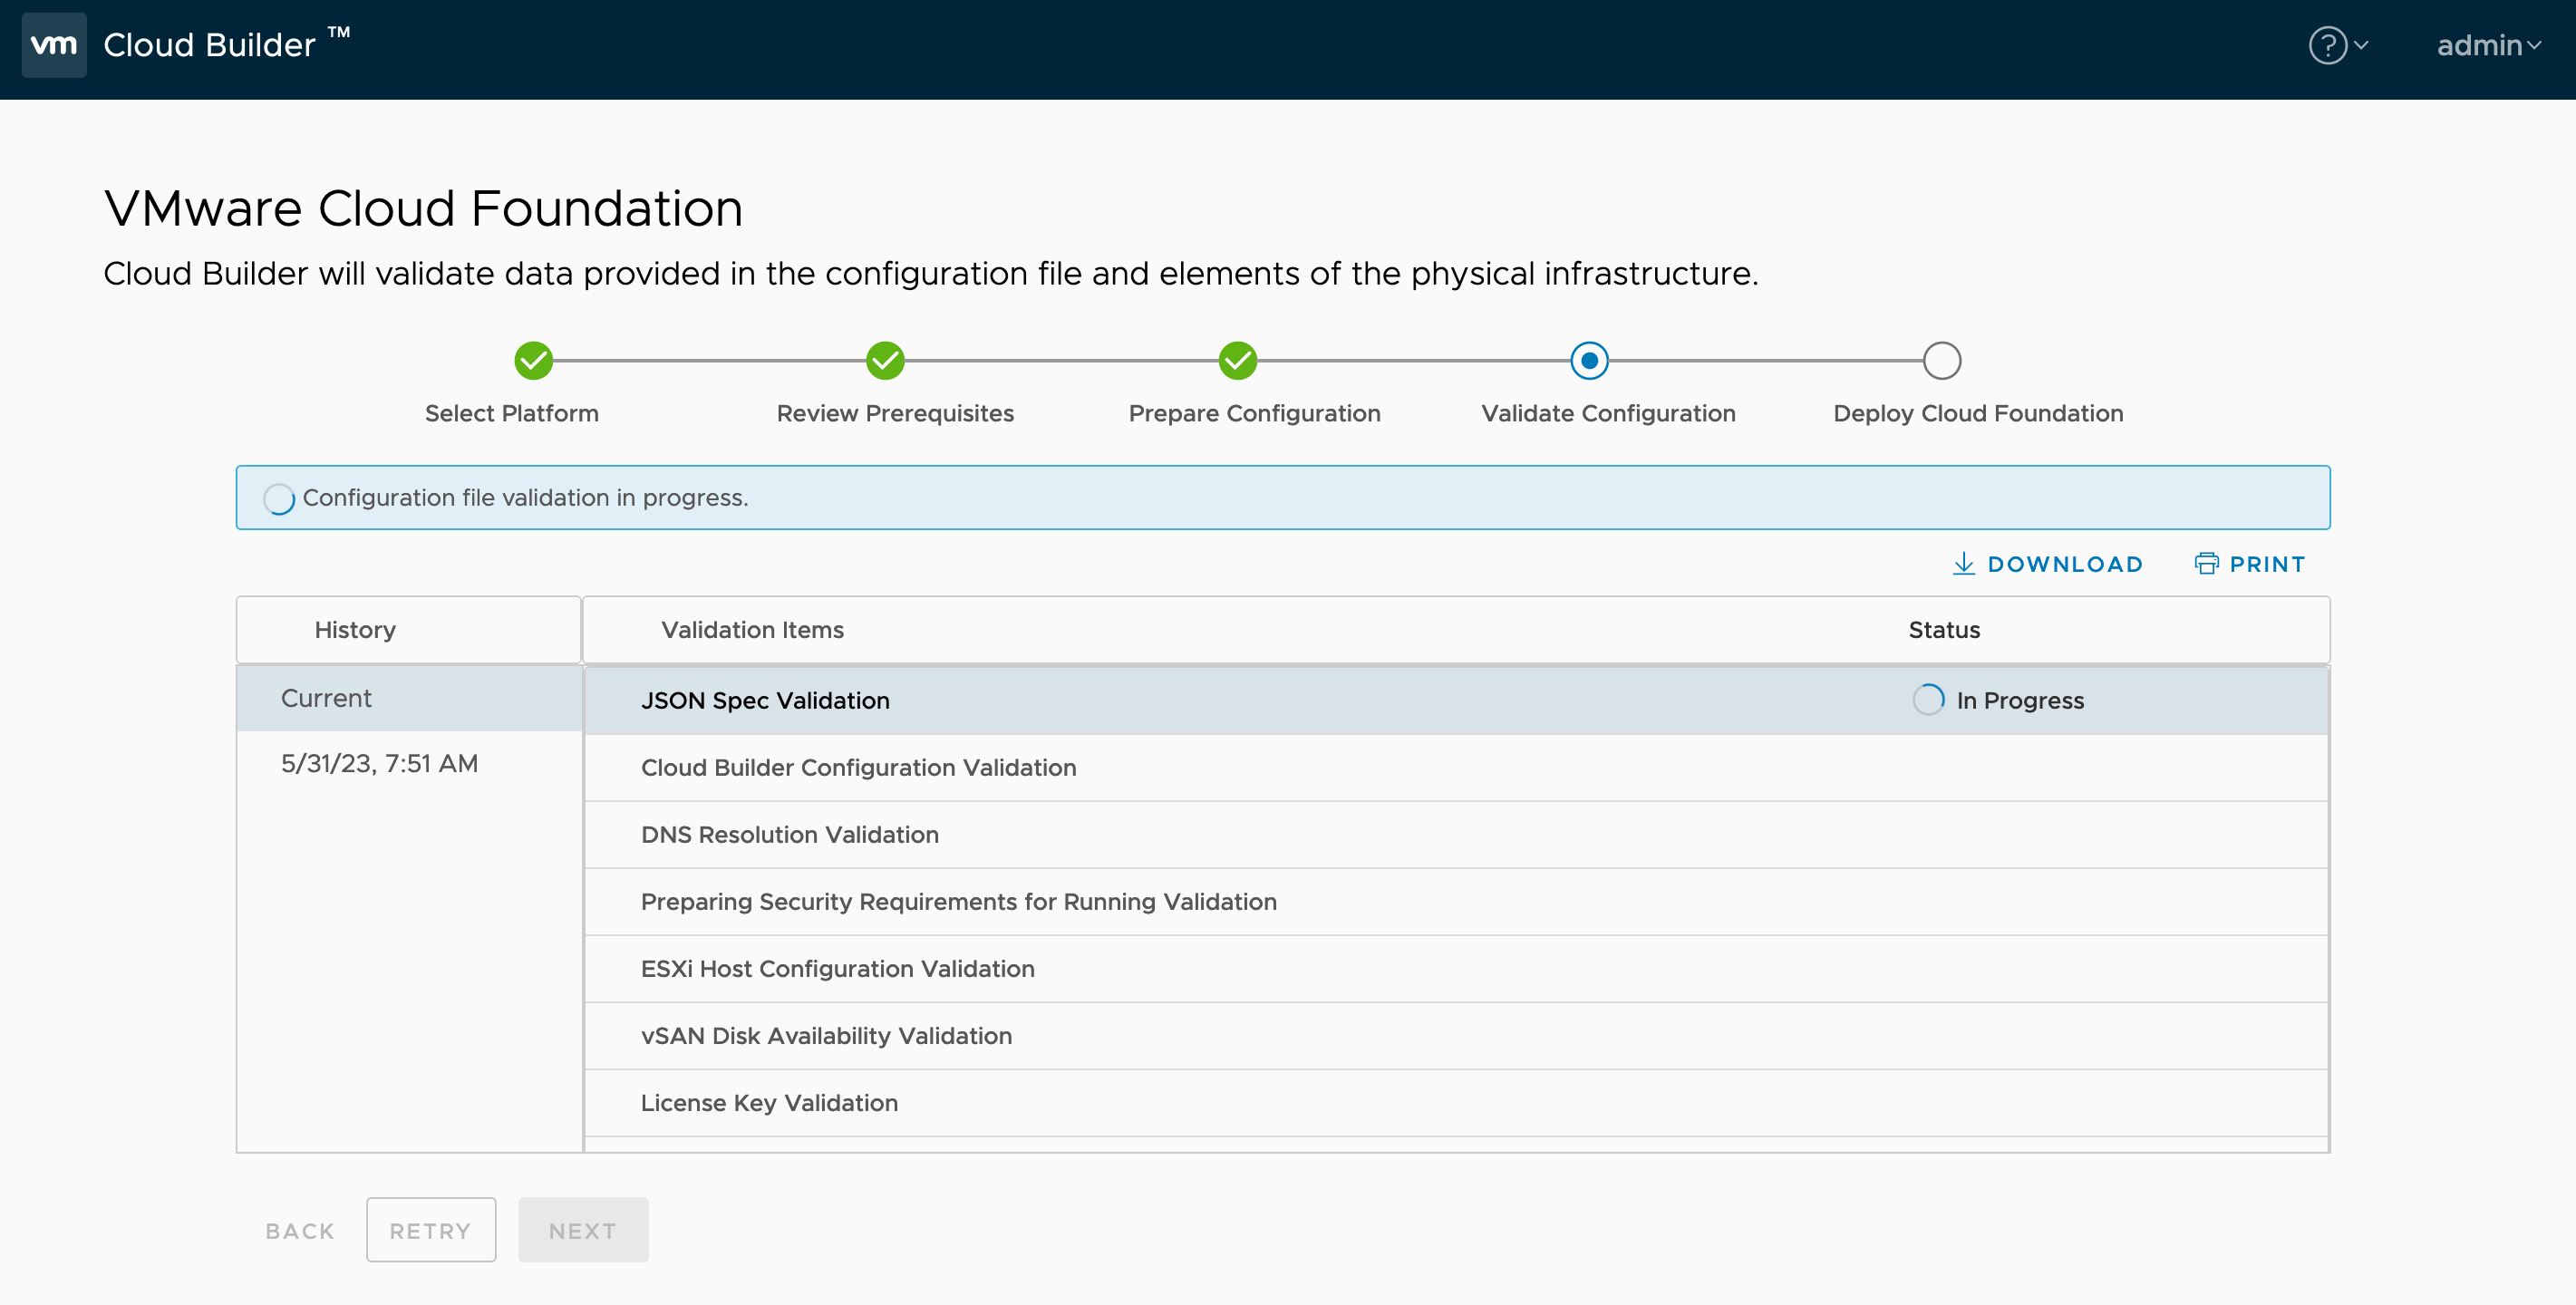
启动部署过程:
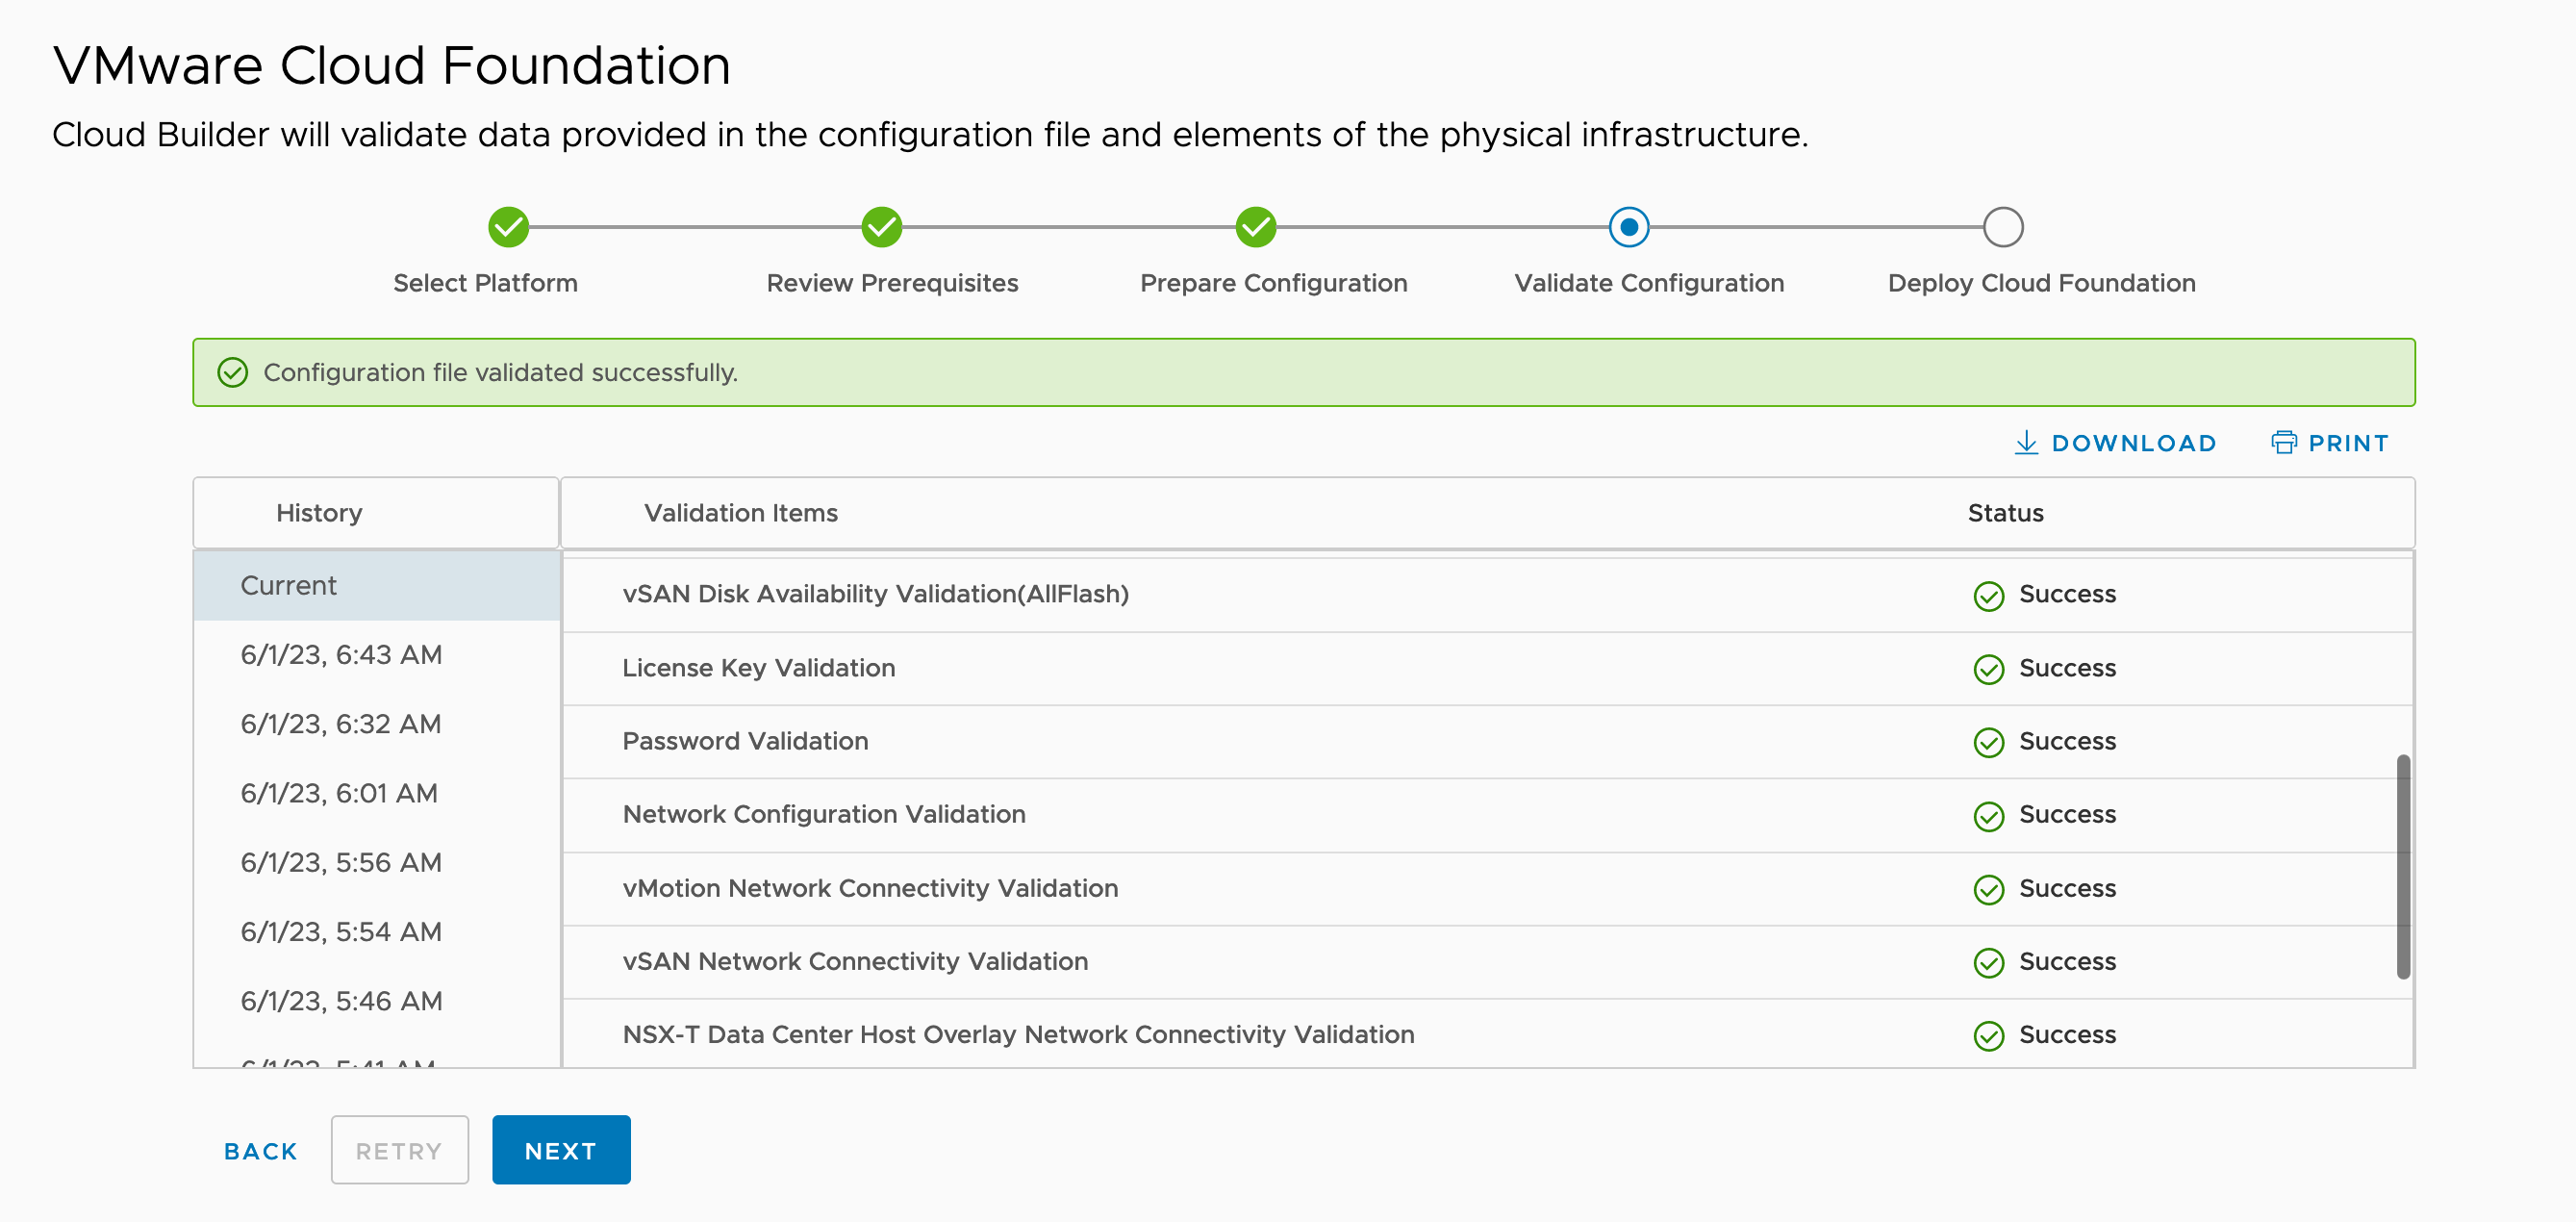
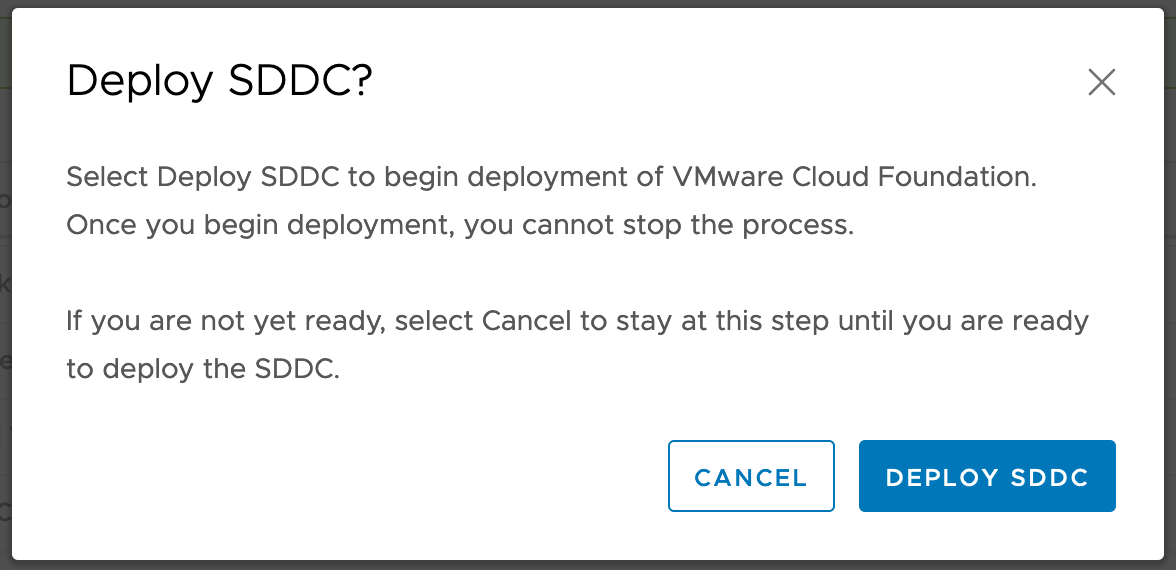
1.5. 部署过程
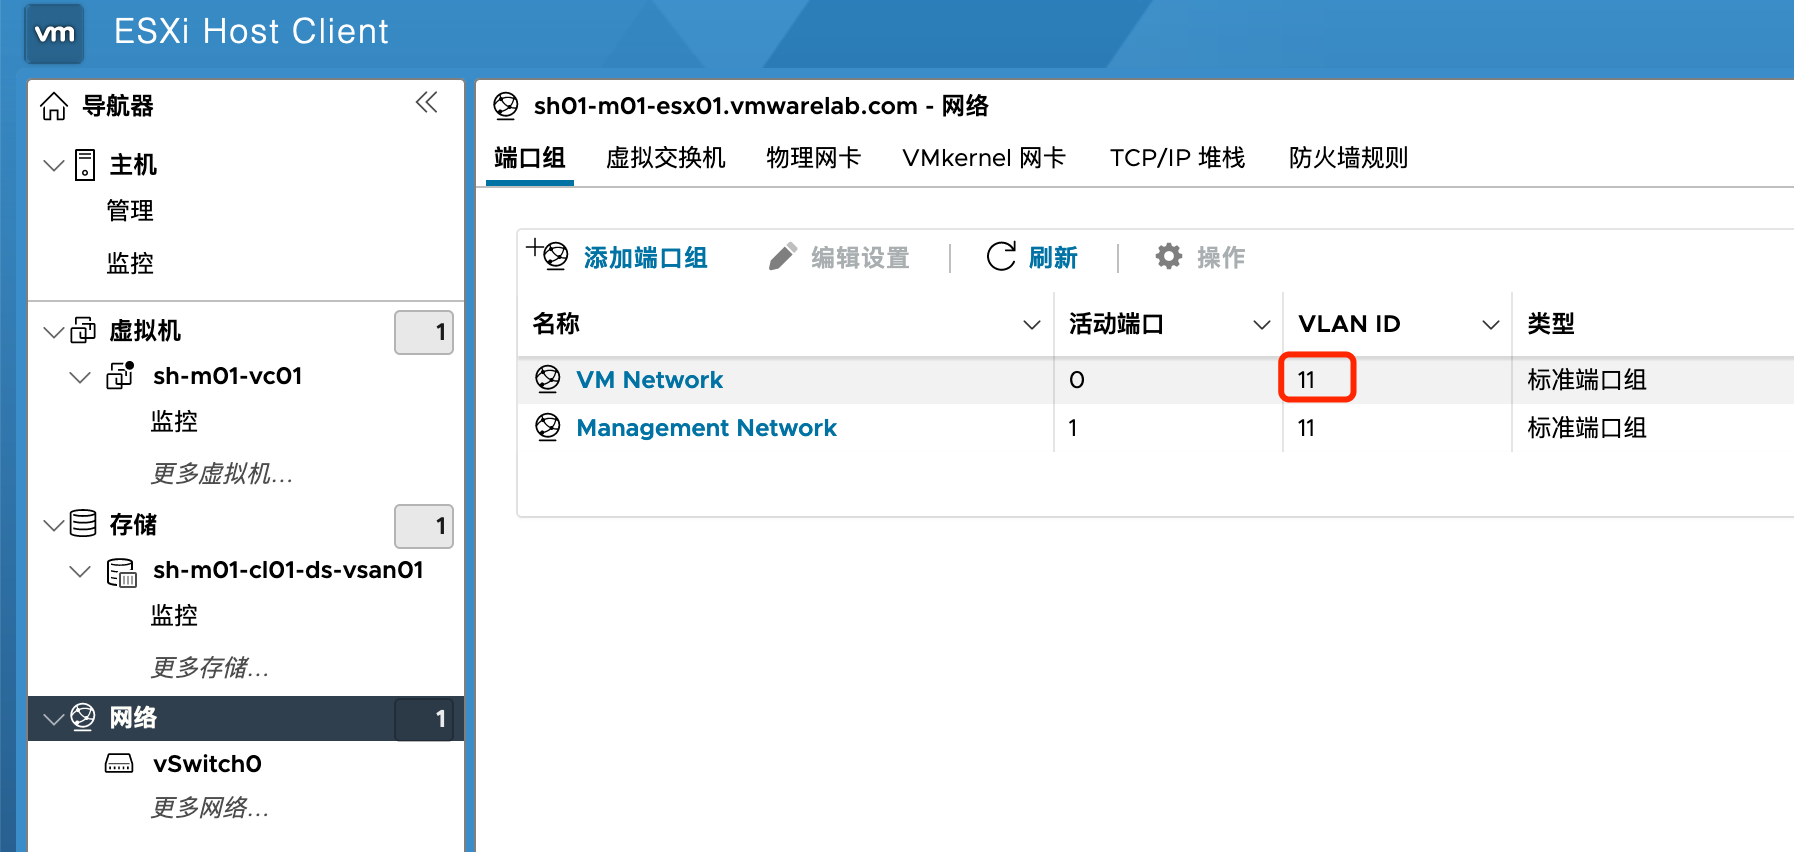
1.5.1. 配置网络及VSAN
自动修改VM Network端口组的 VLAN ID:
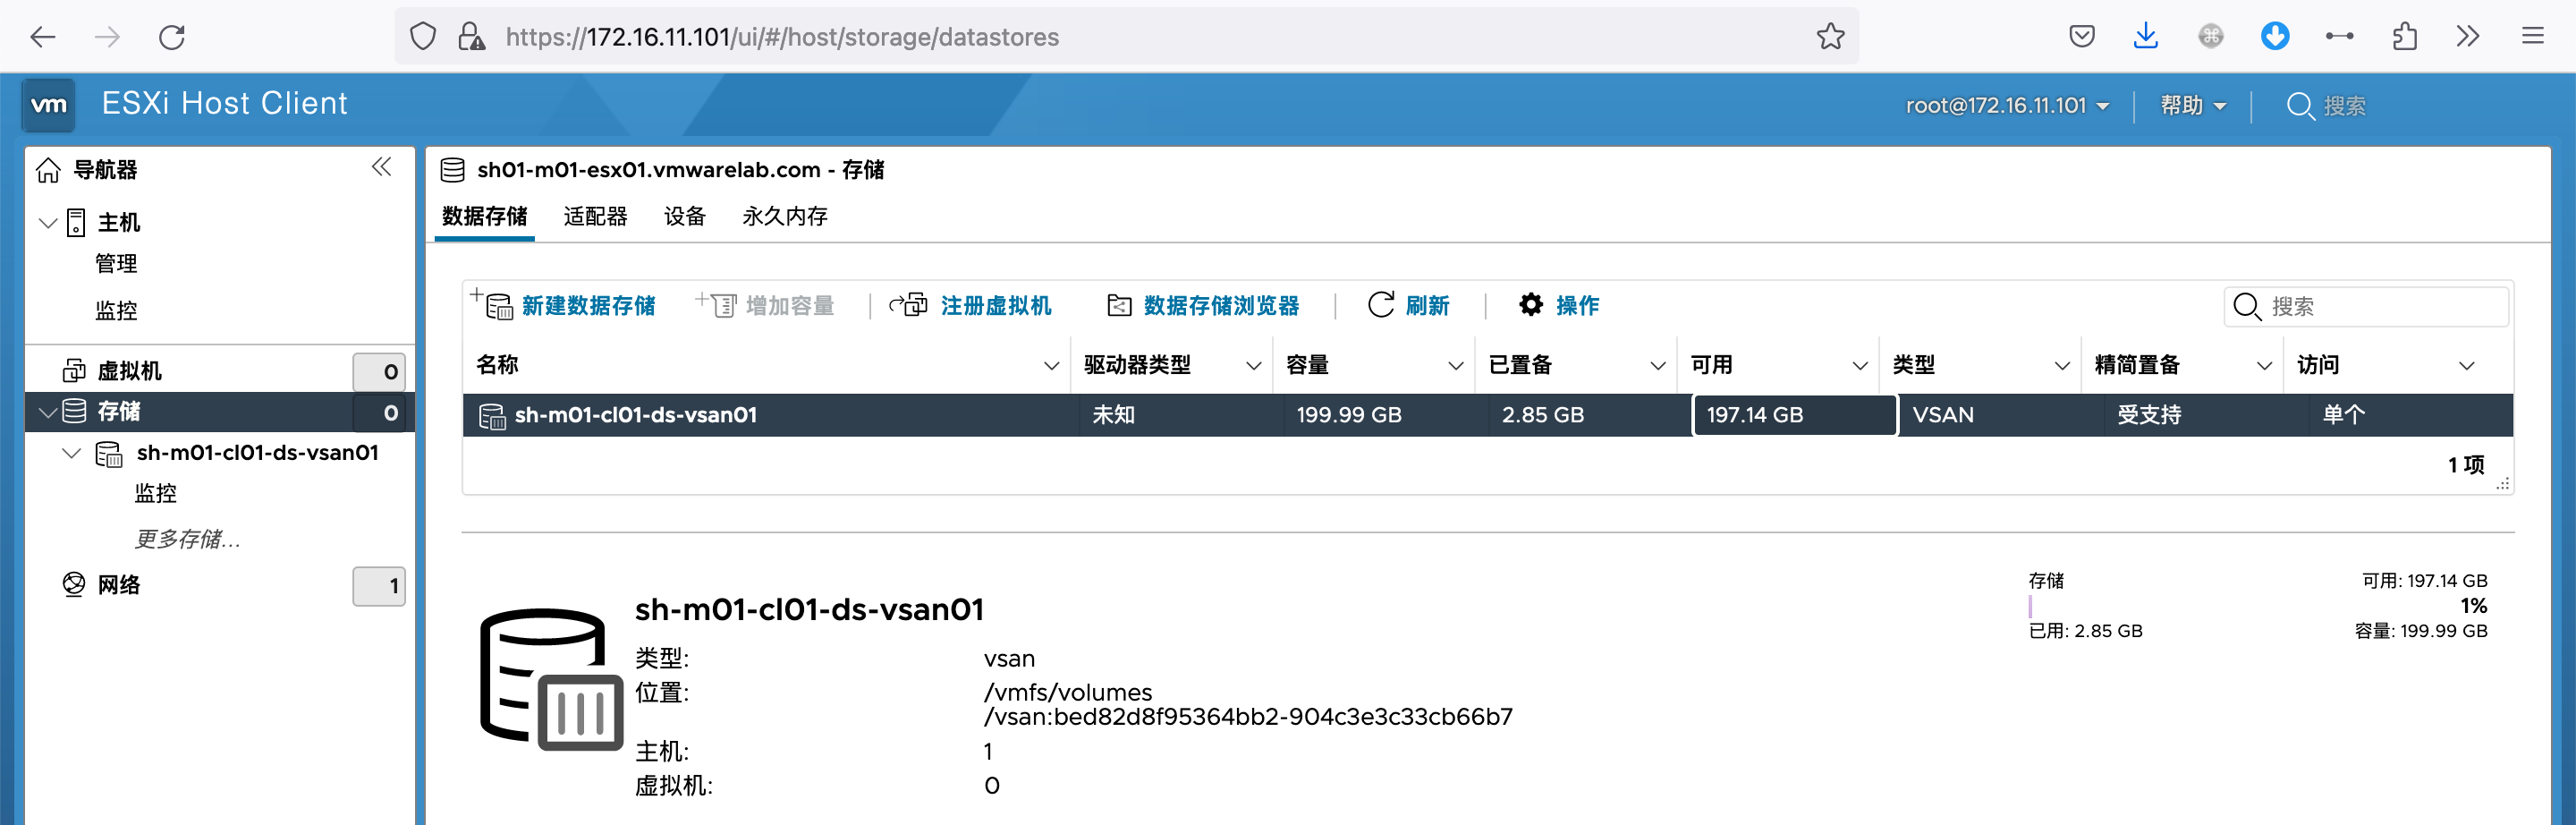
在第一台主机上会创建一个单节点vSAN Datastore
1.5.2. 部署vCenter
将vCenter部署到此主机:
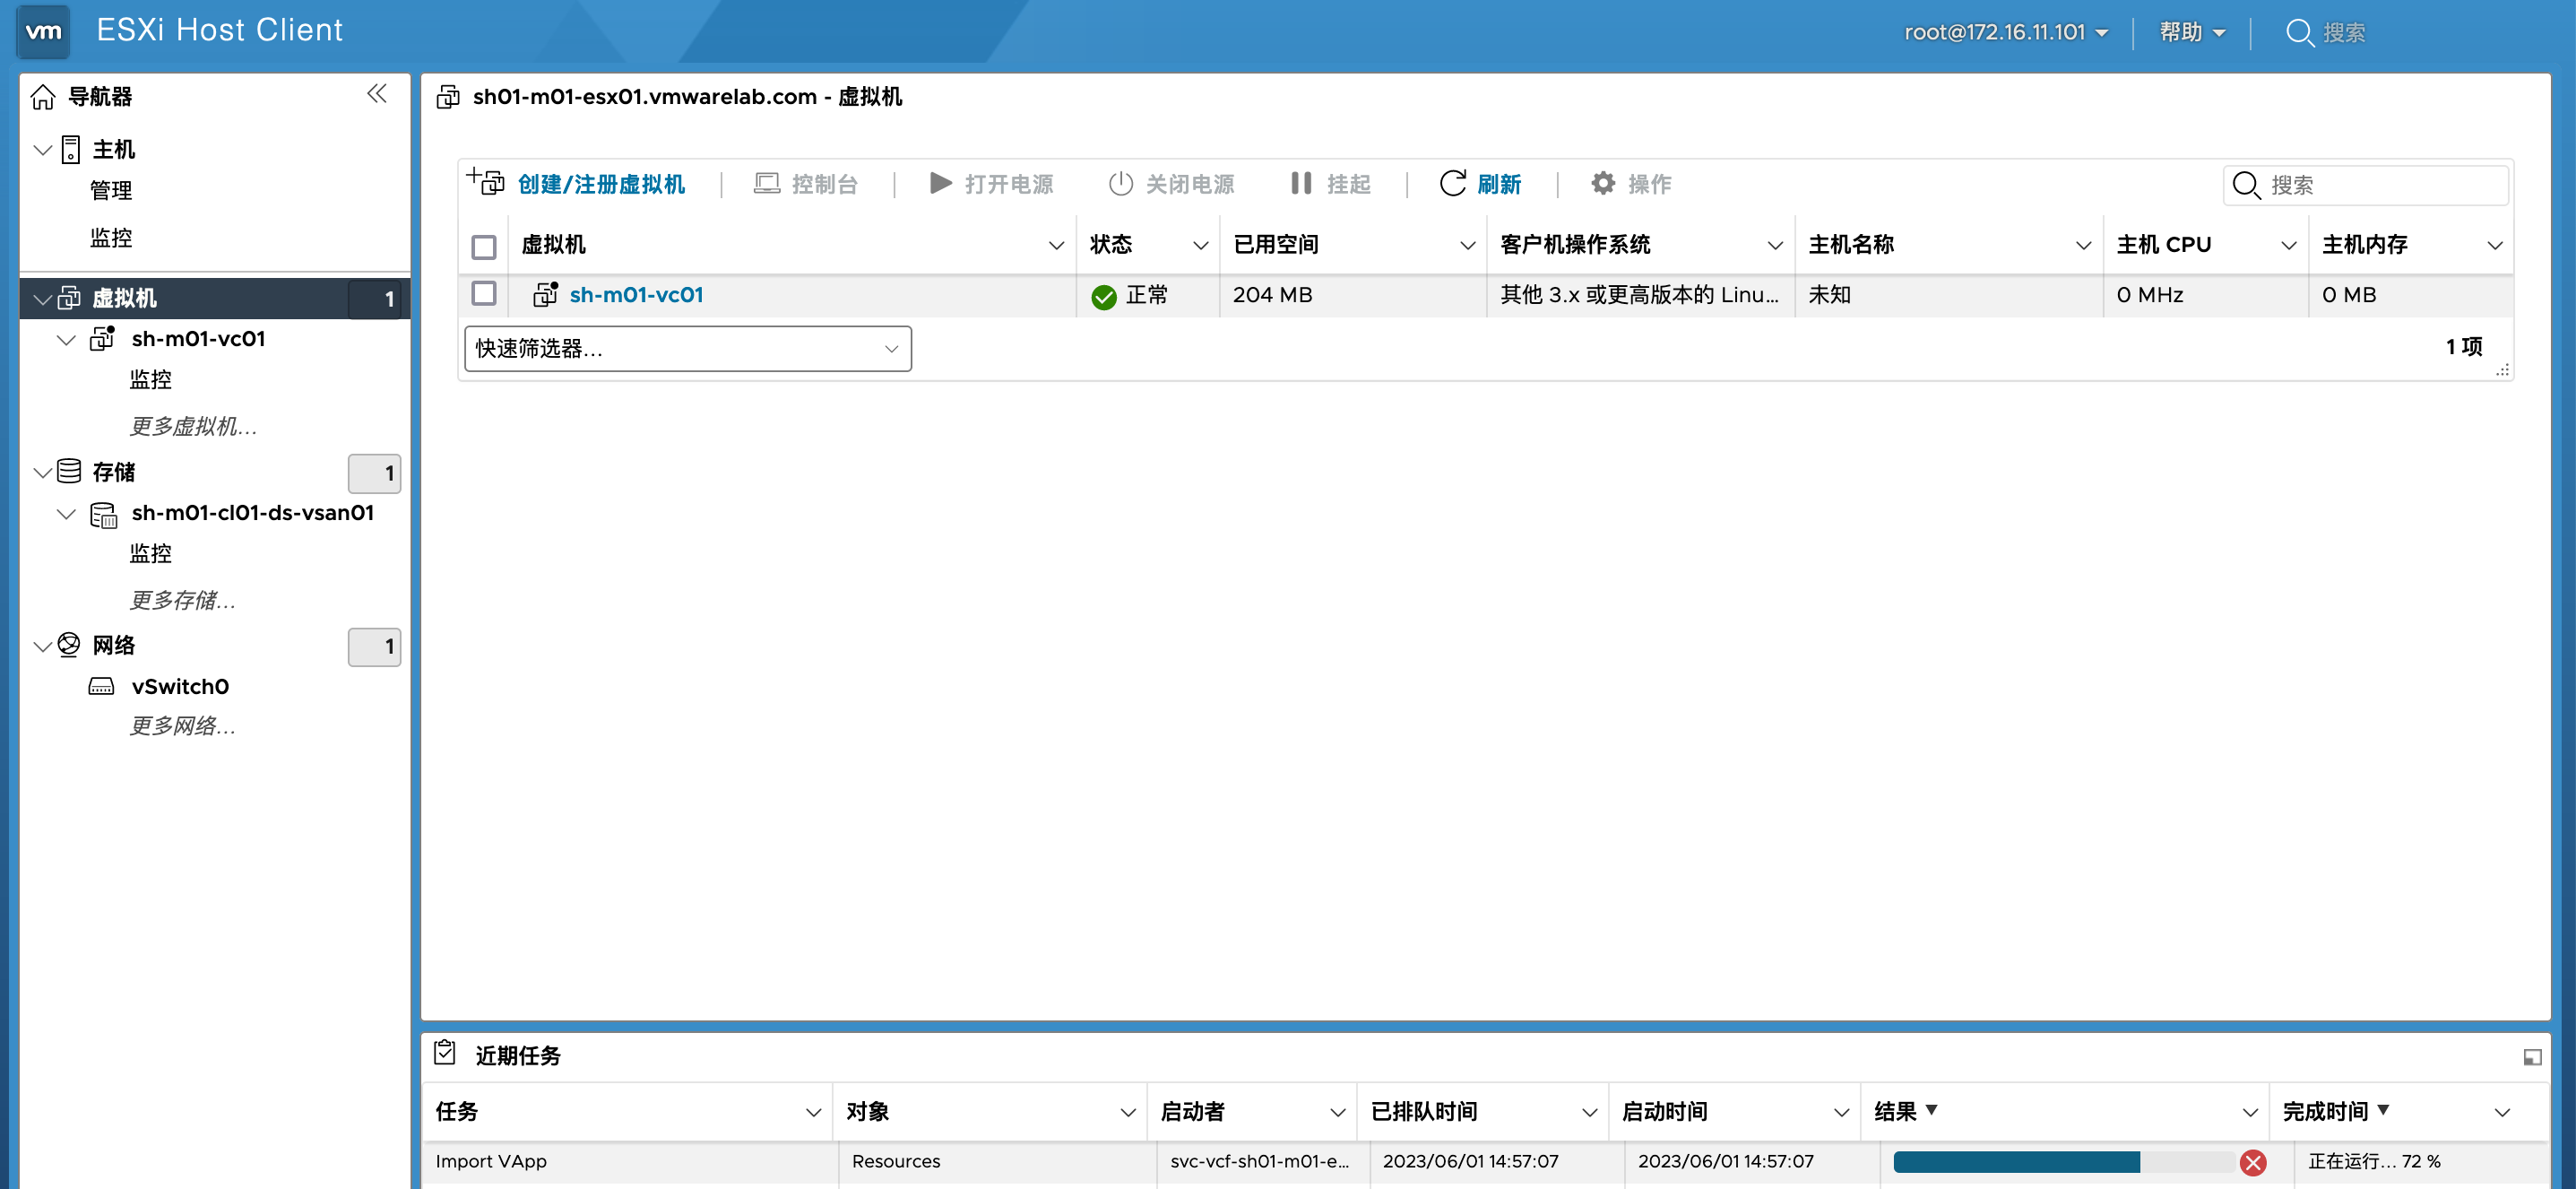
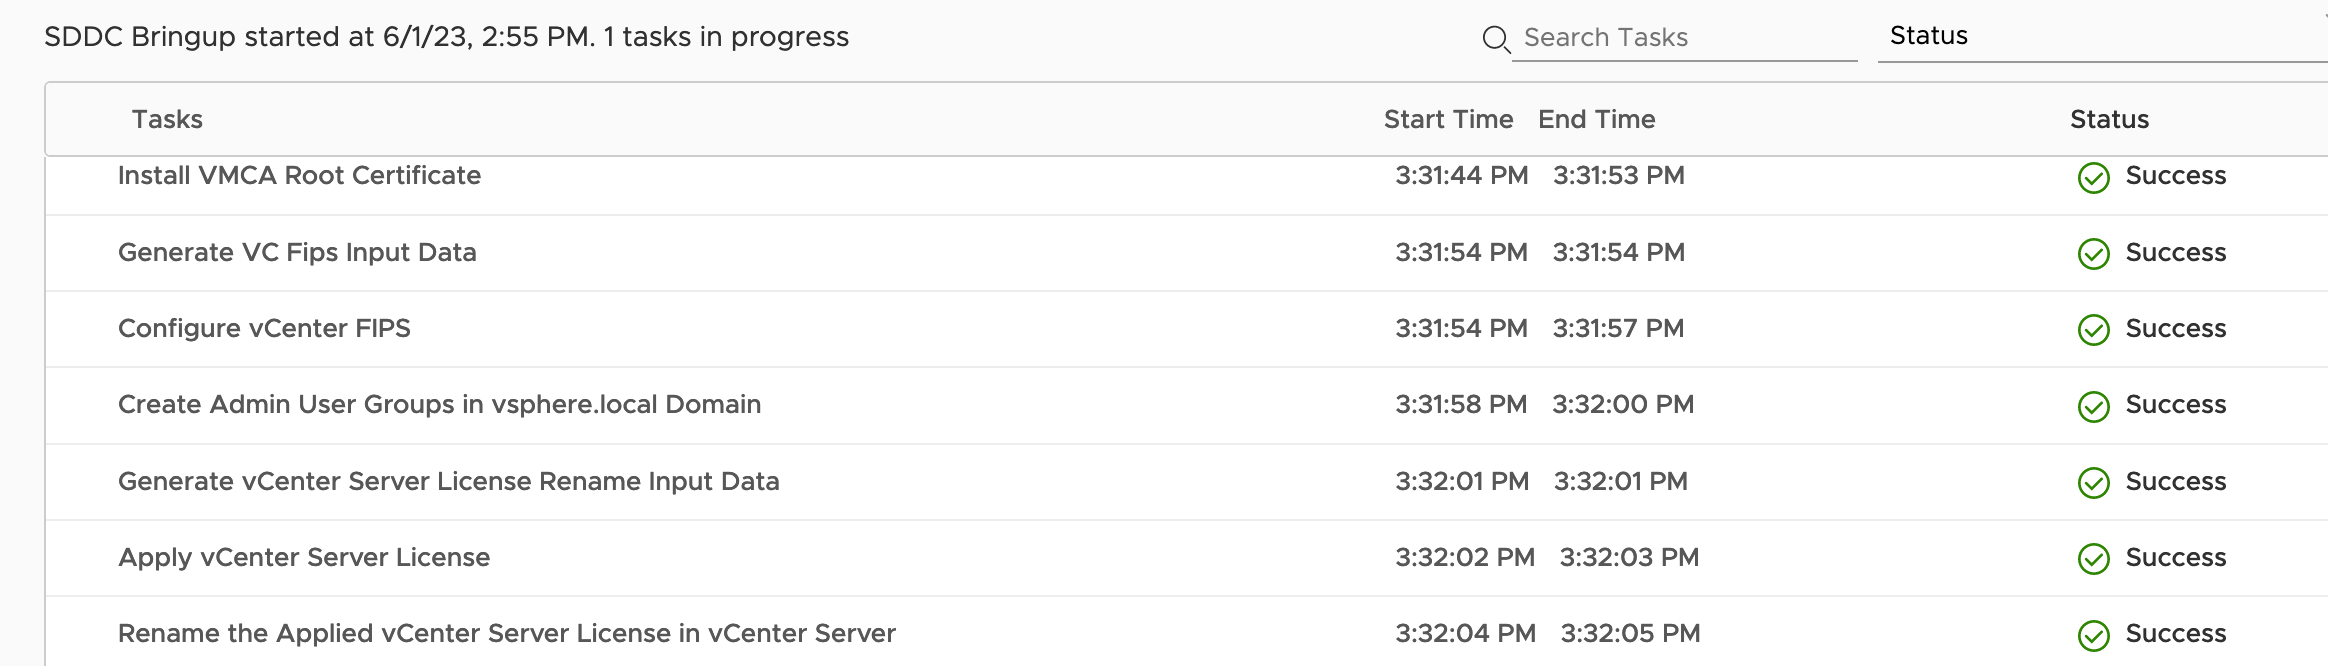
vCenter部署配置完成
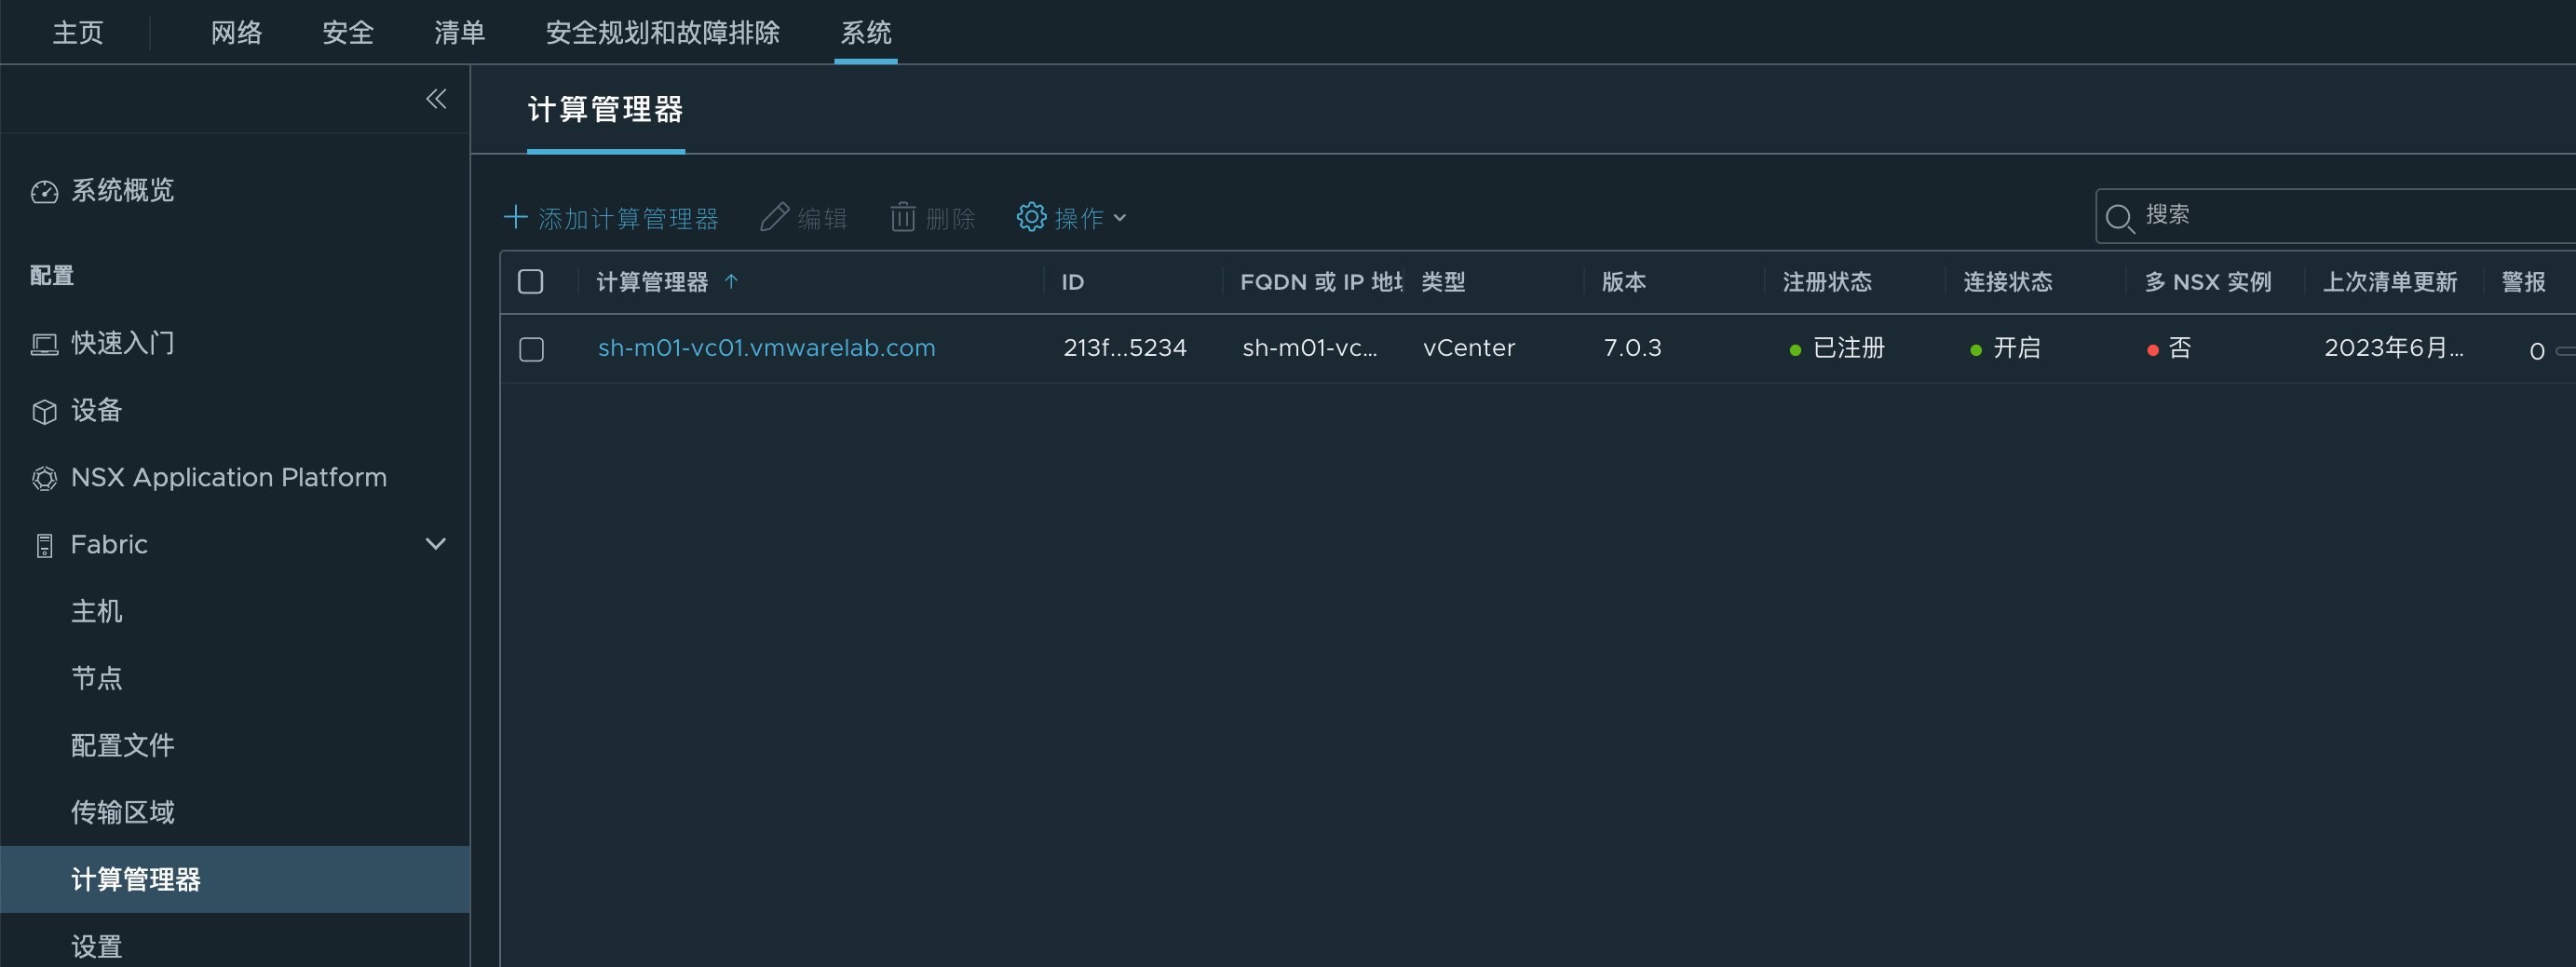
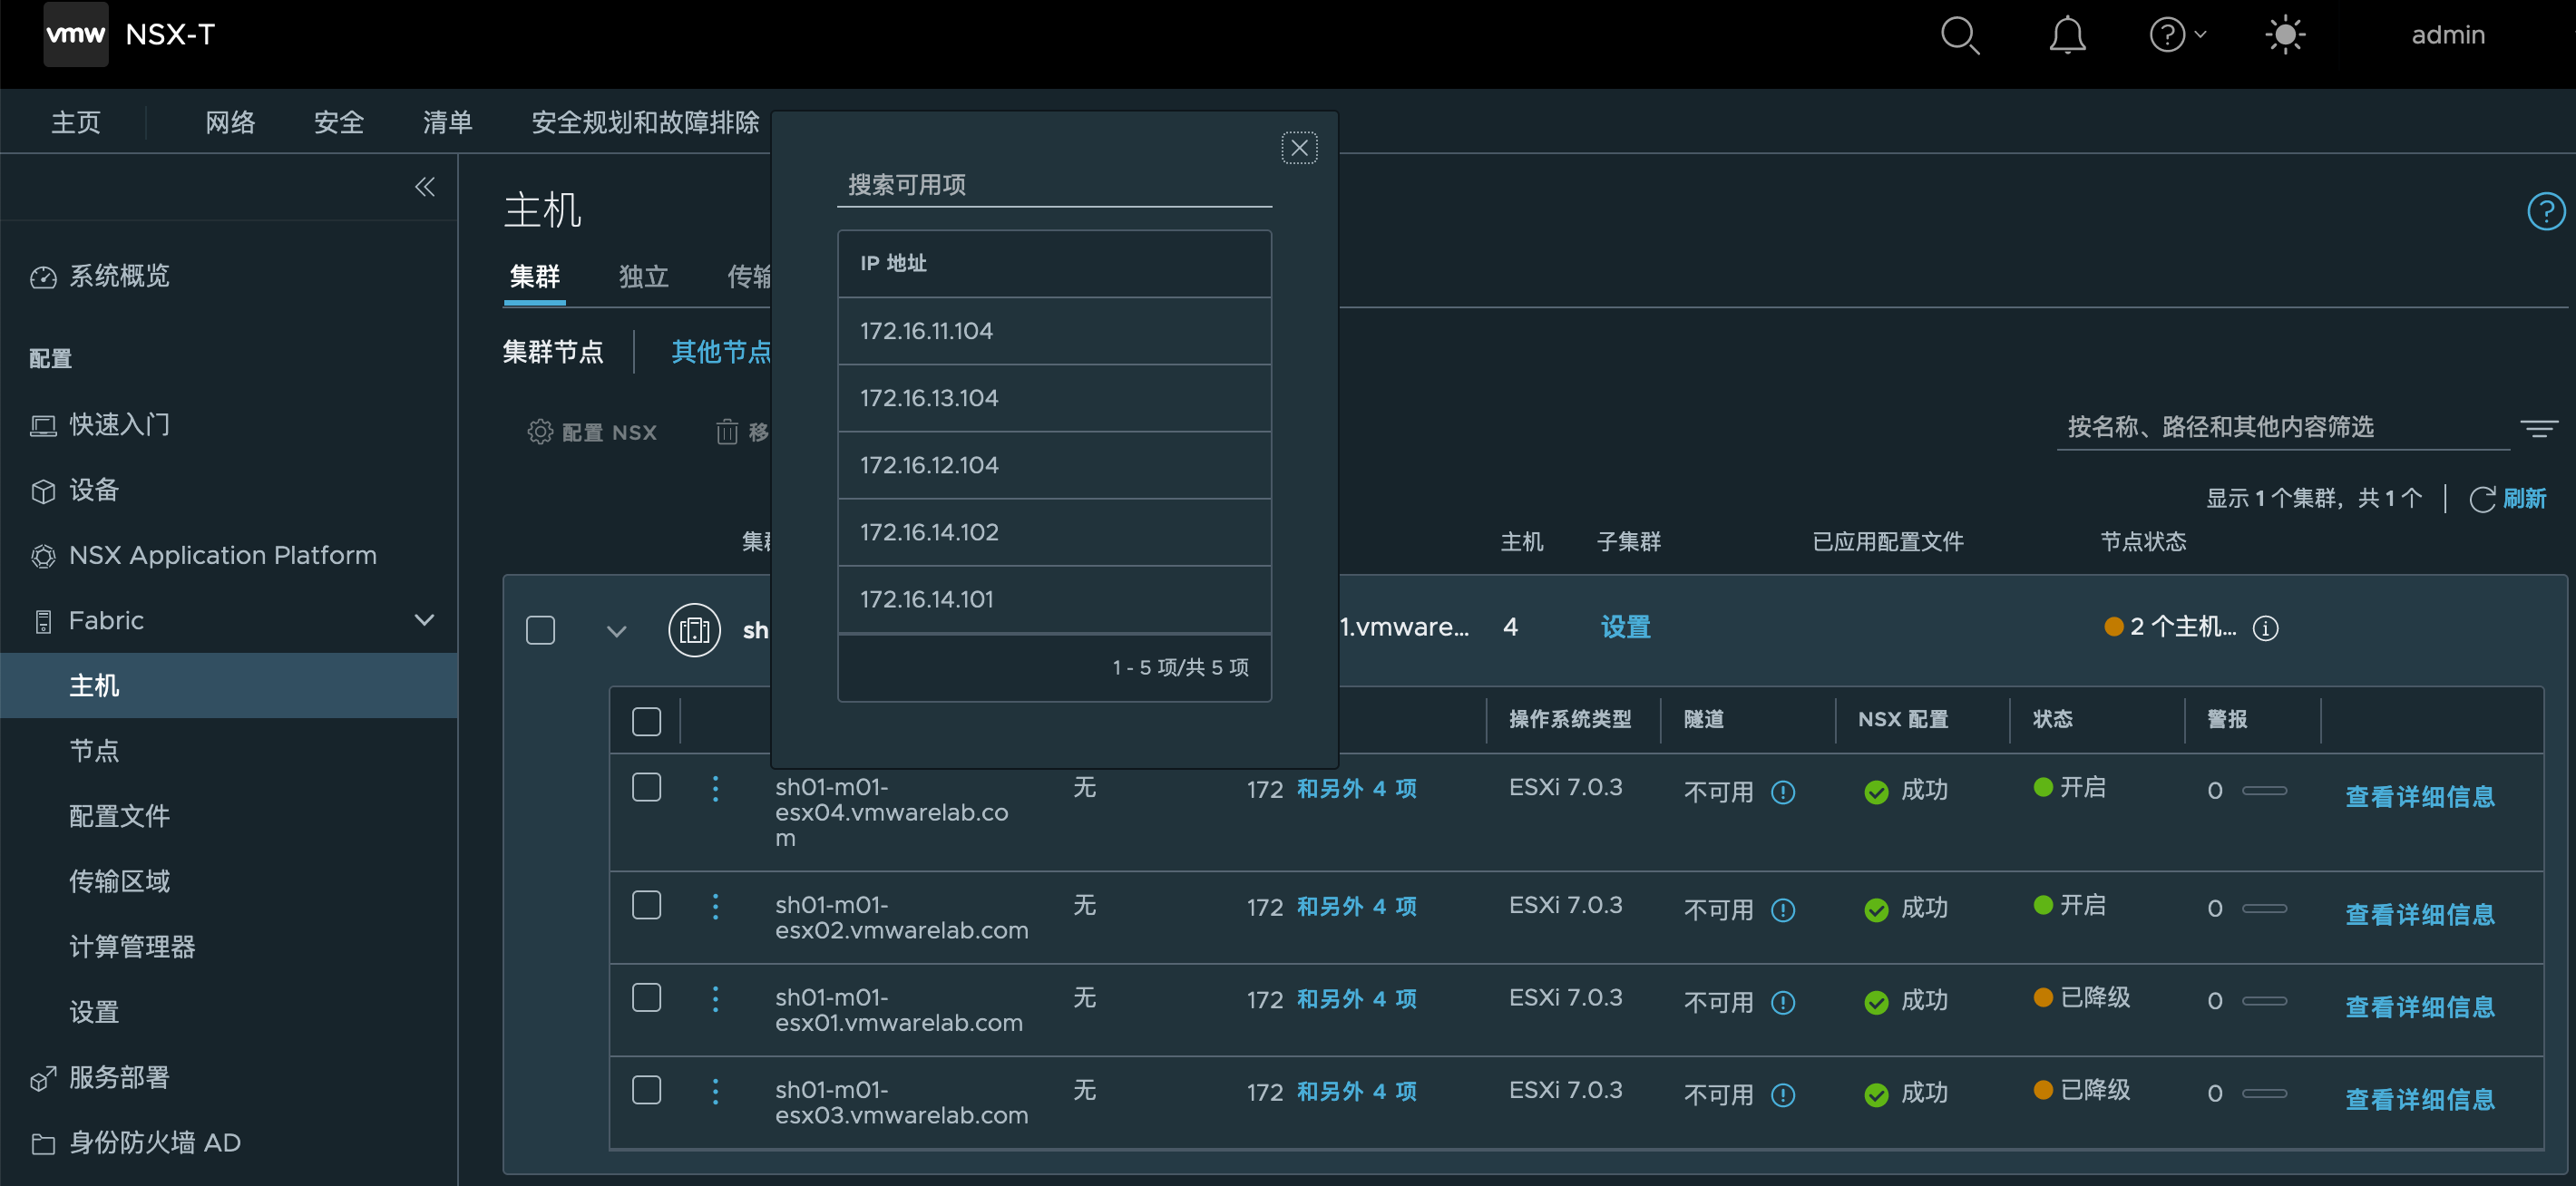
1.5.3. 设置并添加主机到vc
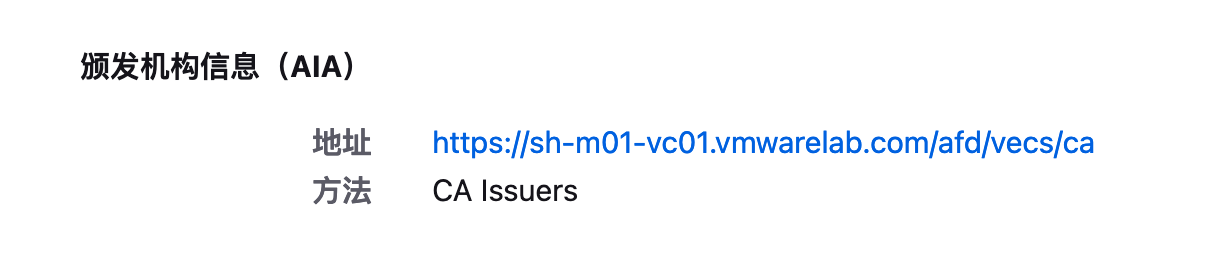
自动为主机设置新的证书:
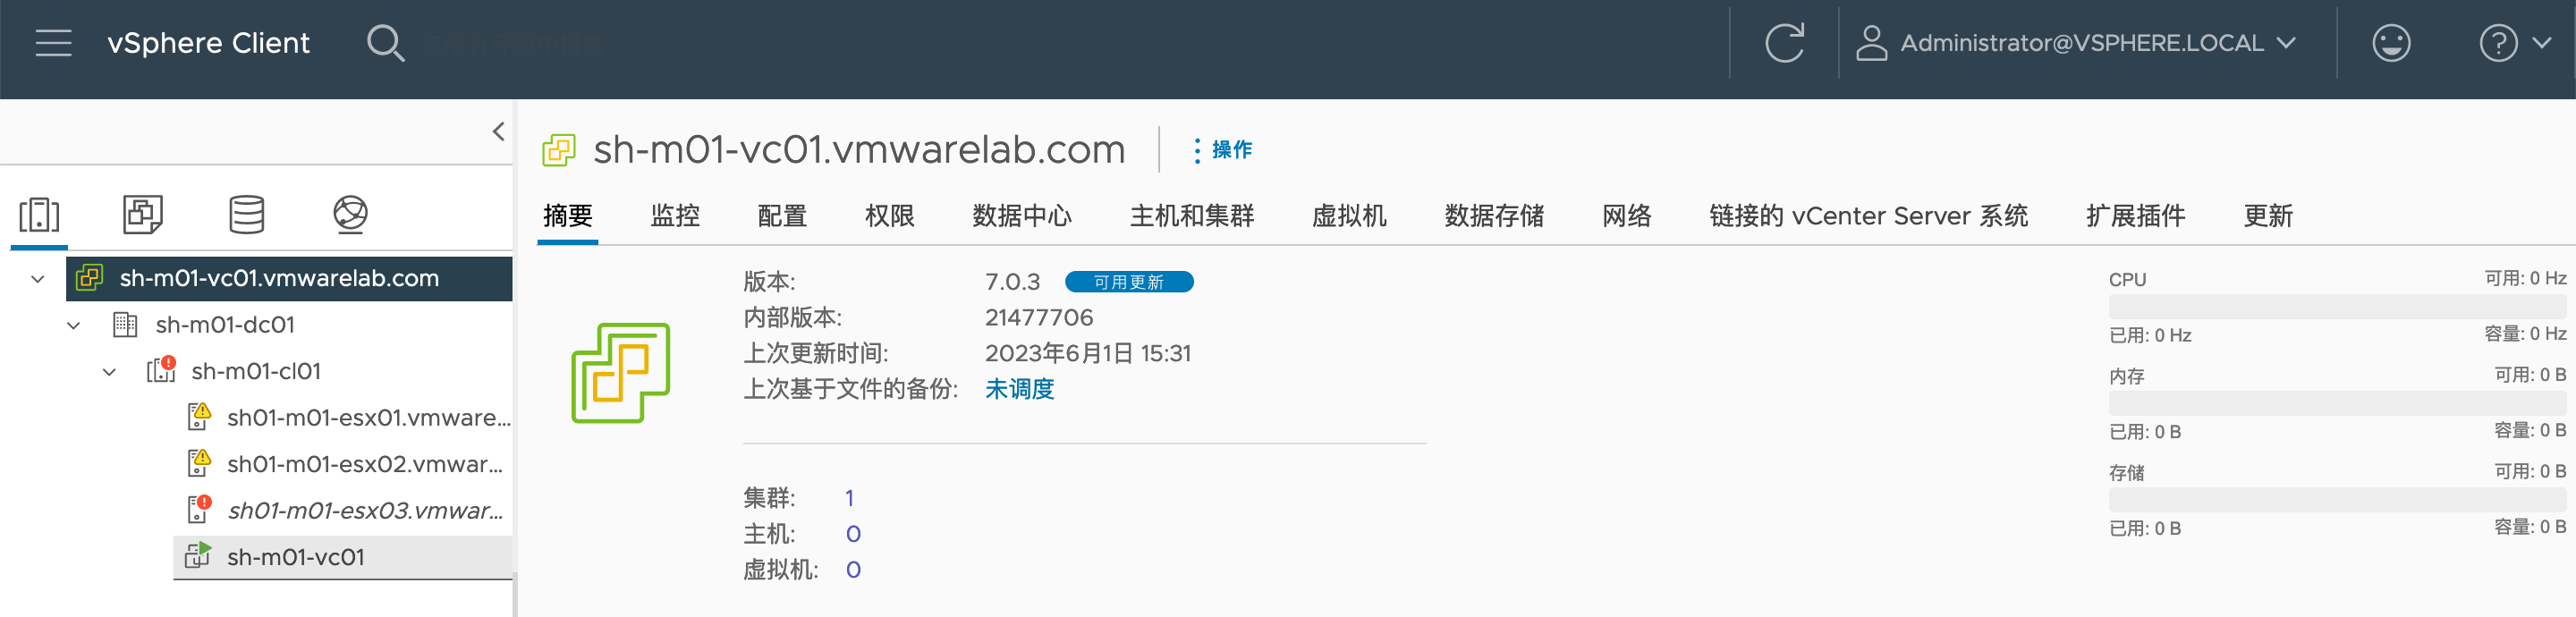
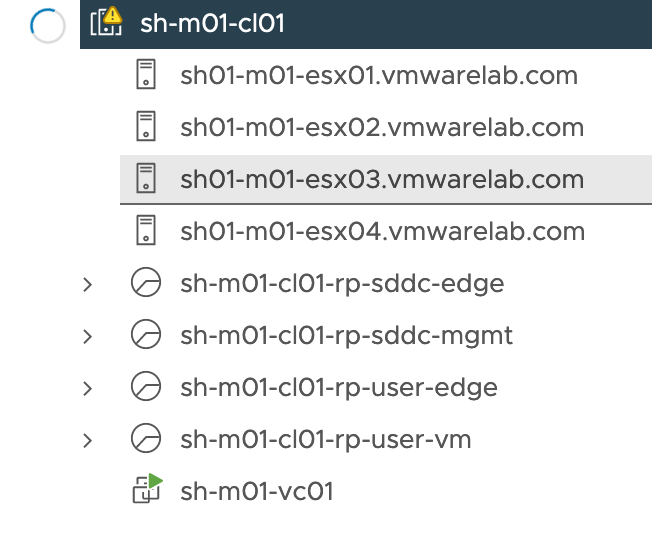
自动创建集群,并将主机加入集群:
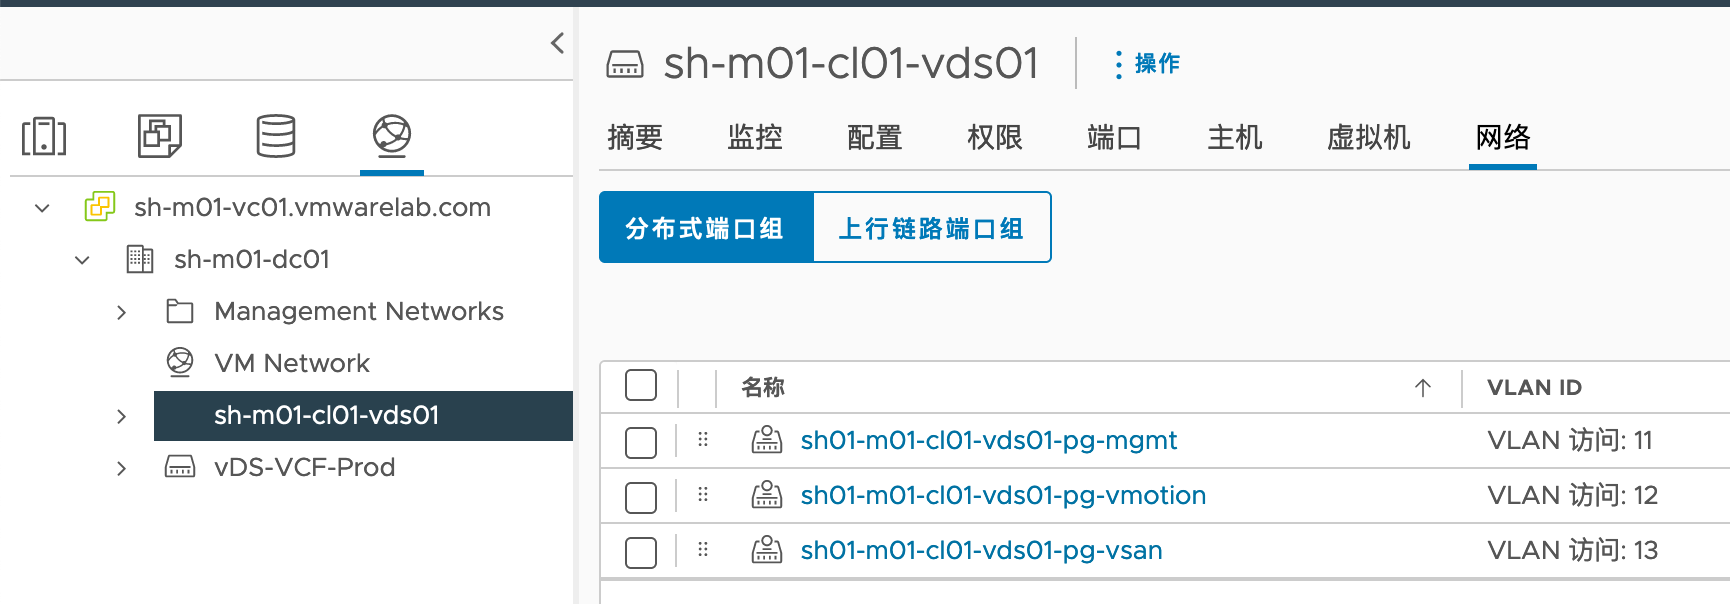
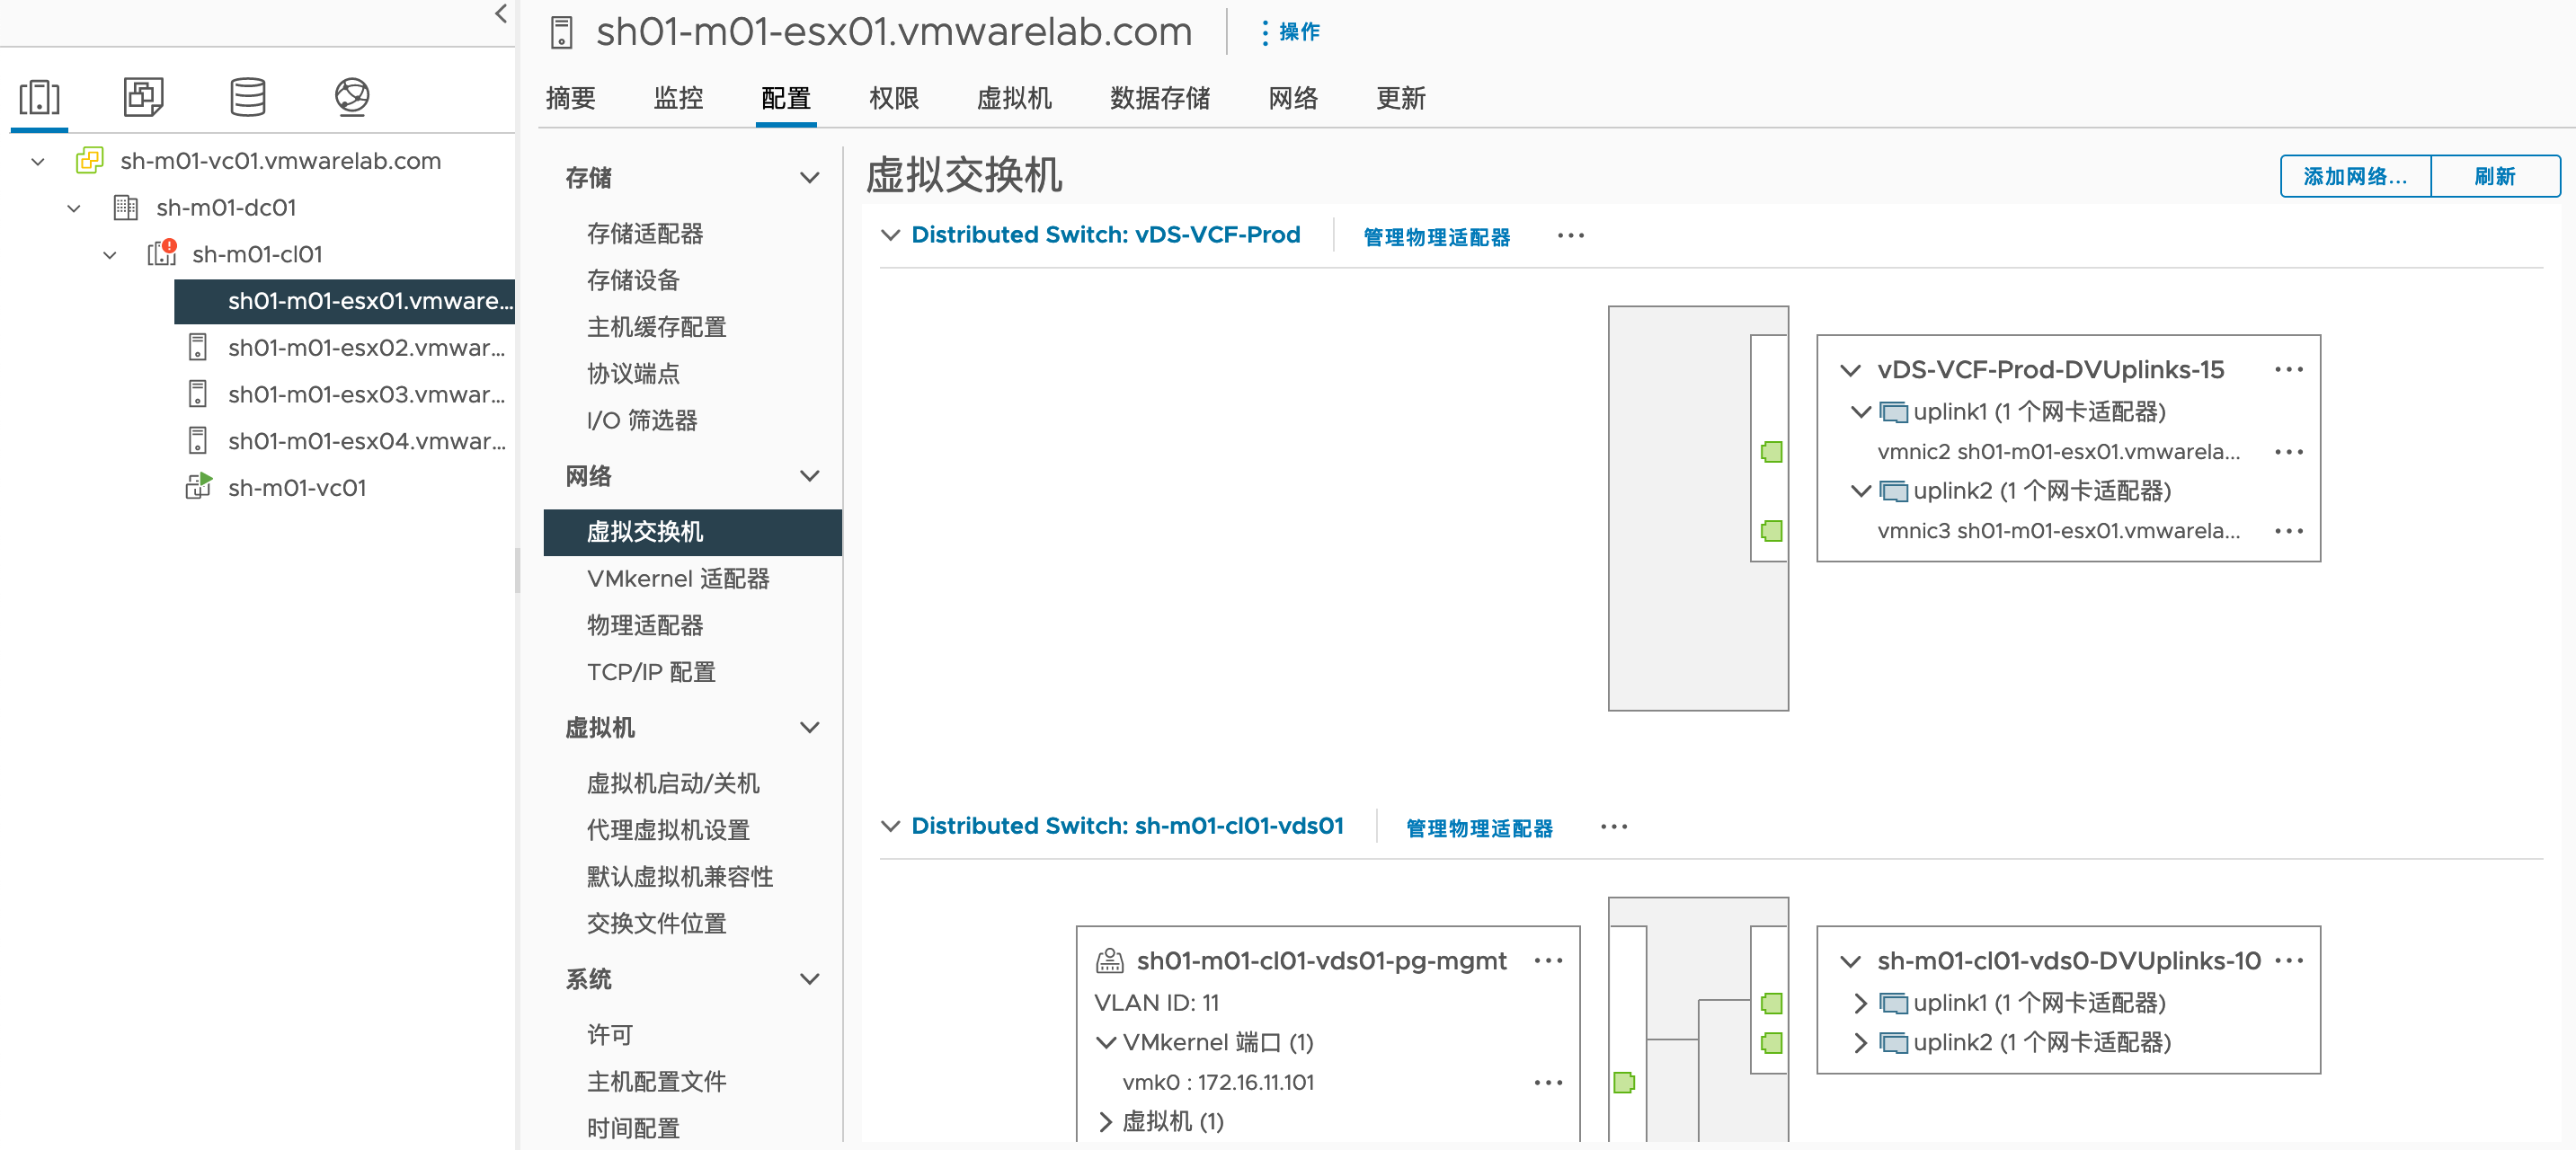
自动配置vDS:
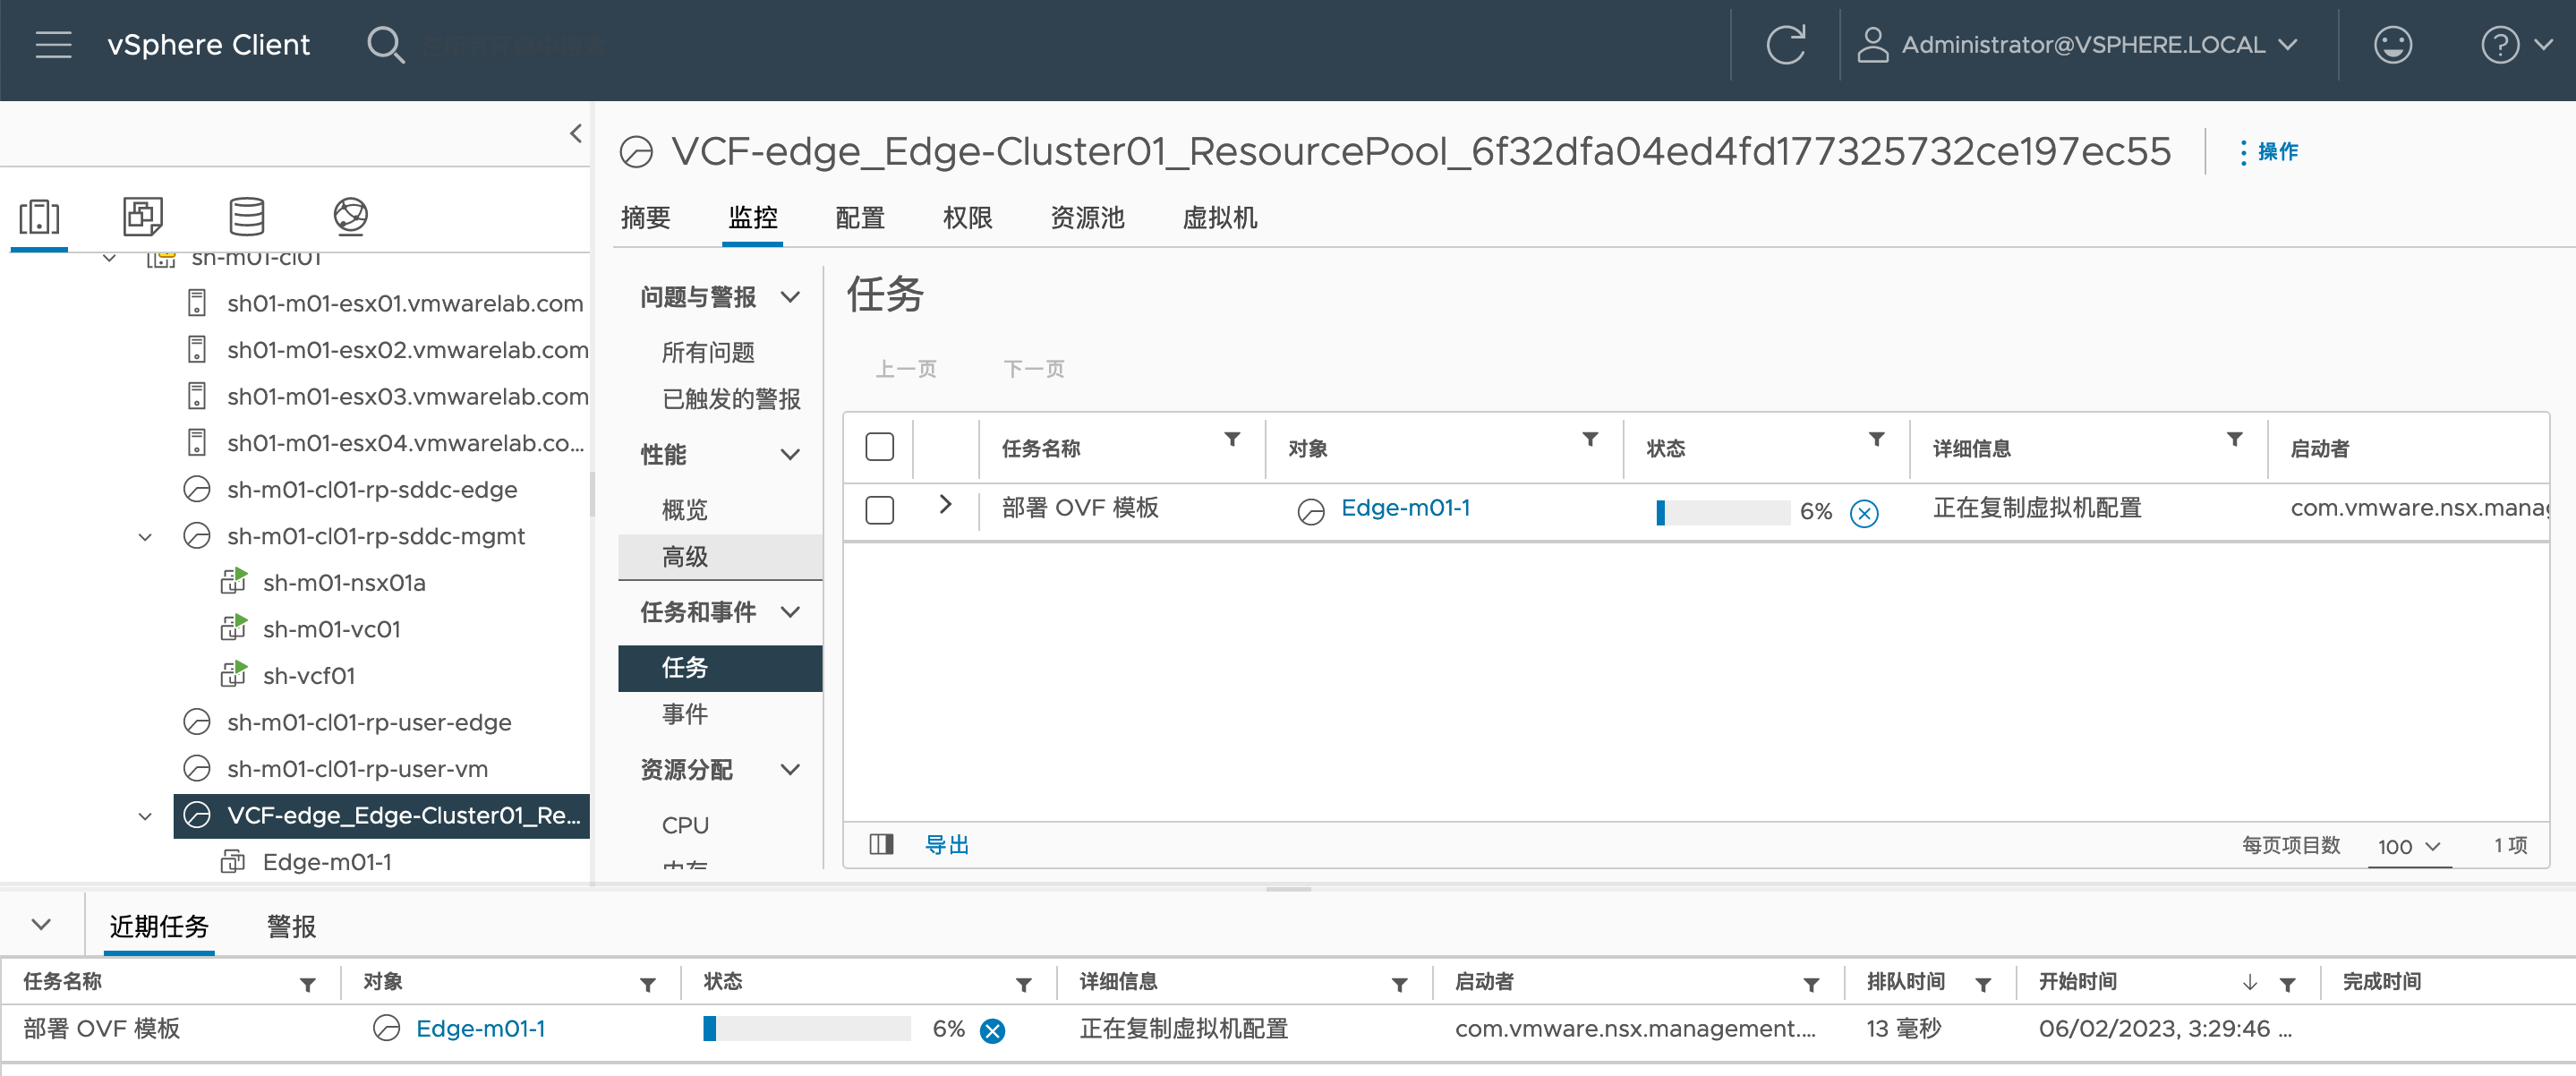
创建资源池:
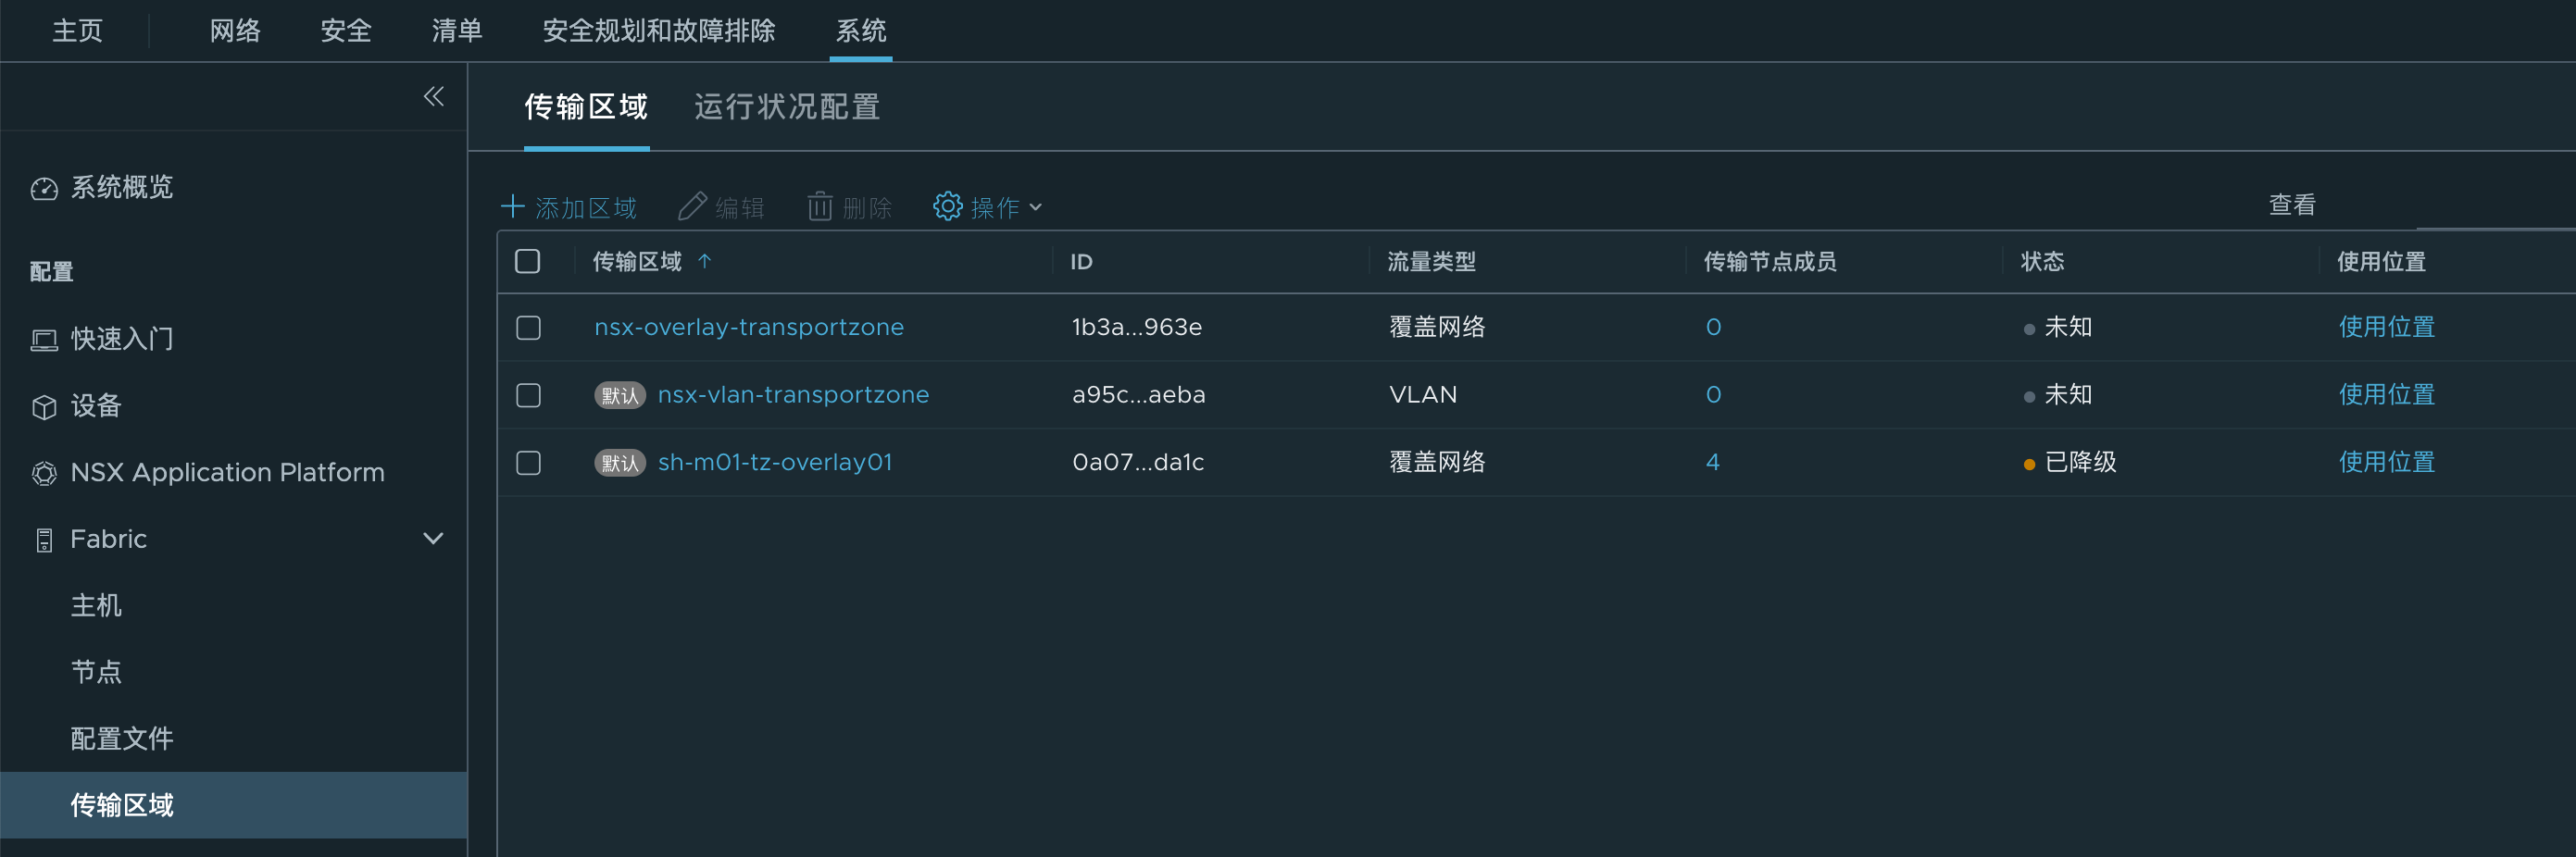
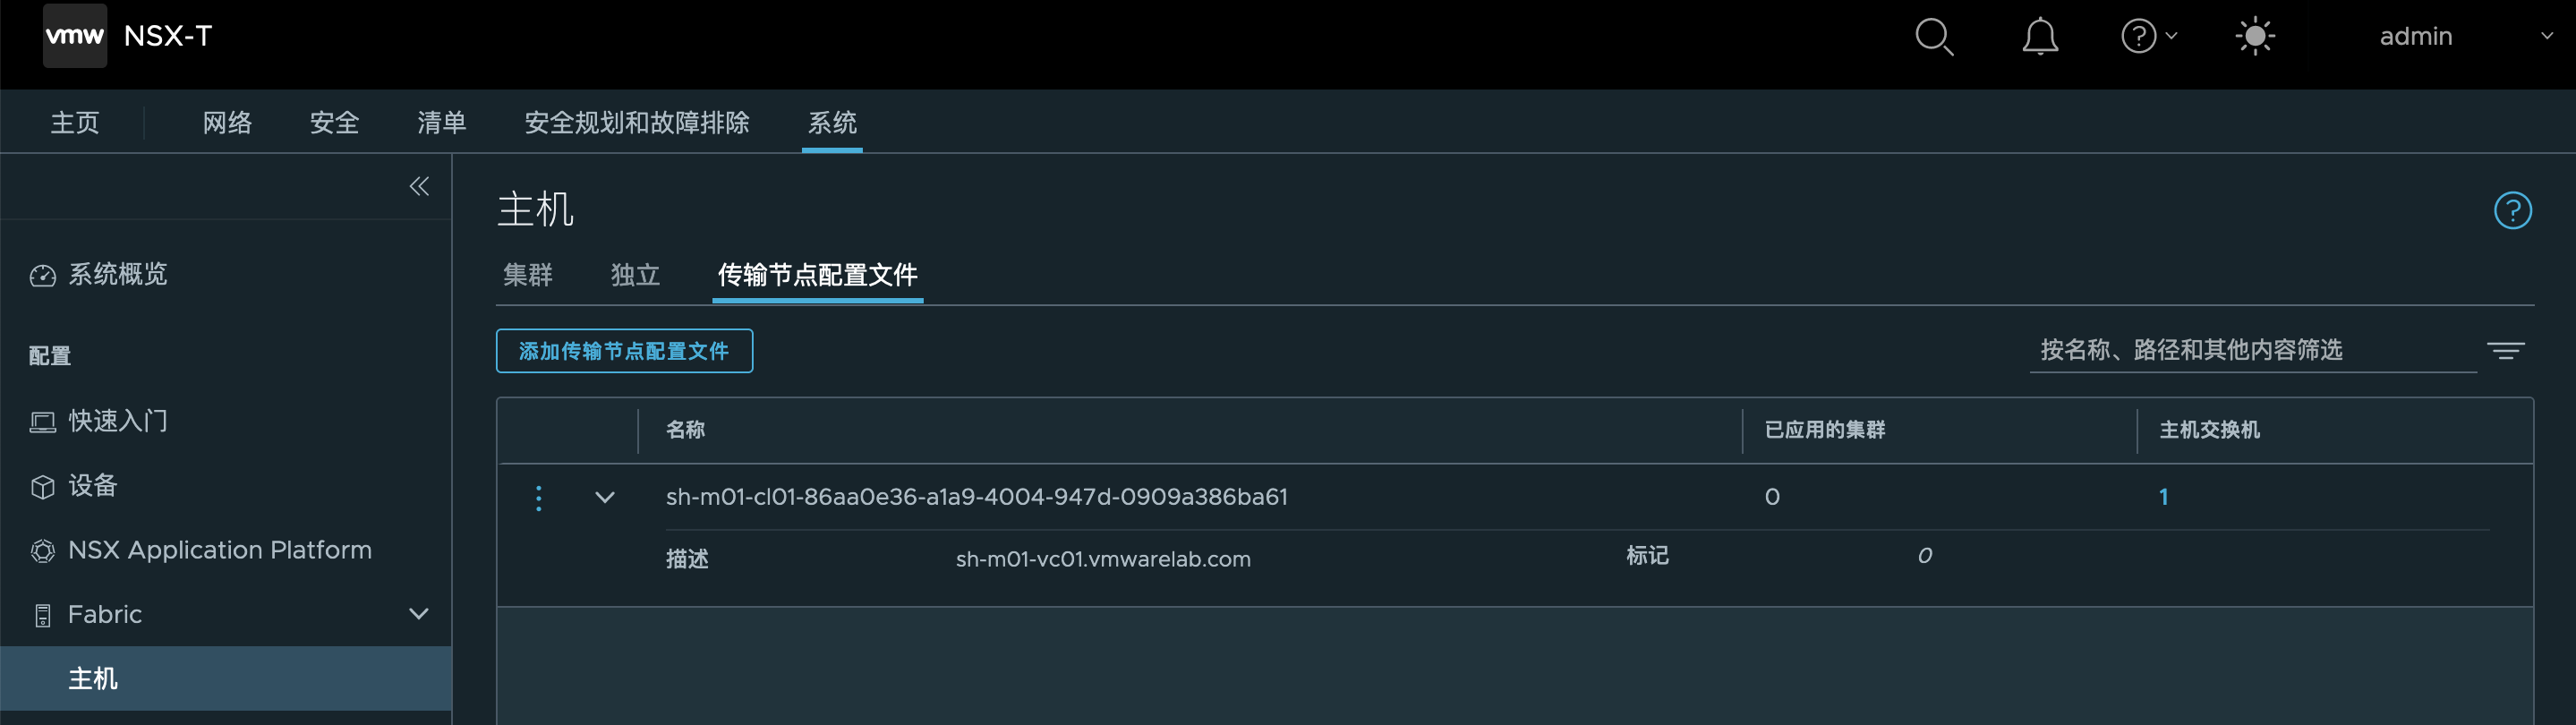
1.5.4. 部署NSX

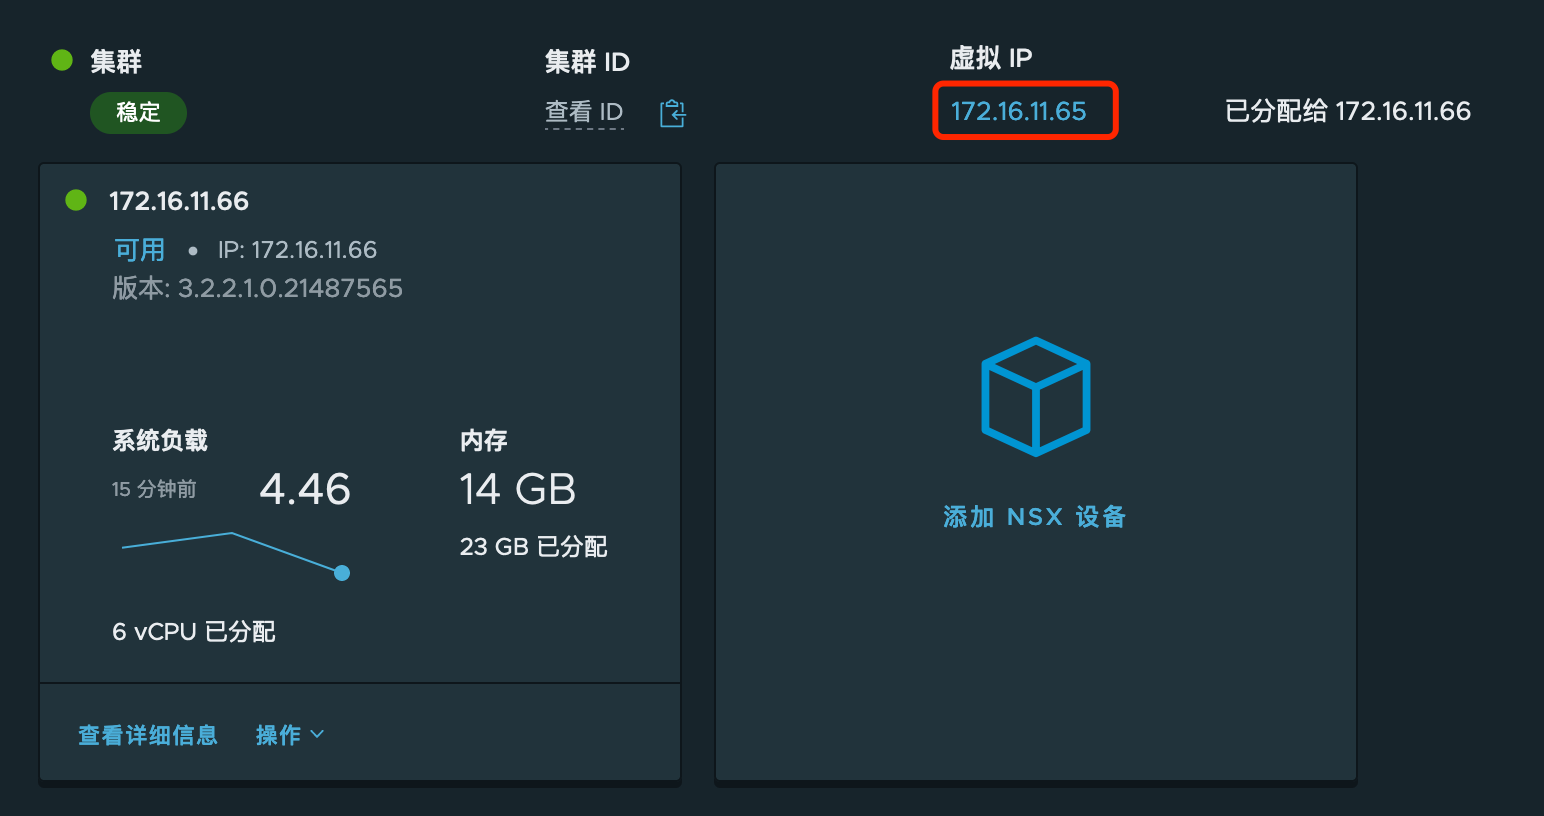
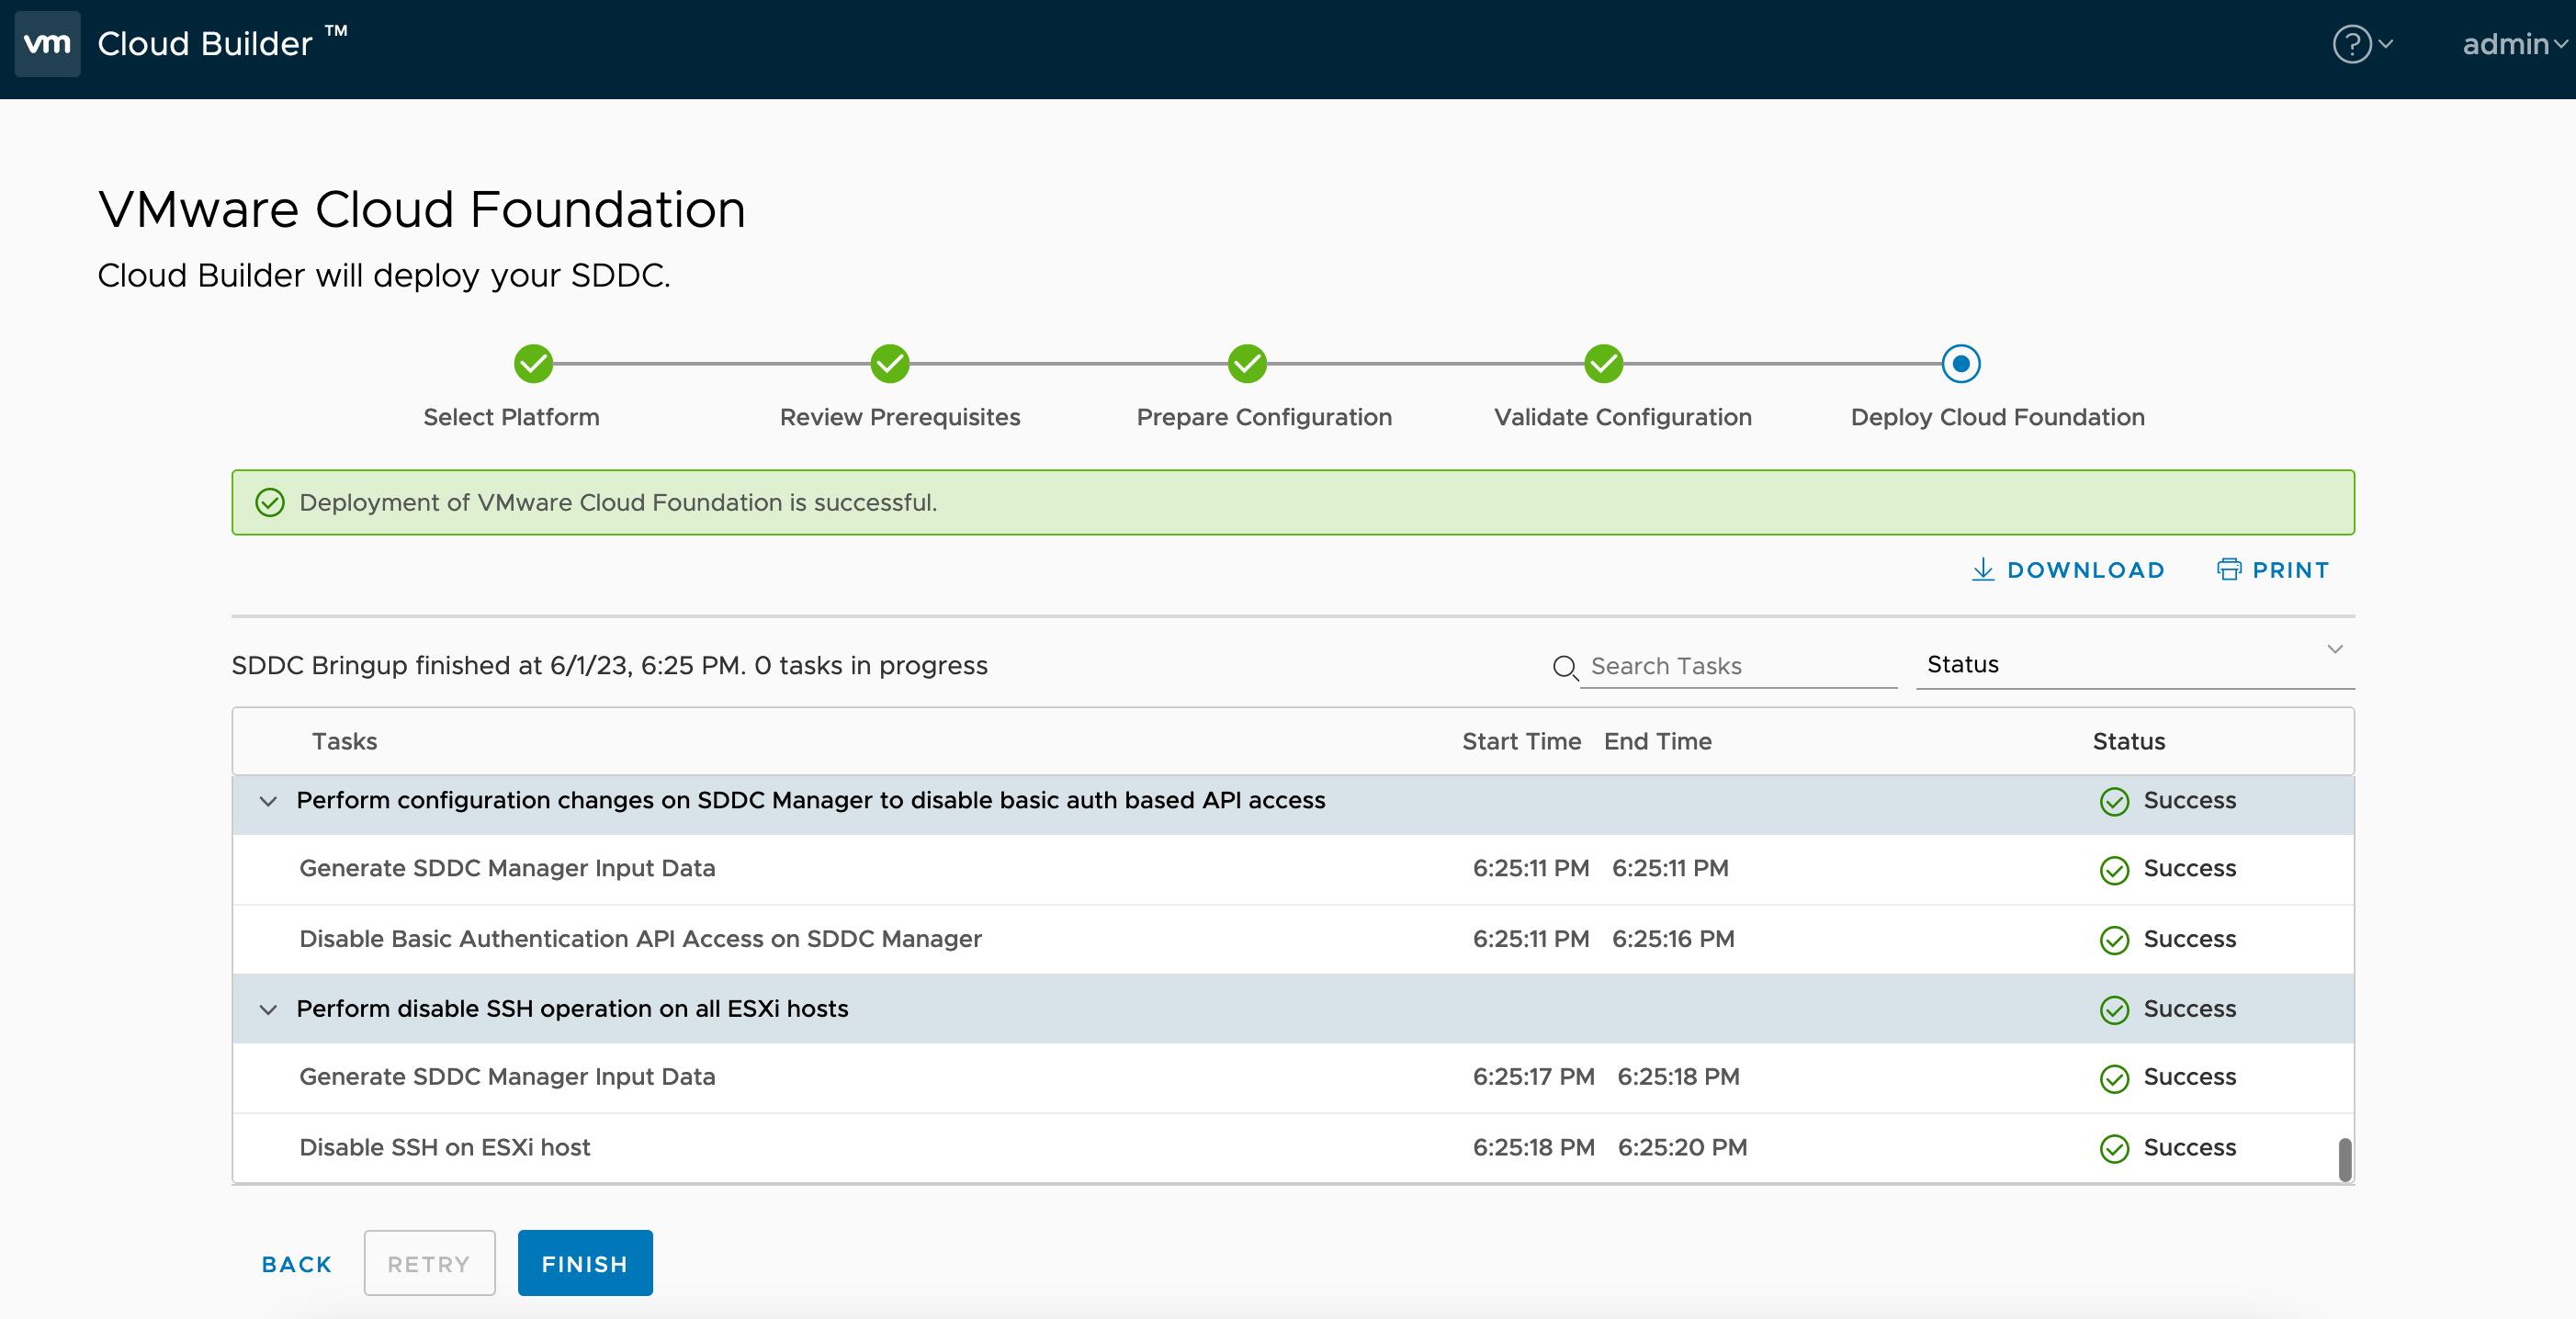
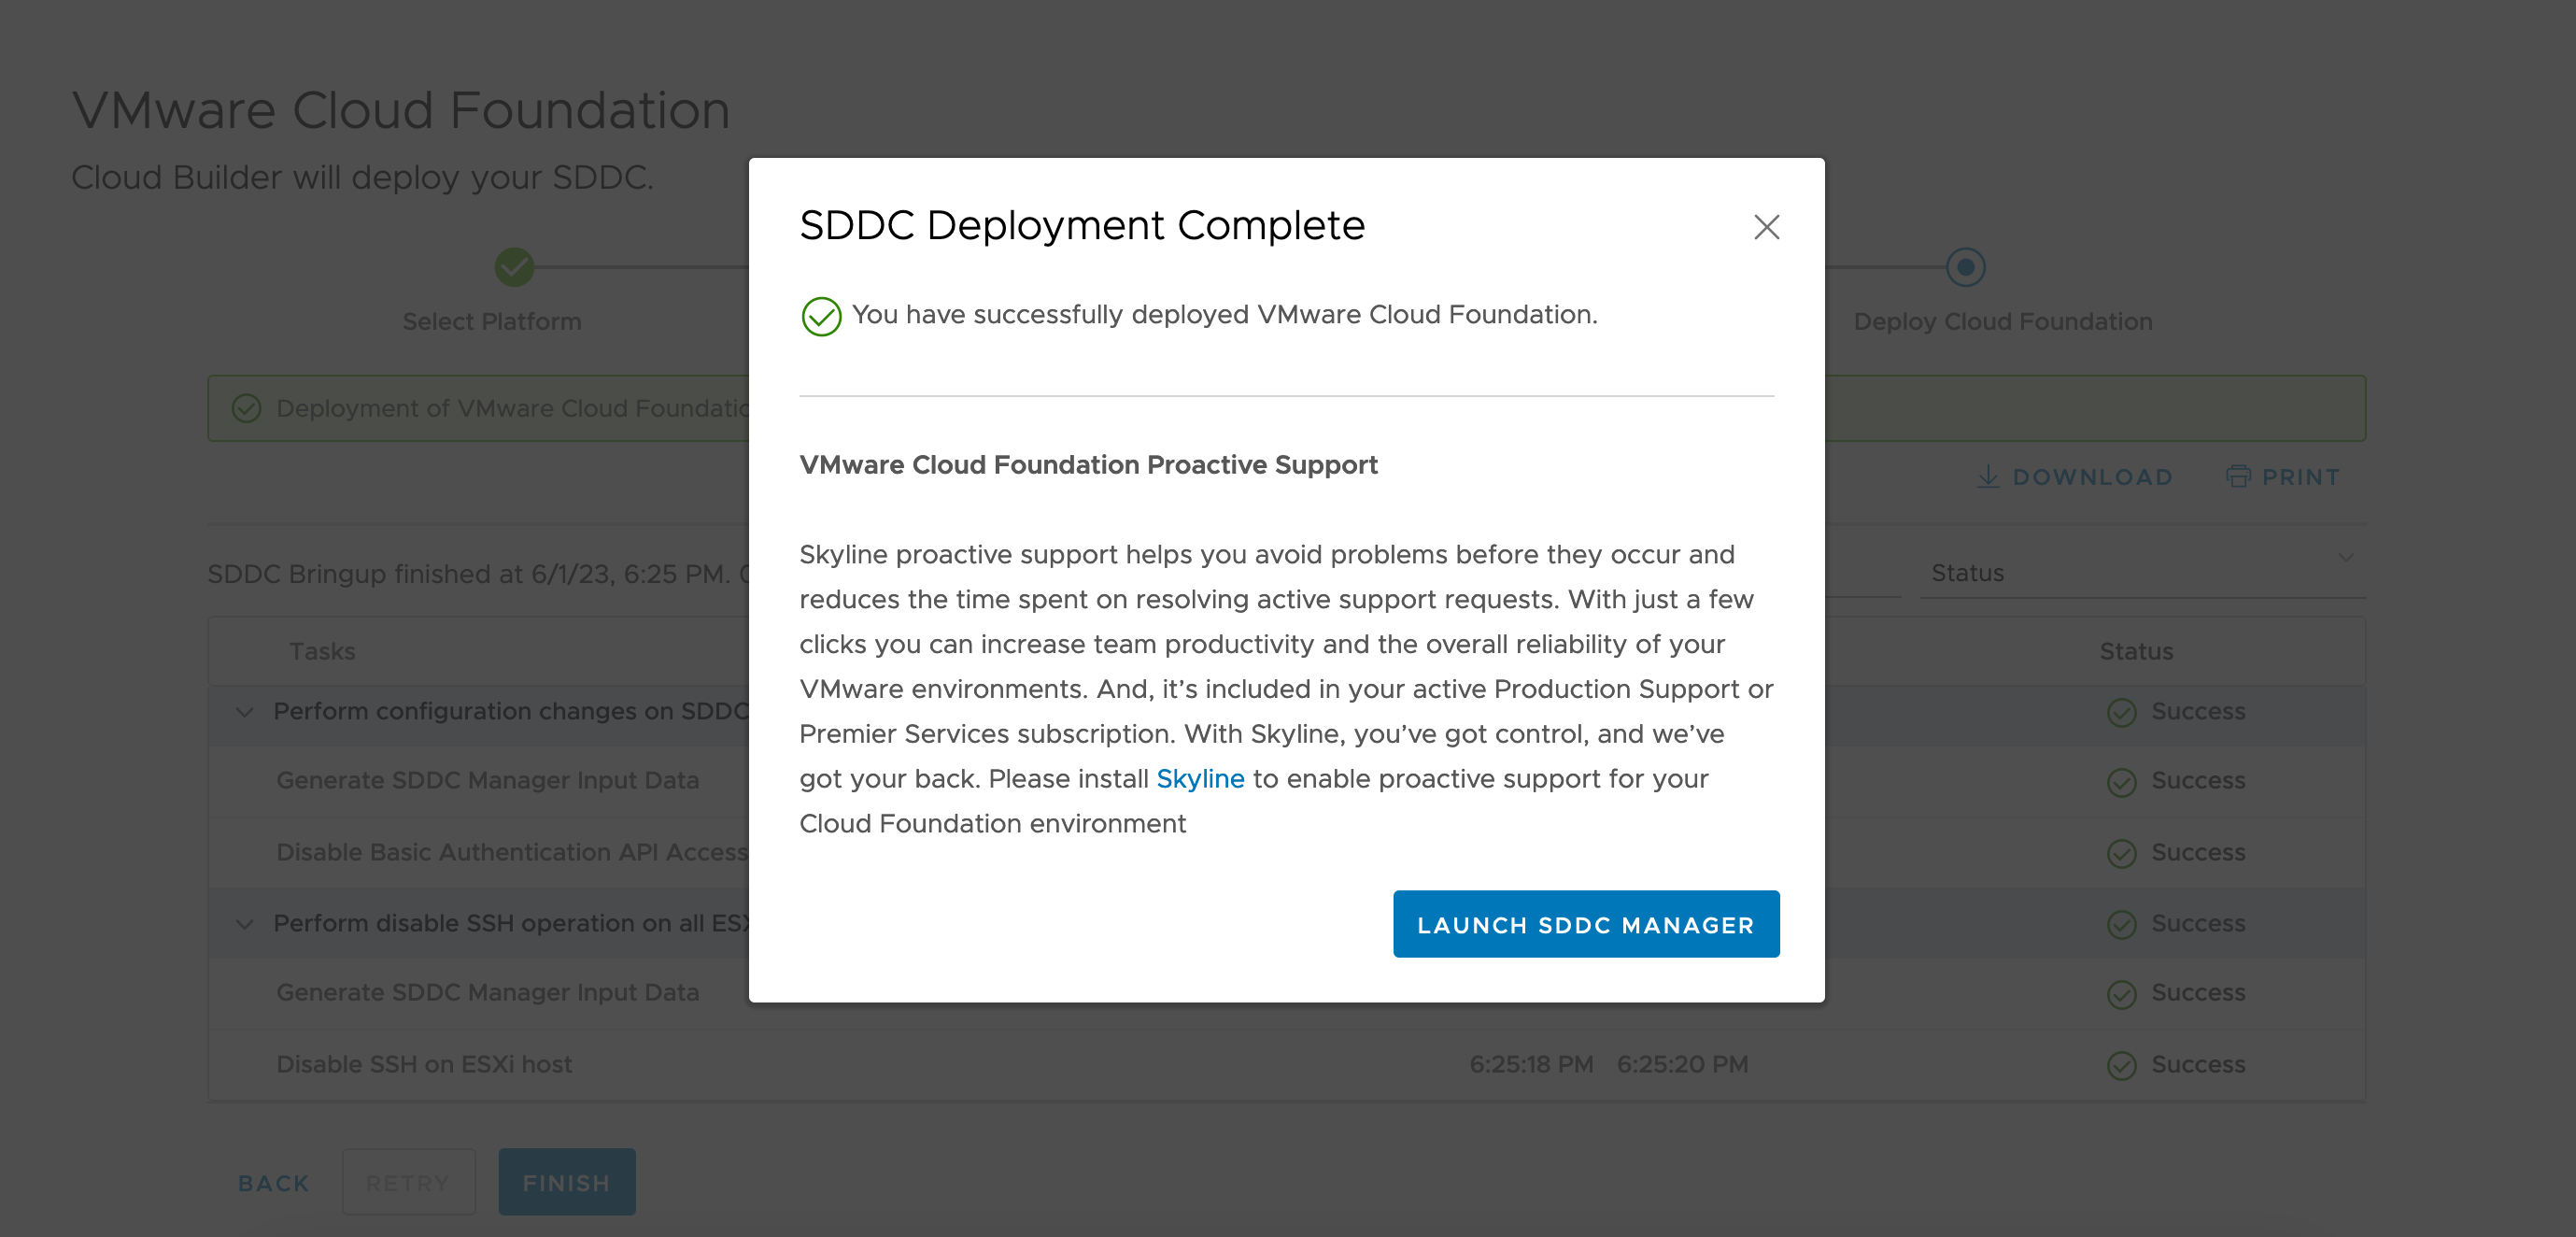
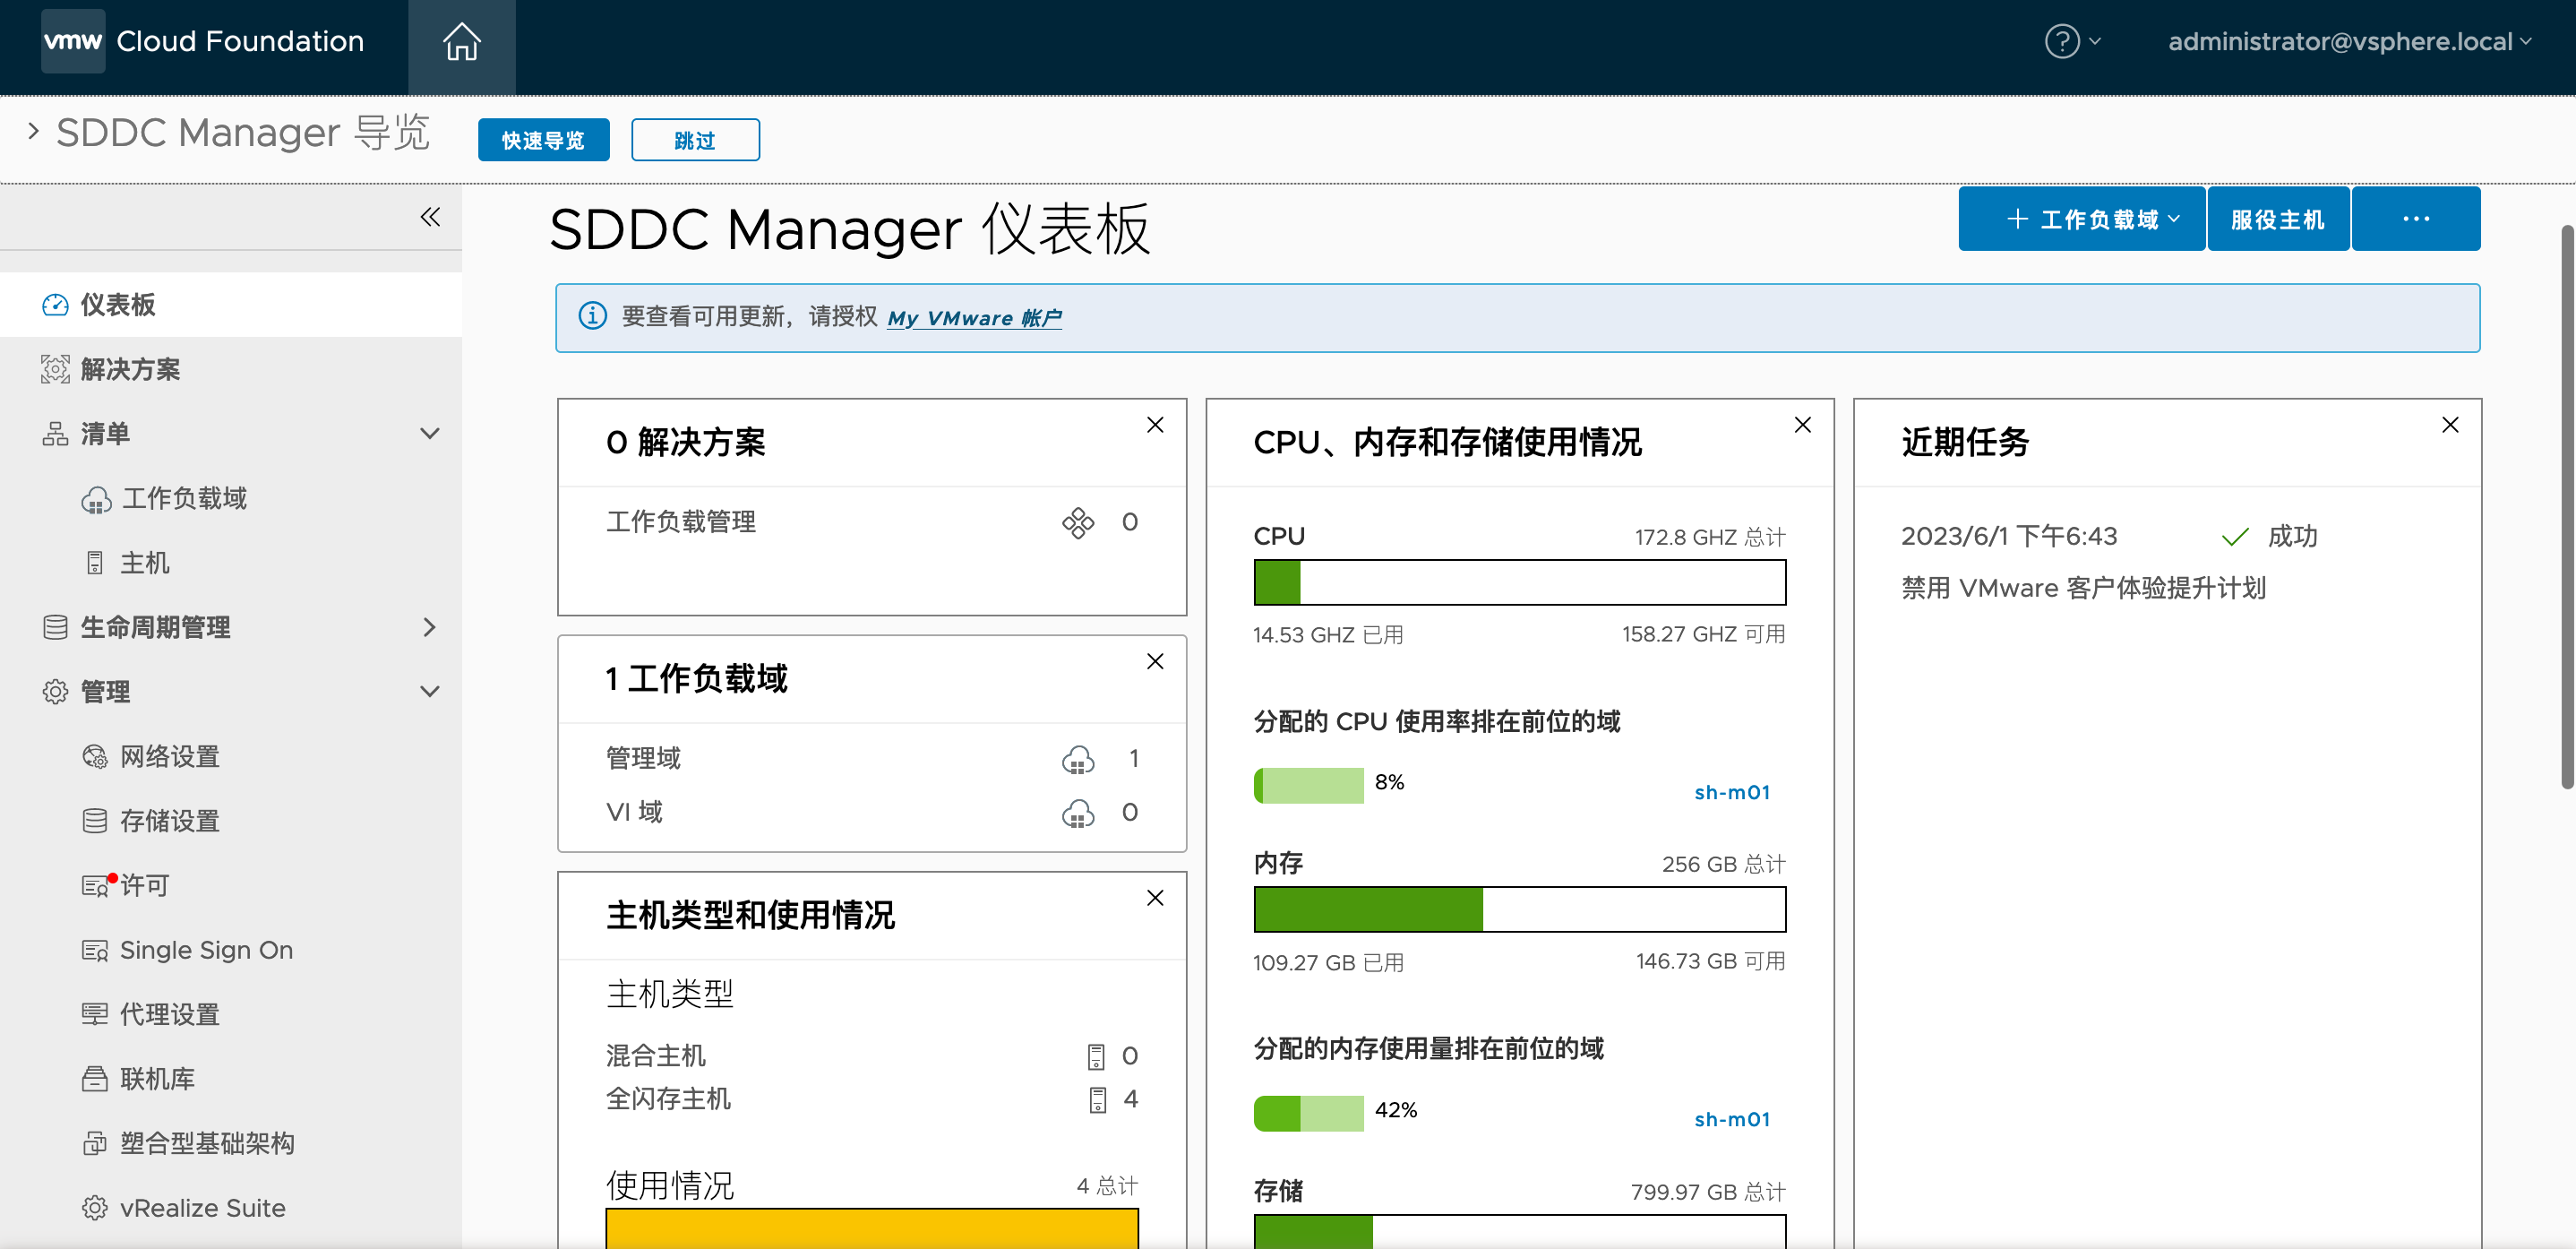
1.5.5. 部署完成
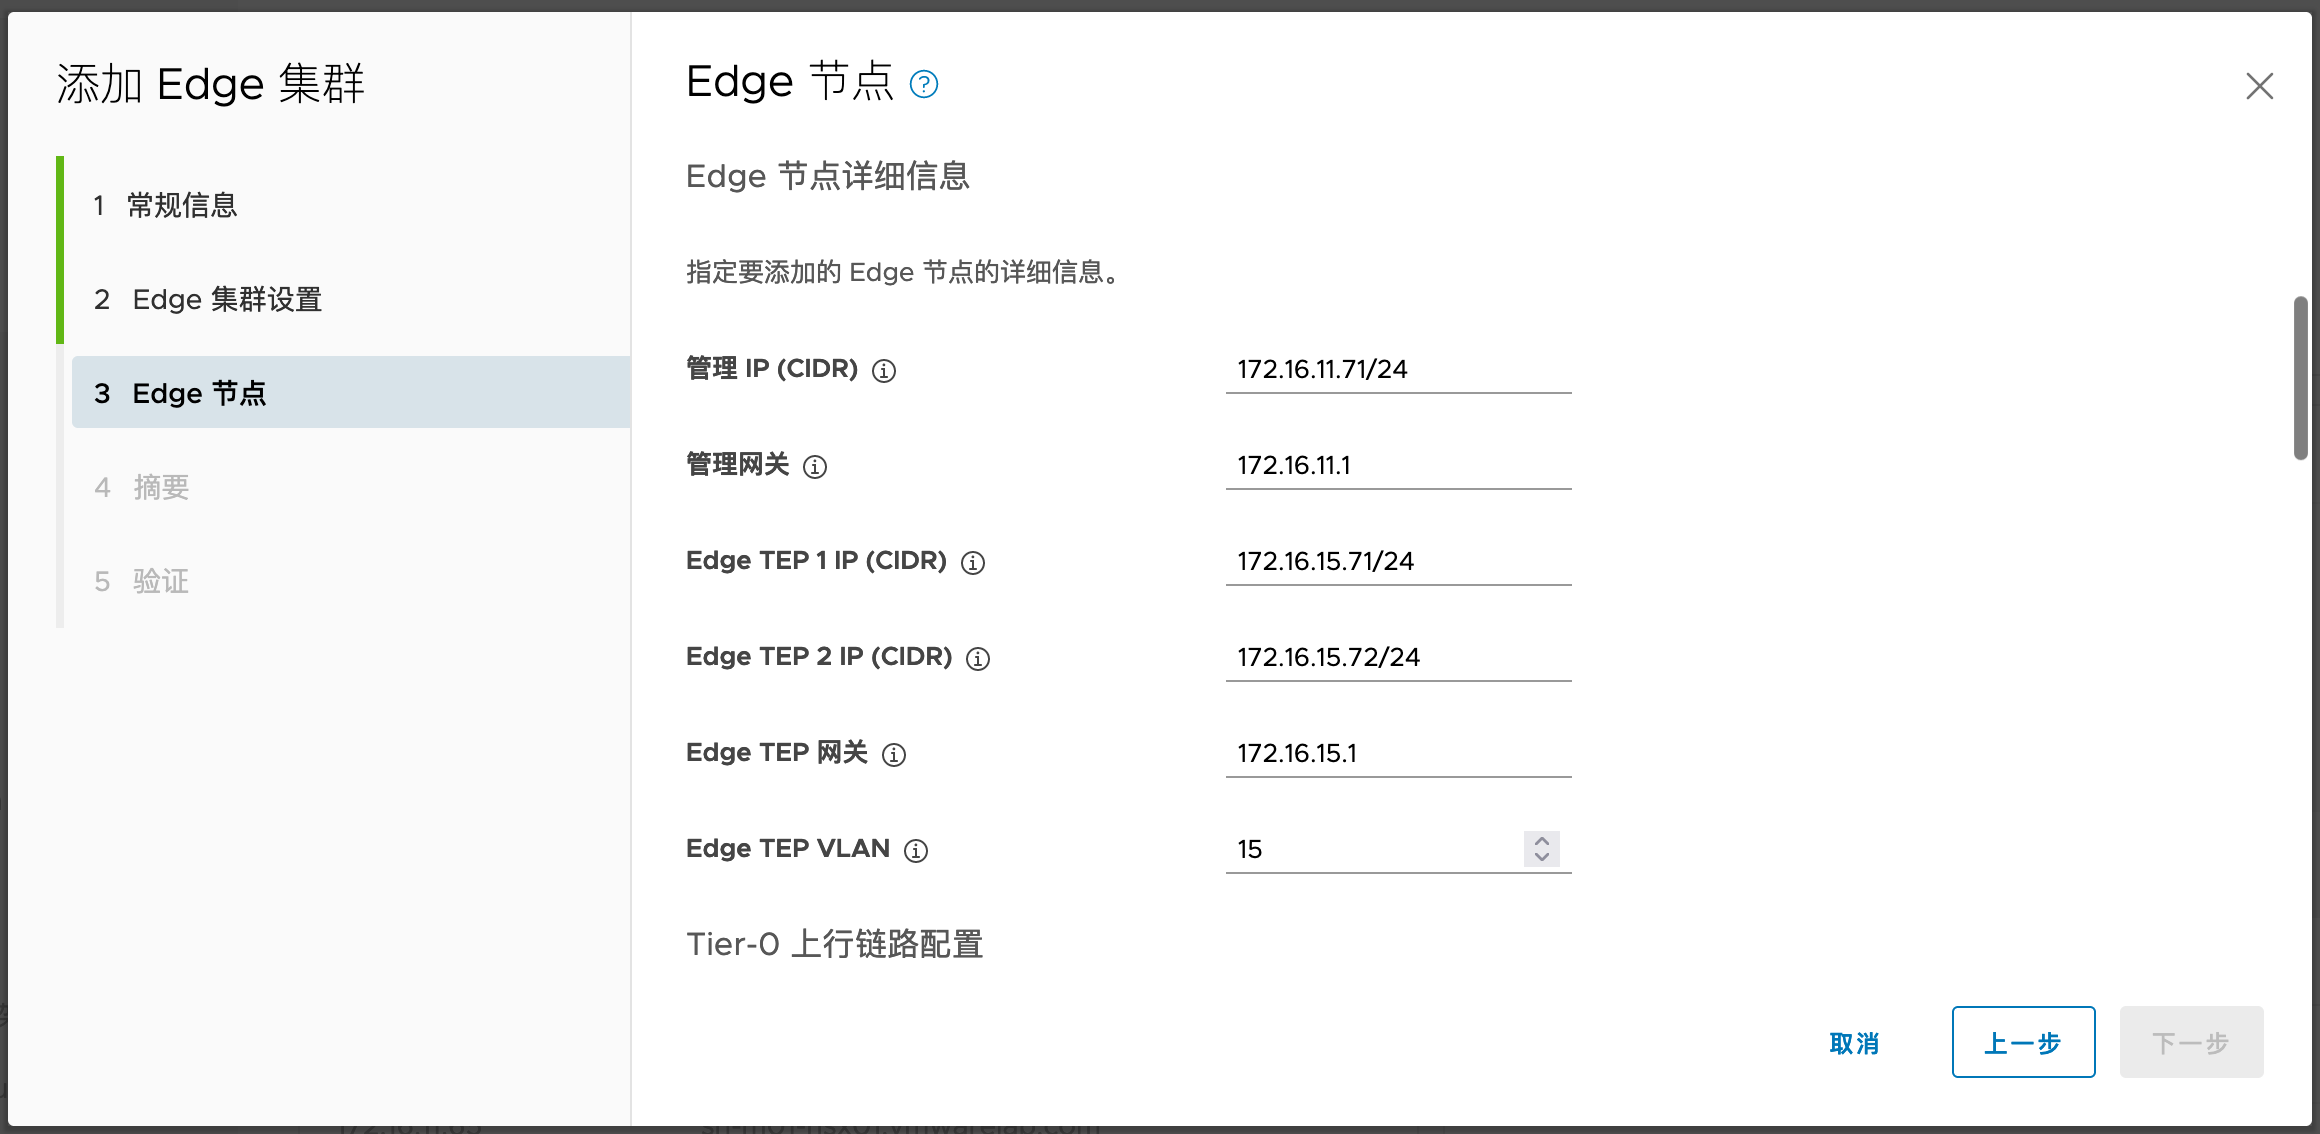
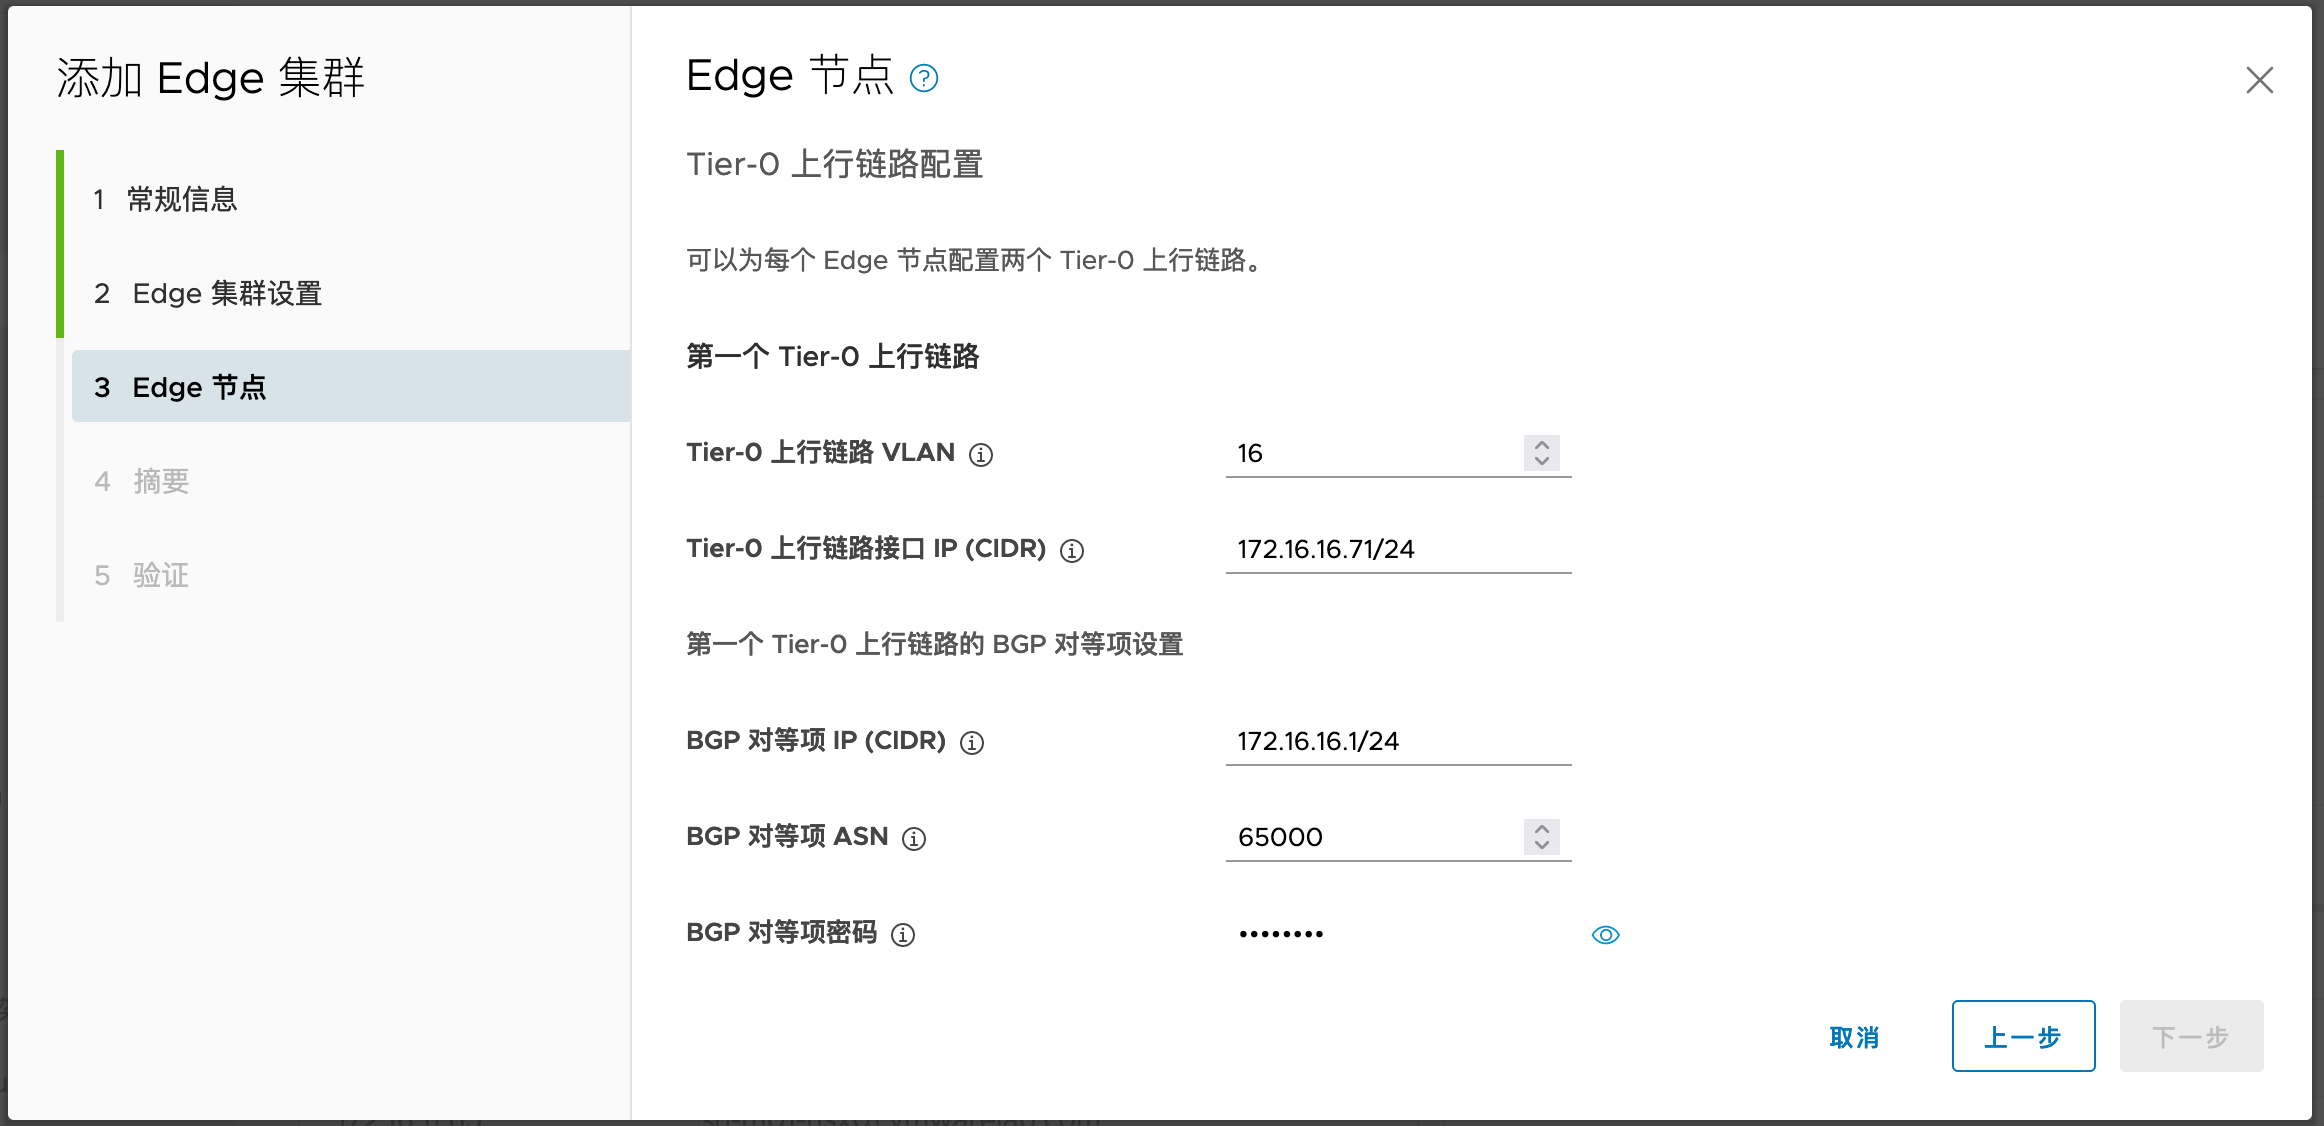
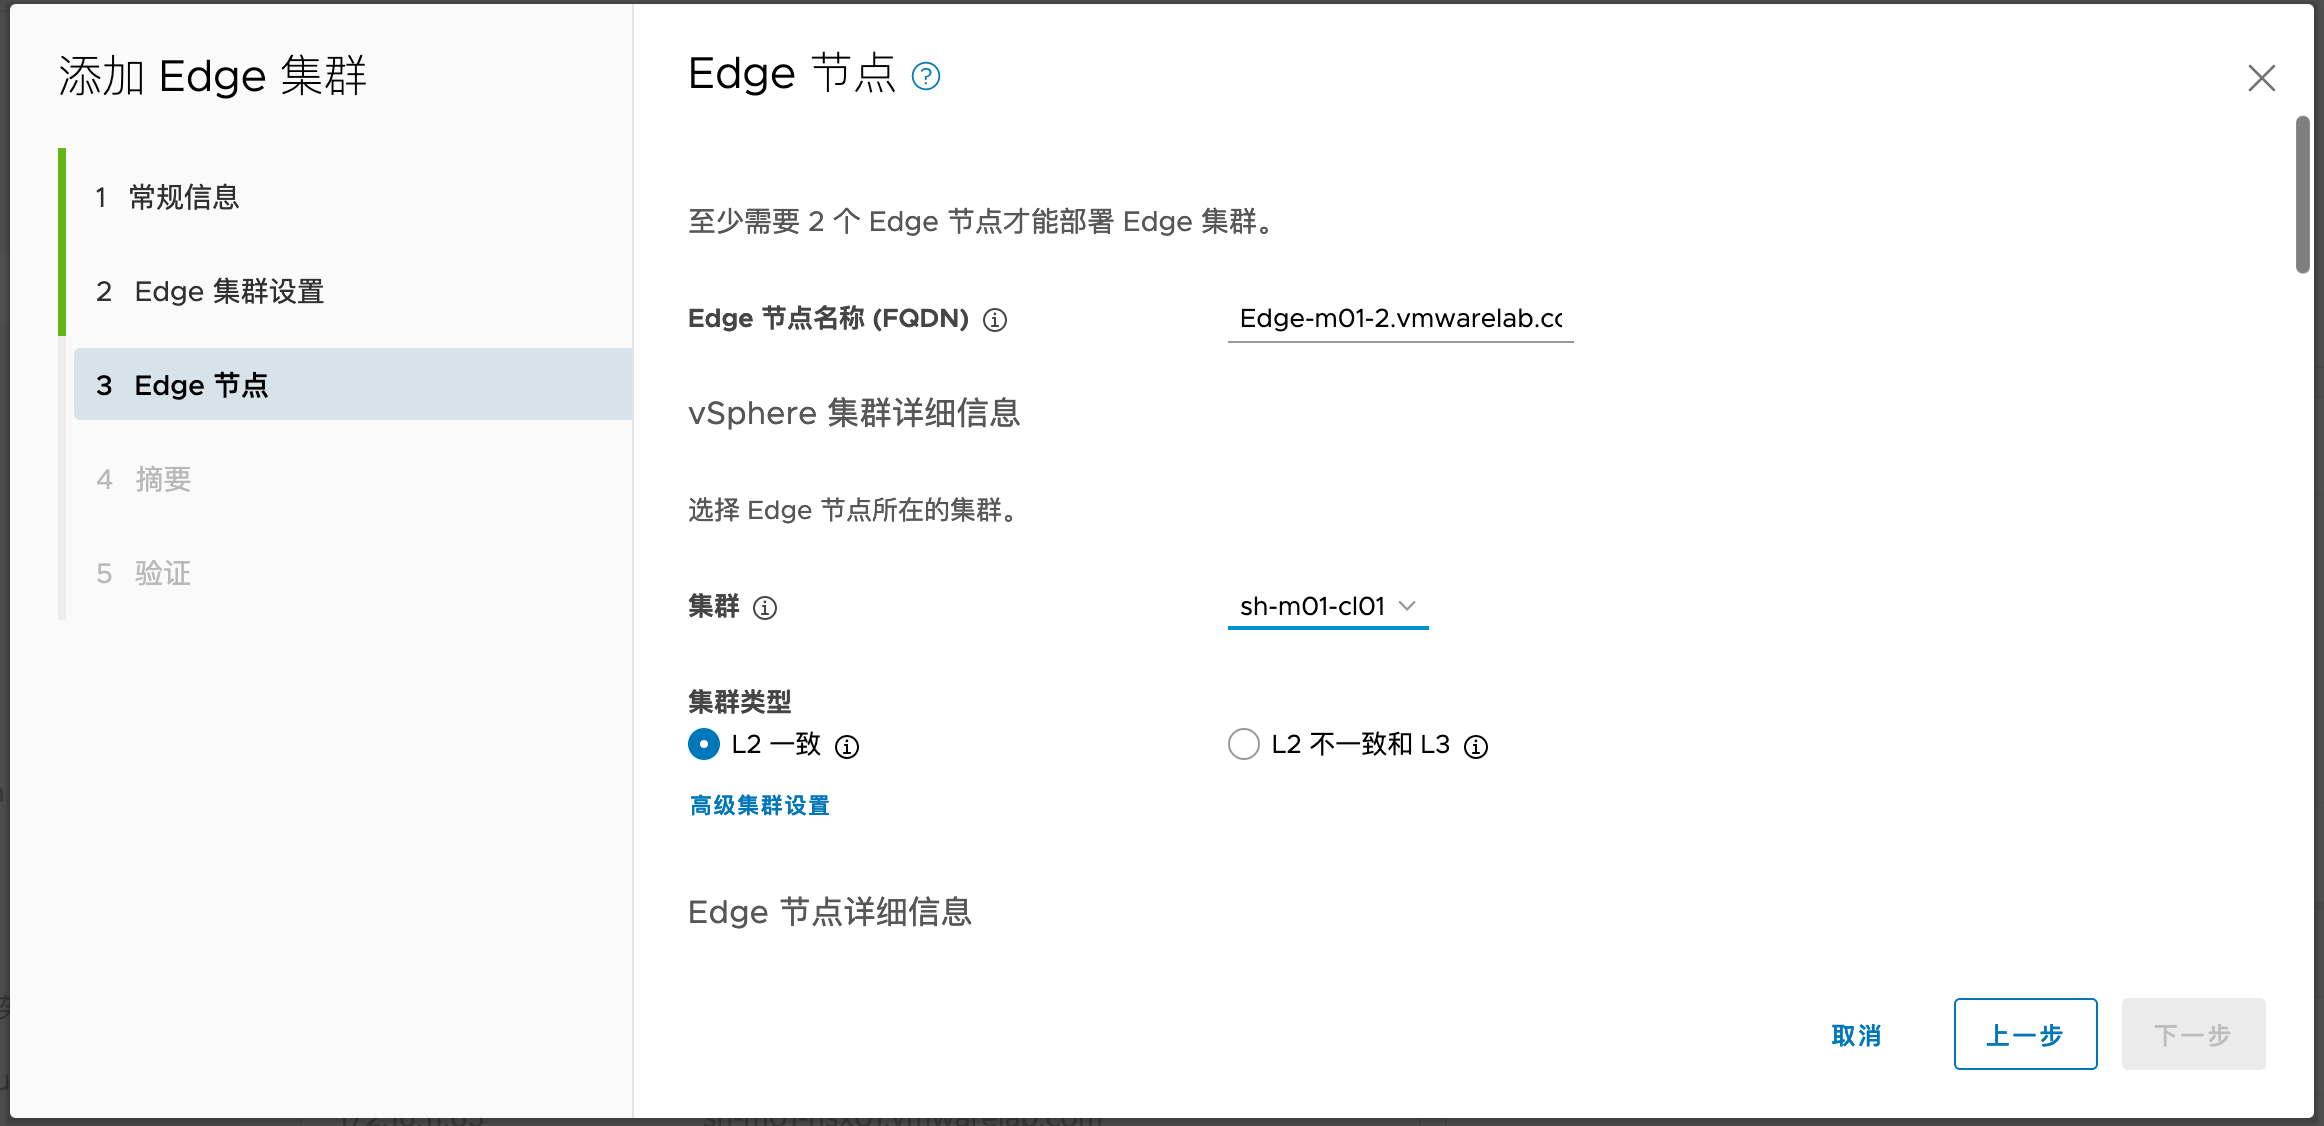
1.6. 创建NSX Edge集群
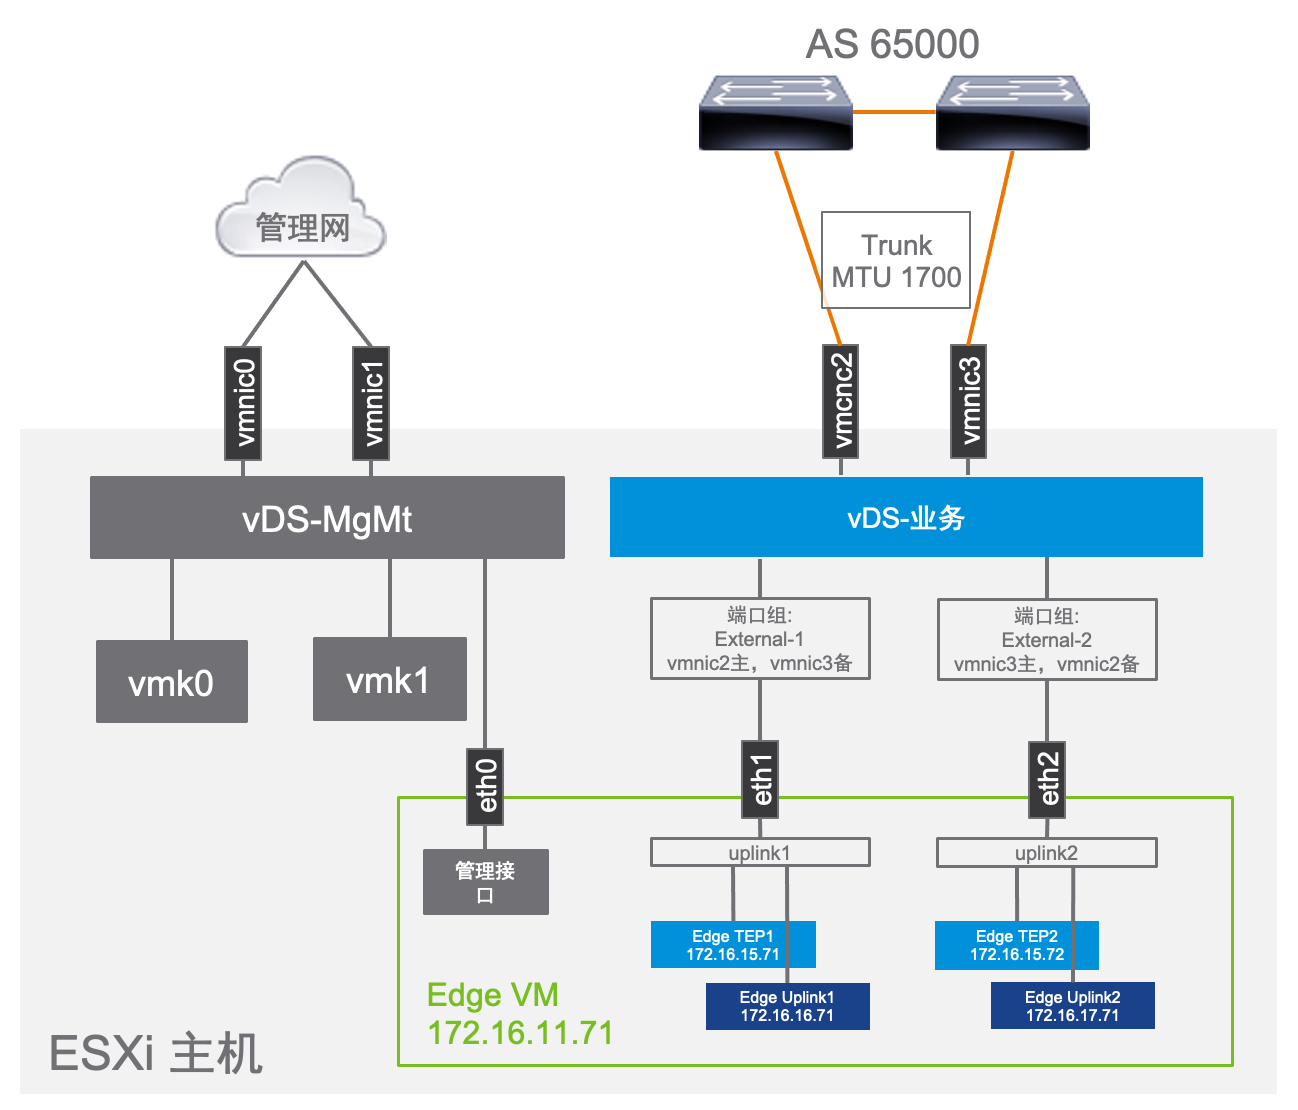
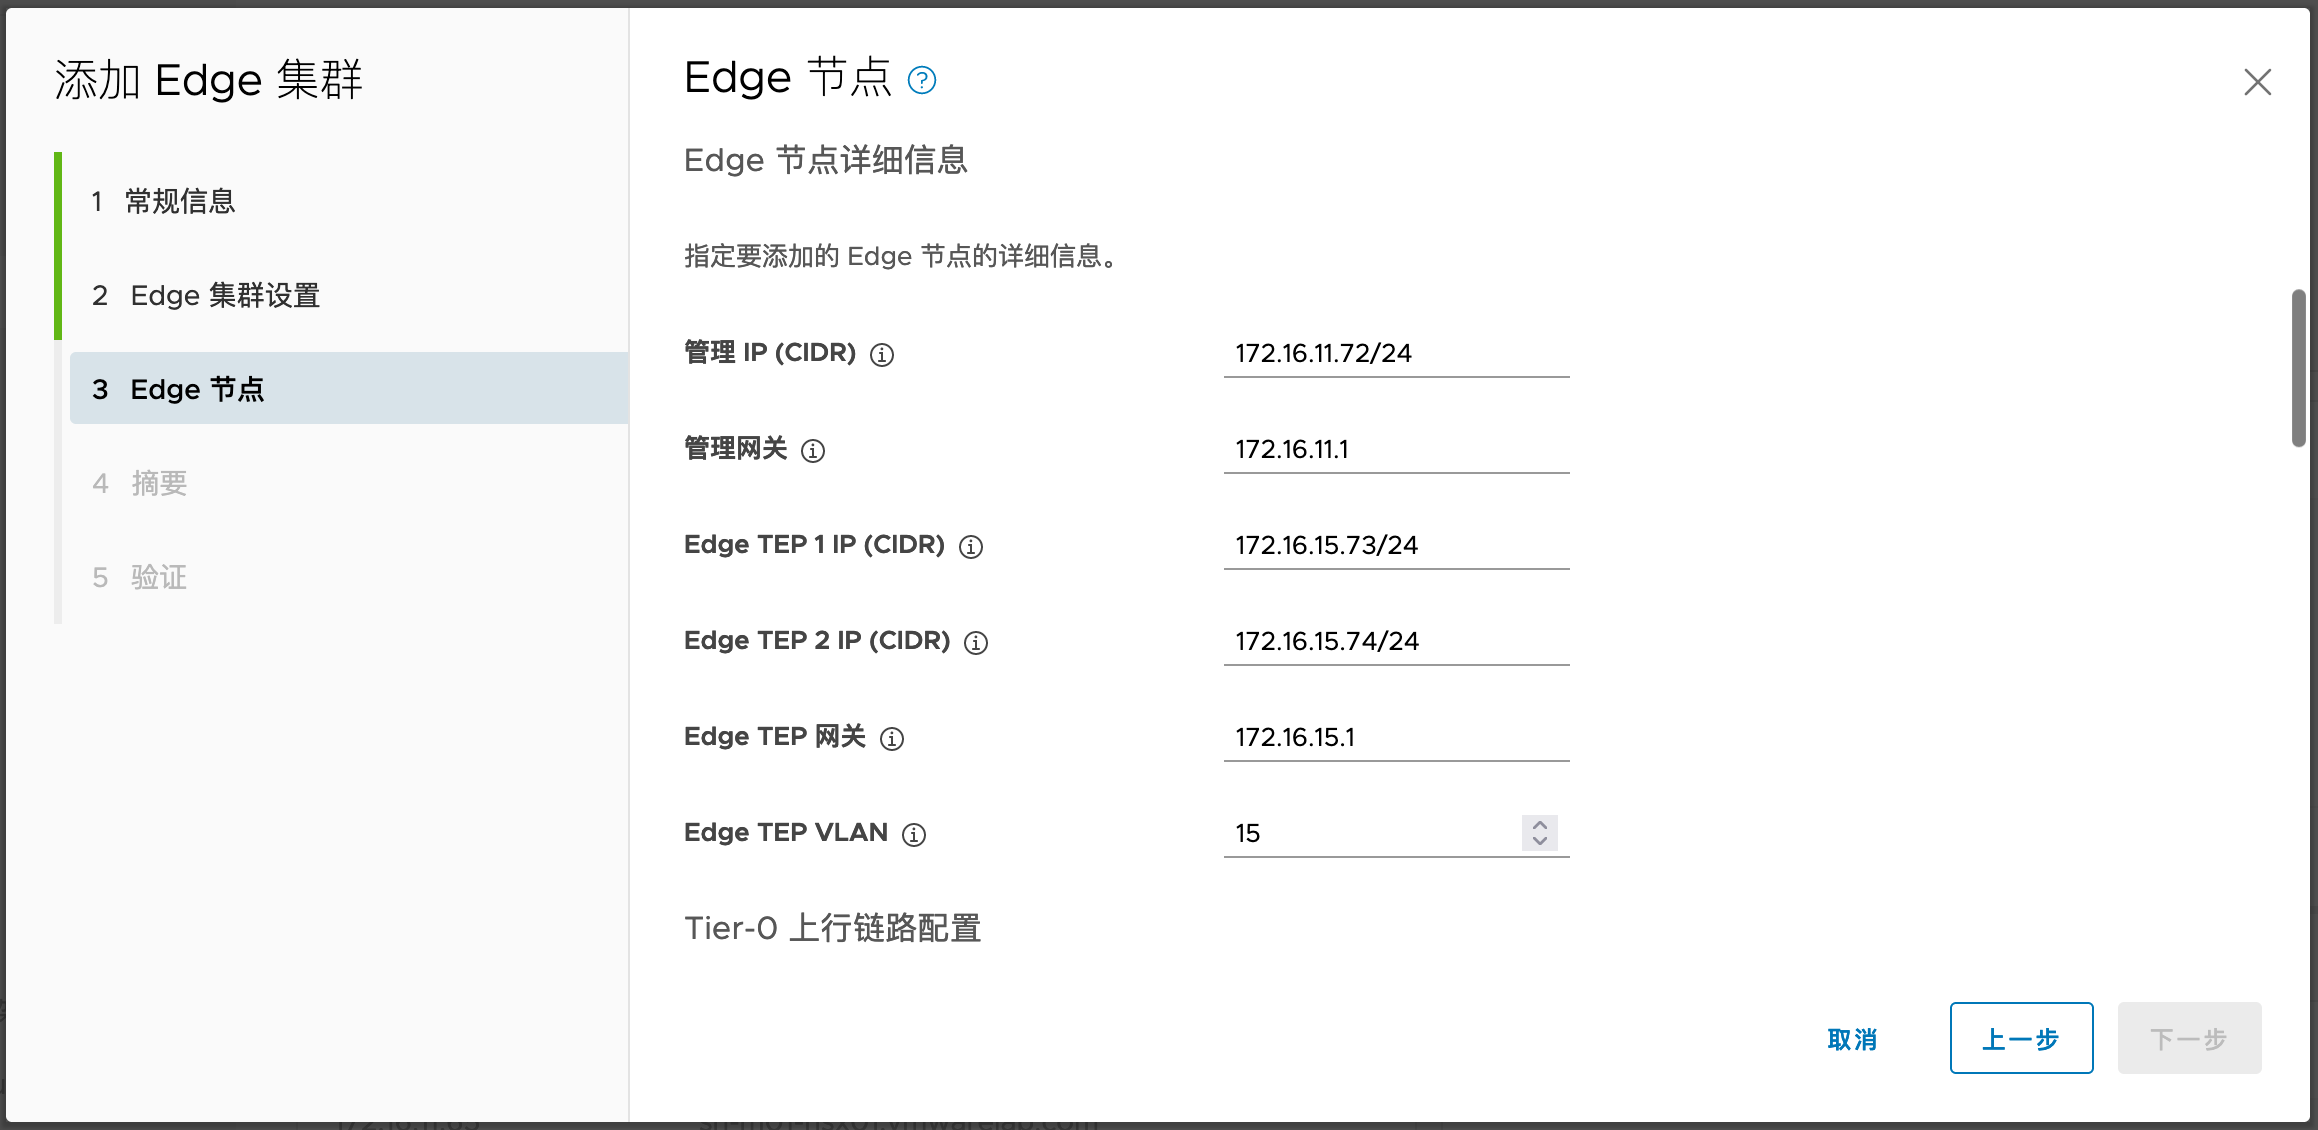
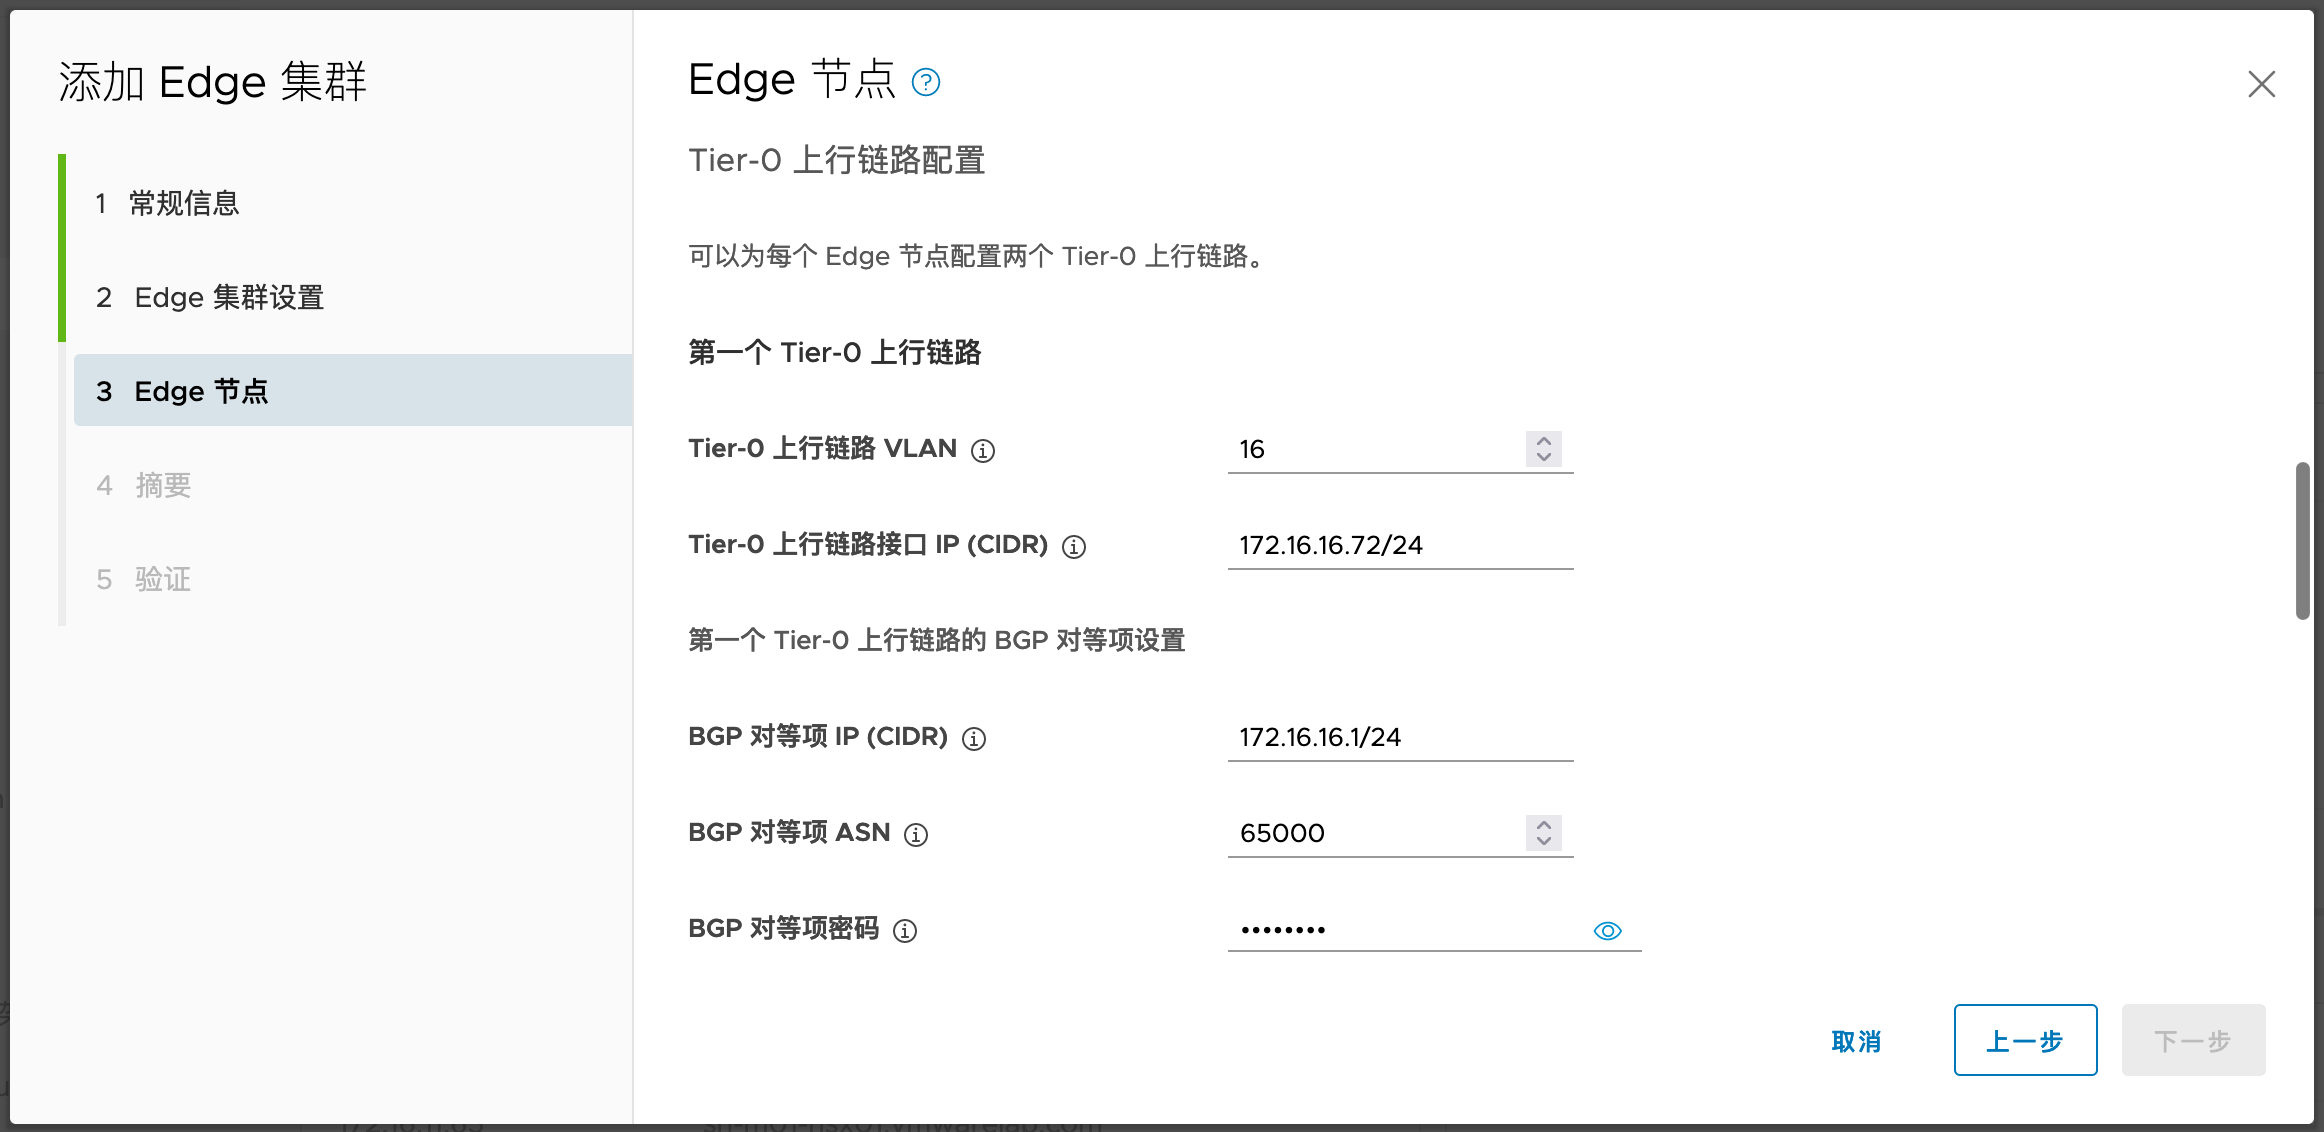
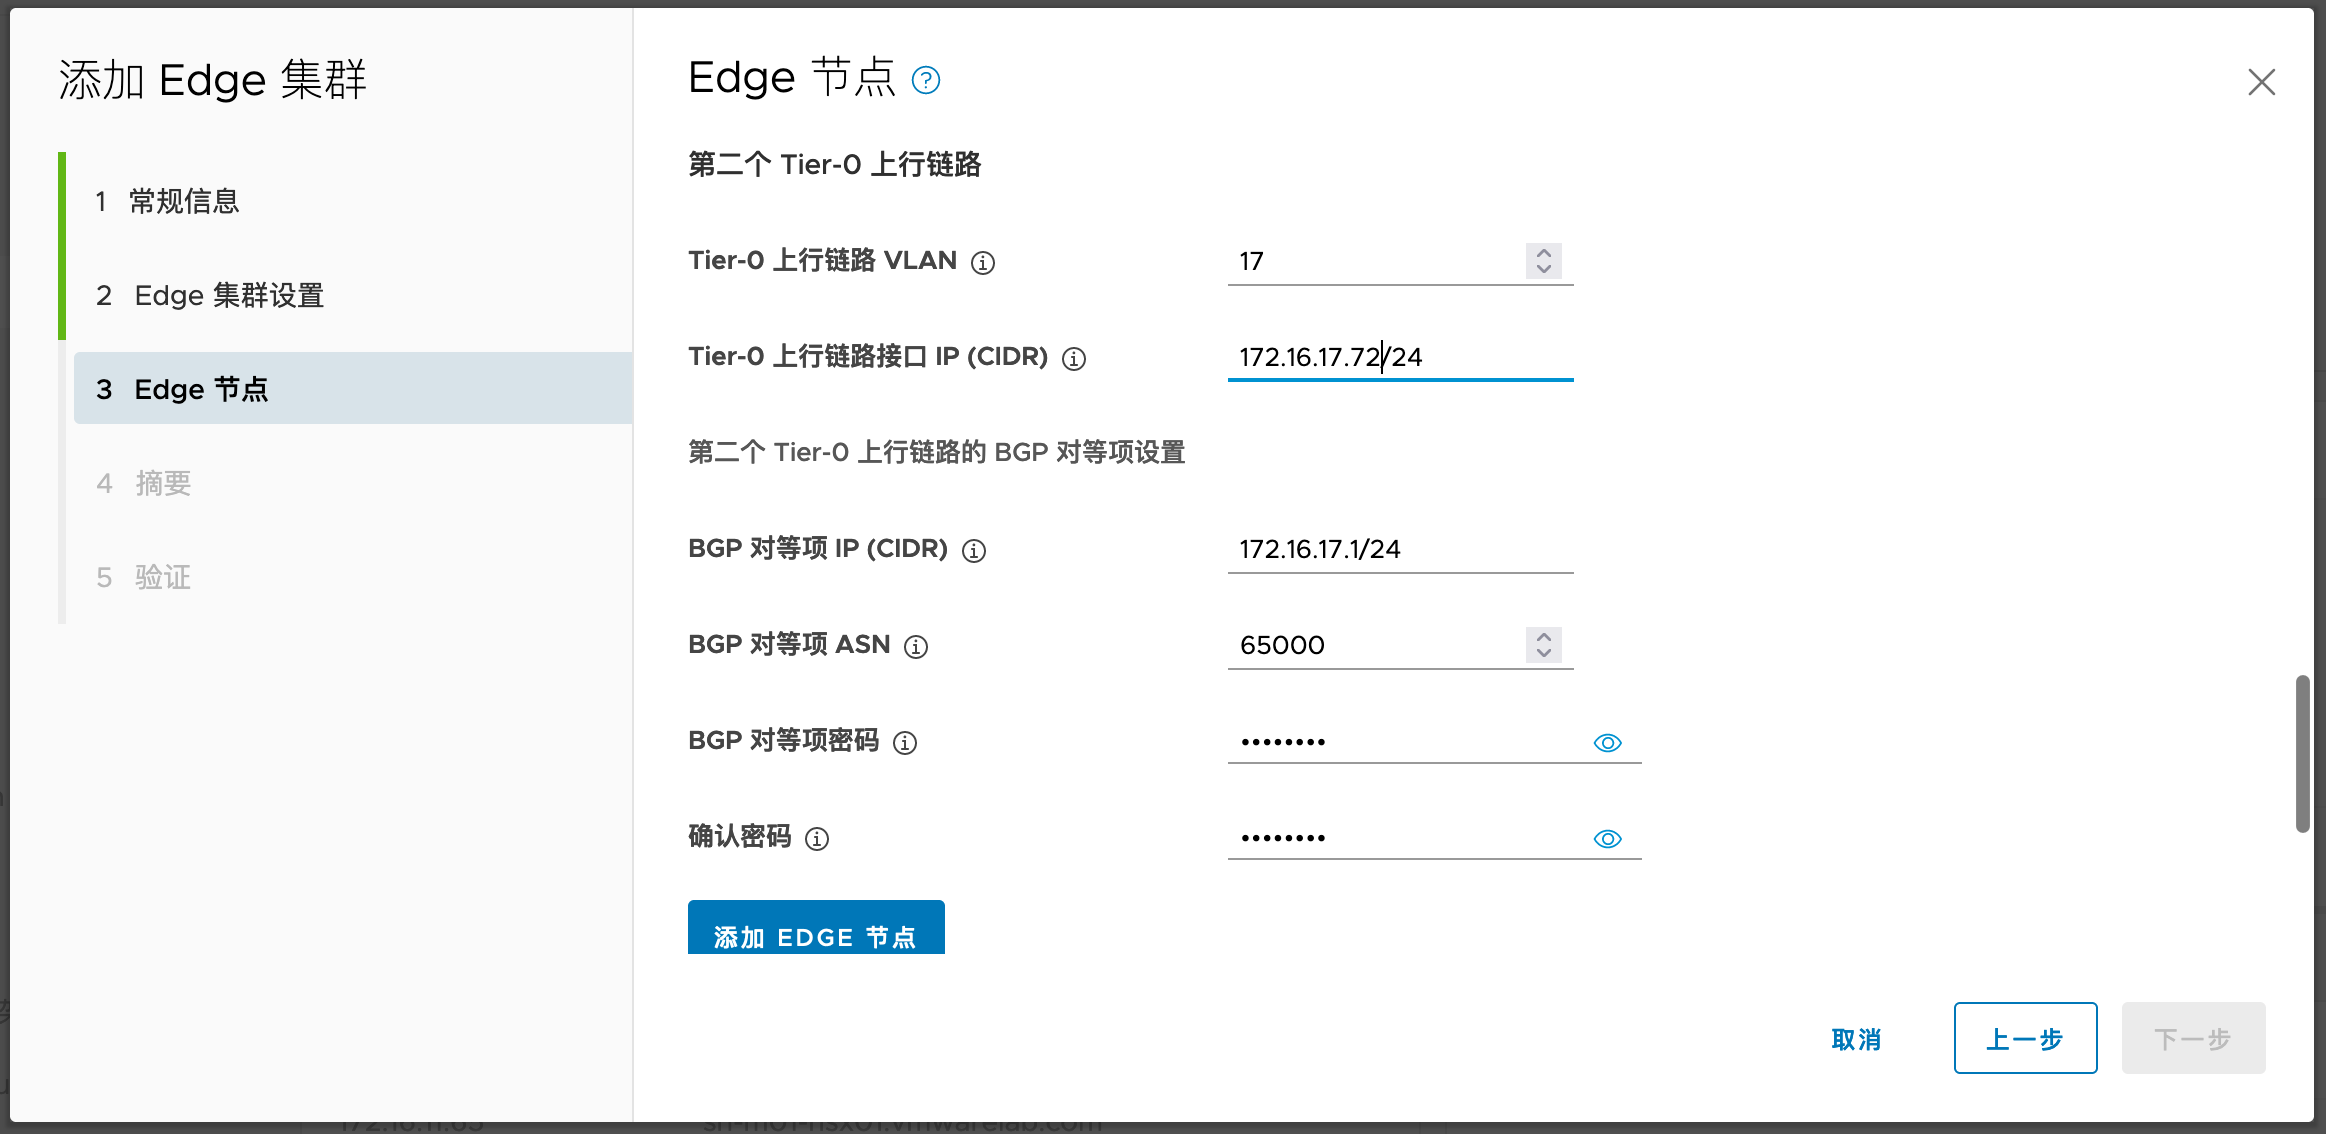
1.6.1. 网络规划
| 名称 | IP | VLAN信息 |
|---|---|---|
| Edge-m01-1 管理 | 172.16.11.71 | VLAN11 |
| Edge-m01-2 管理 | 172.16.11.72 | VLAN11 |
| Edge-m01-1 TEP | 172.16.15.71 172.16.15.72 | VLAN15 |
| Edge-m01-2 TEP | 172.16.15.73 172.16.15.74 | VLAN15 |
| Edge-m01-1 Uplink1 Edge-m01-1 Uplink2 | 172.16.16.71 172.16.17.71 | VLAN16 |
| Edge-m01-2 Uplink1 Edge-m01-2 Uplink2 | 172.16.16.72 172.16.17.72 | VLAN17 |
Edge 的逻辑拓扑如下:
和之前一样,需要在DNS服务器中为Edge管理FQDN设置正向解析。
在物理网络侧提前设置好BGP Peer:

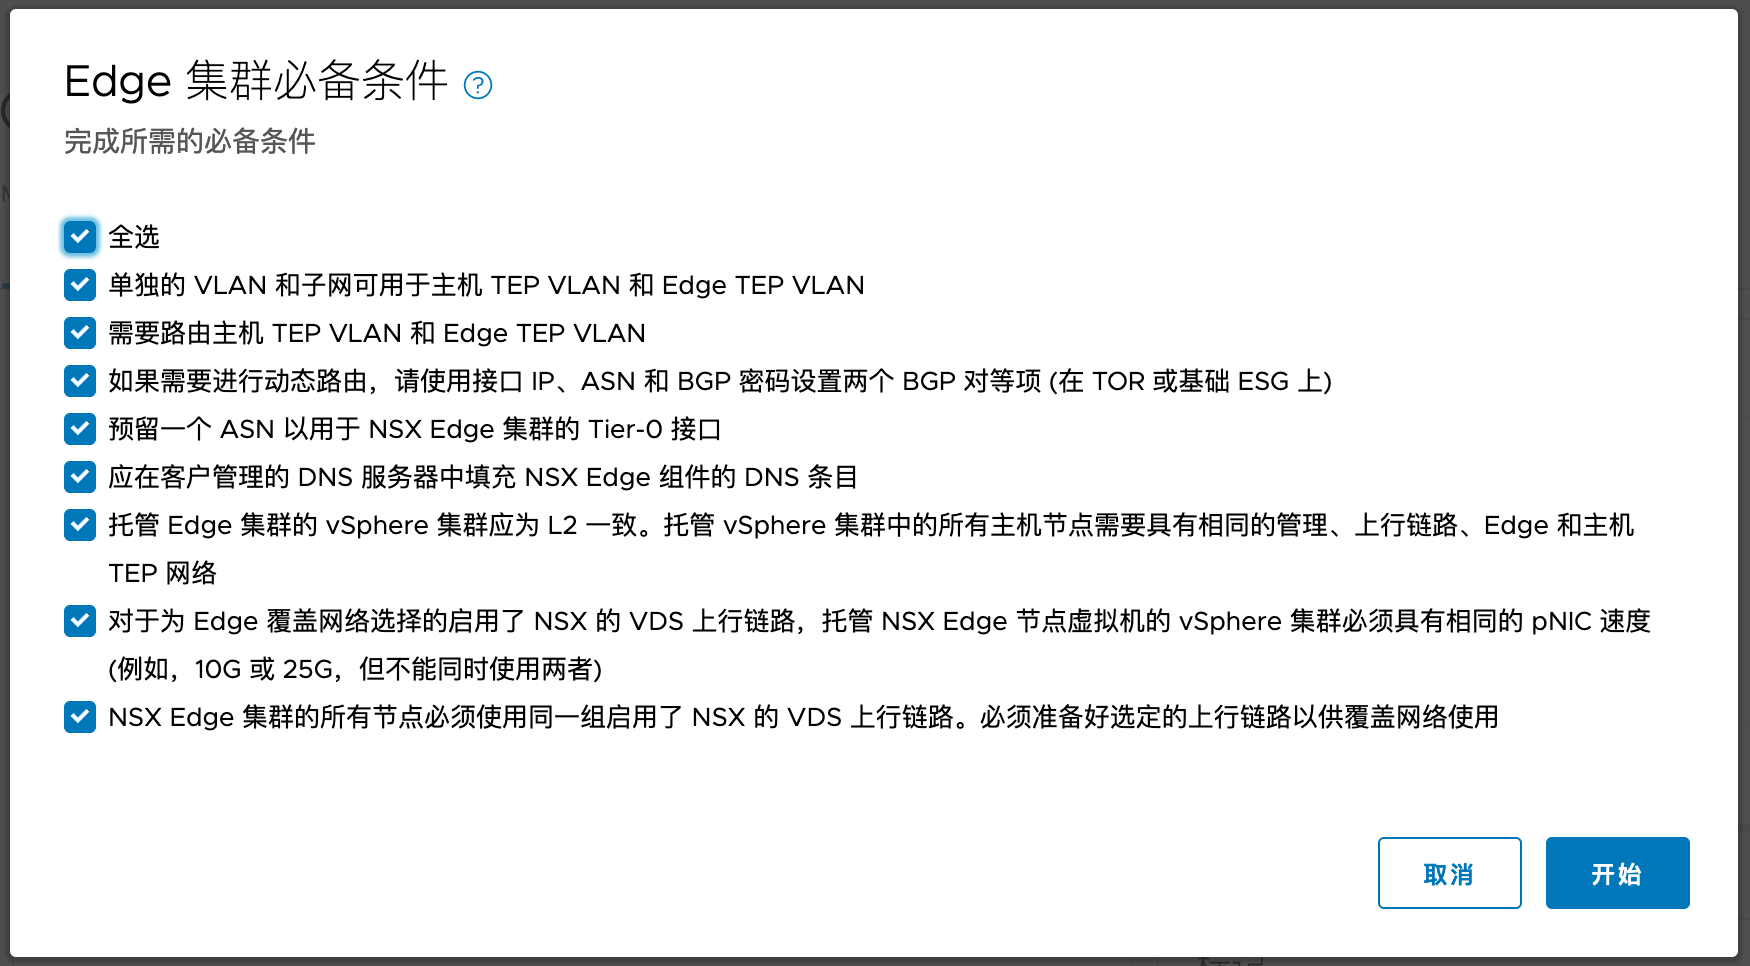
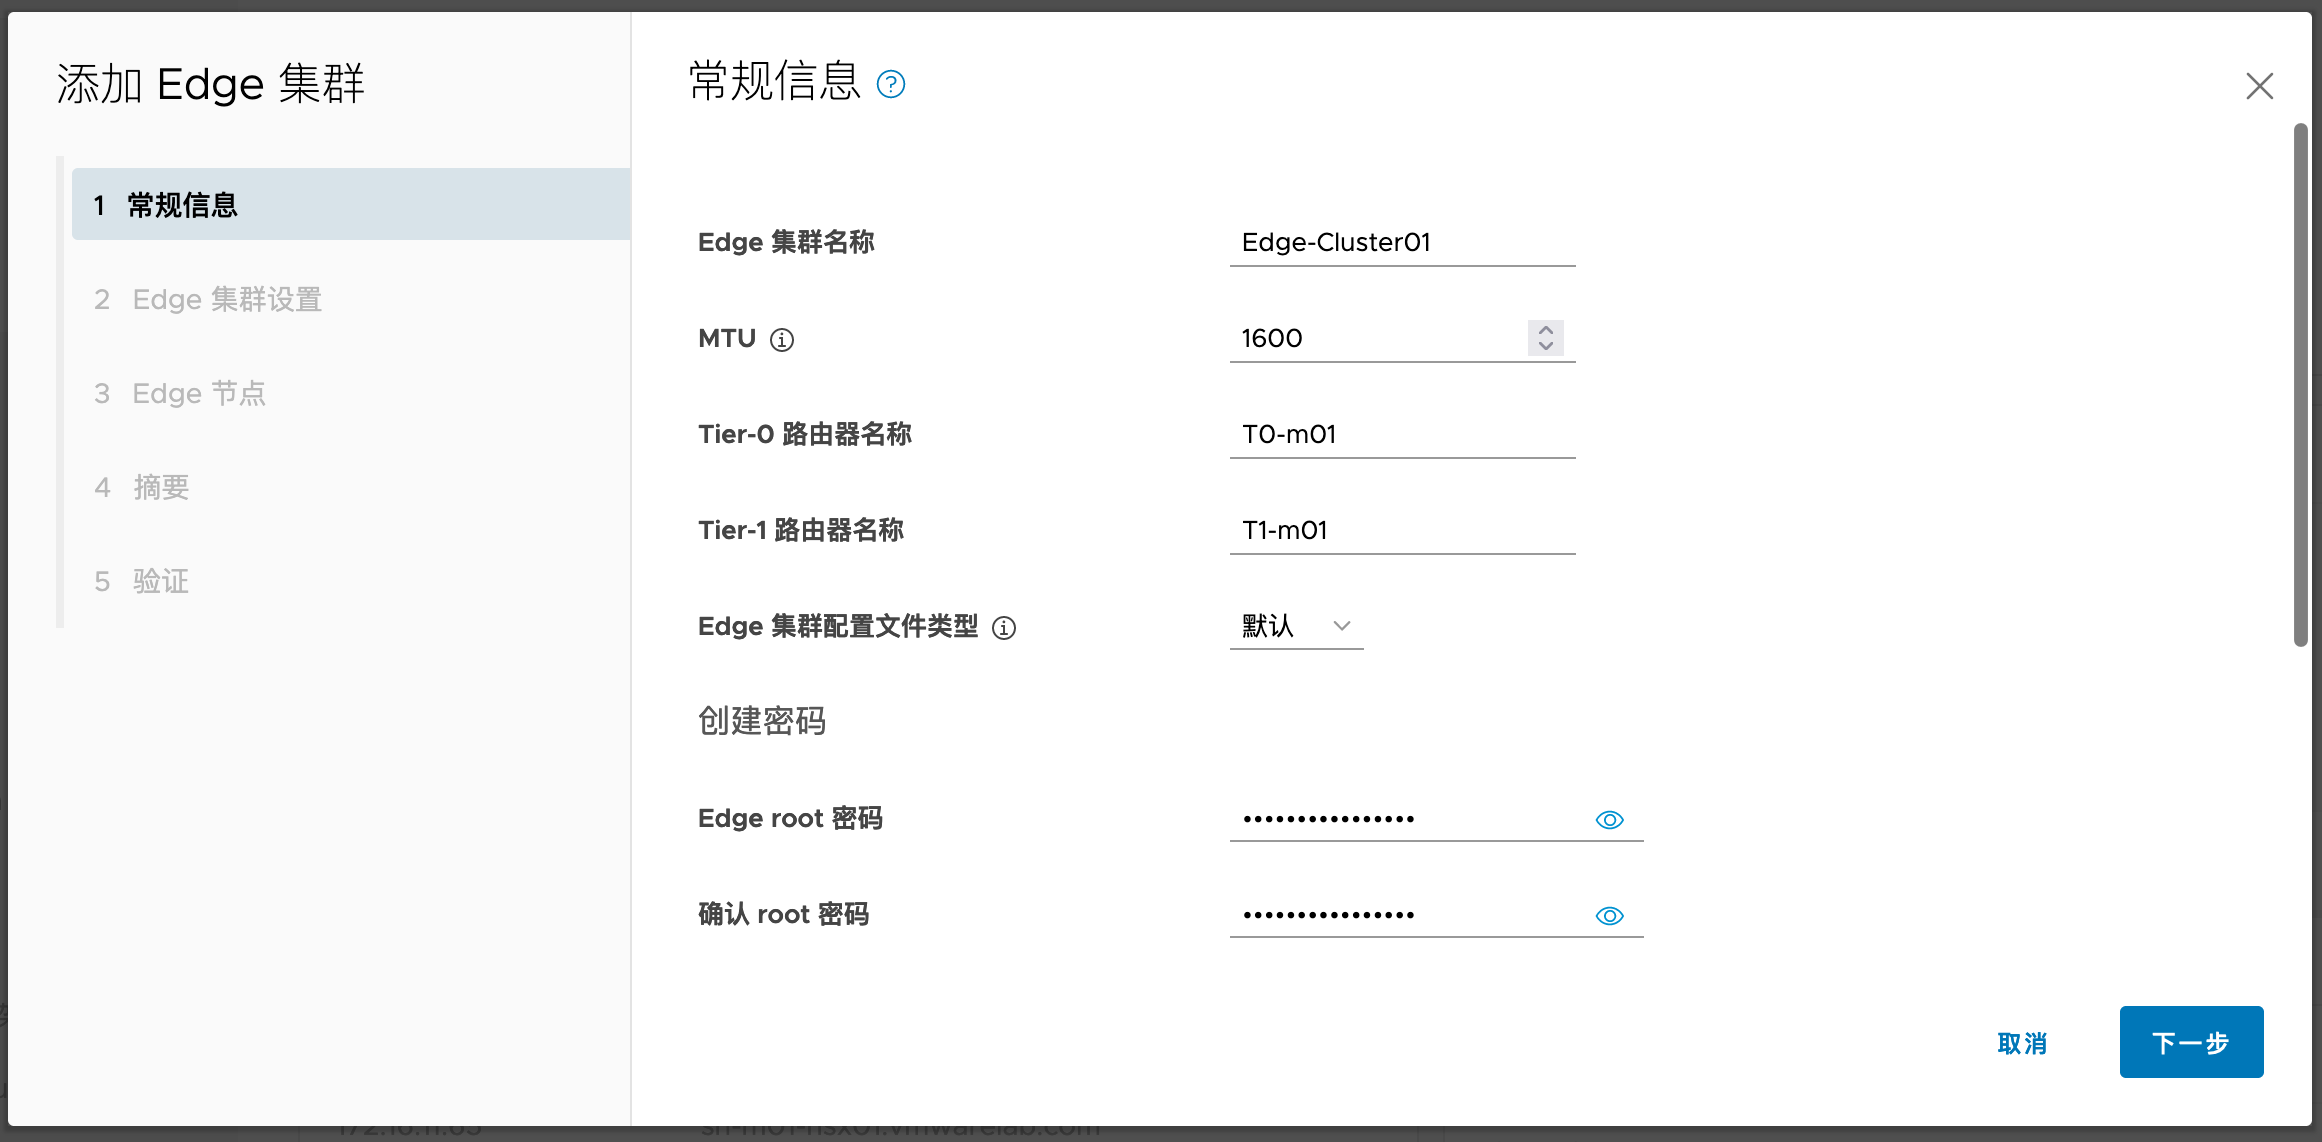
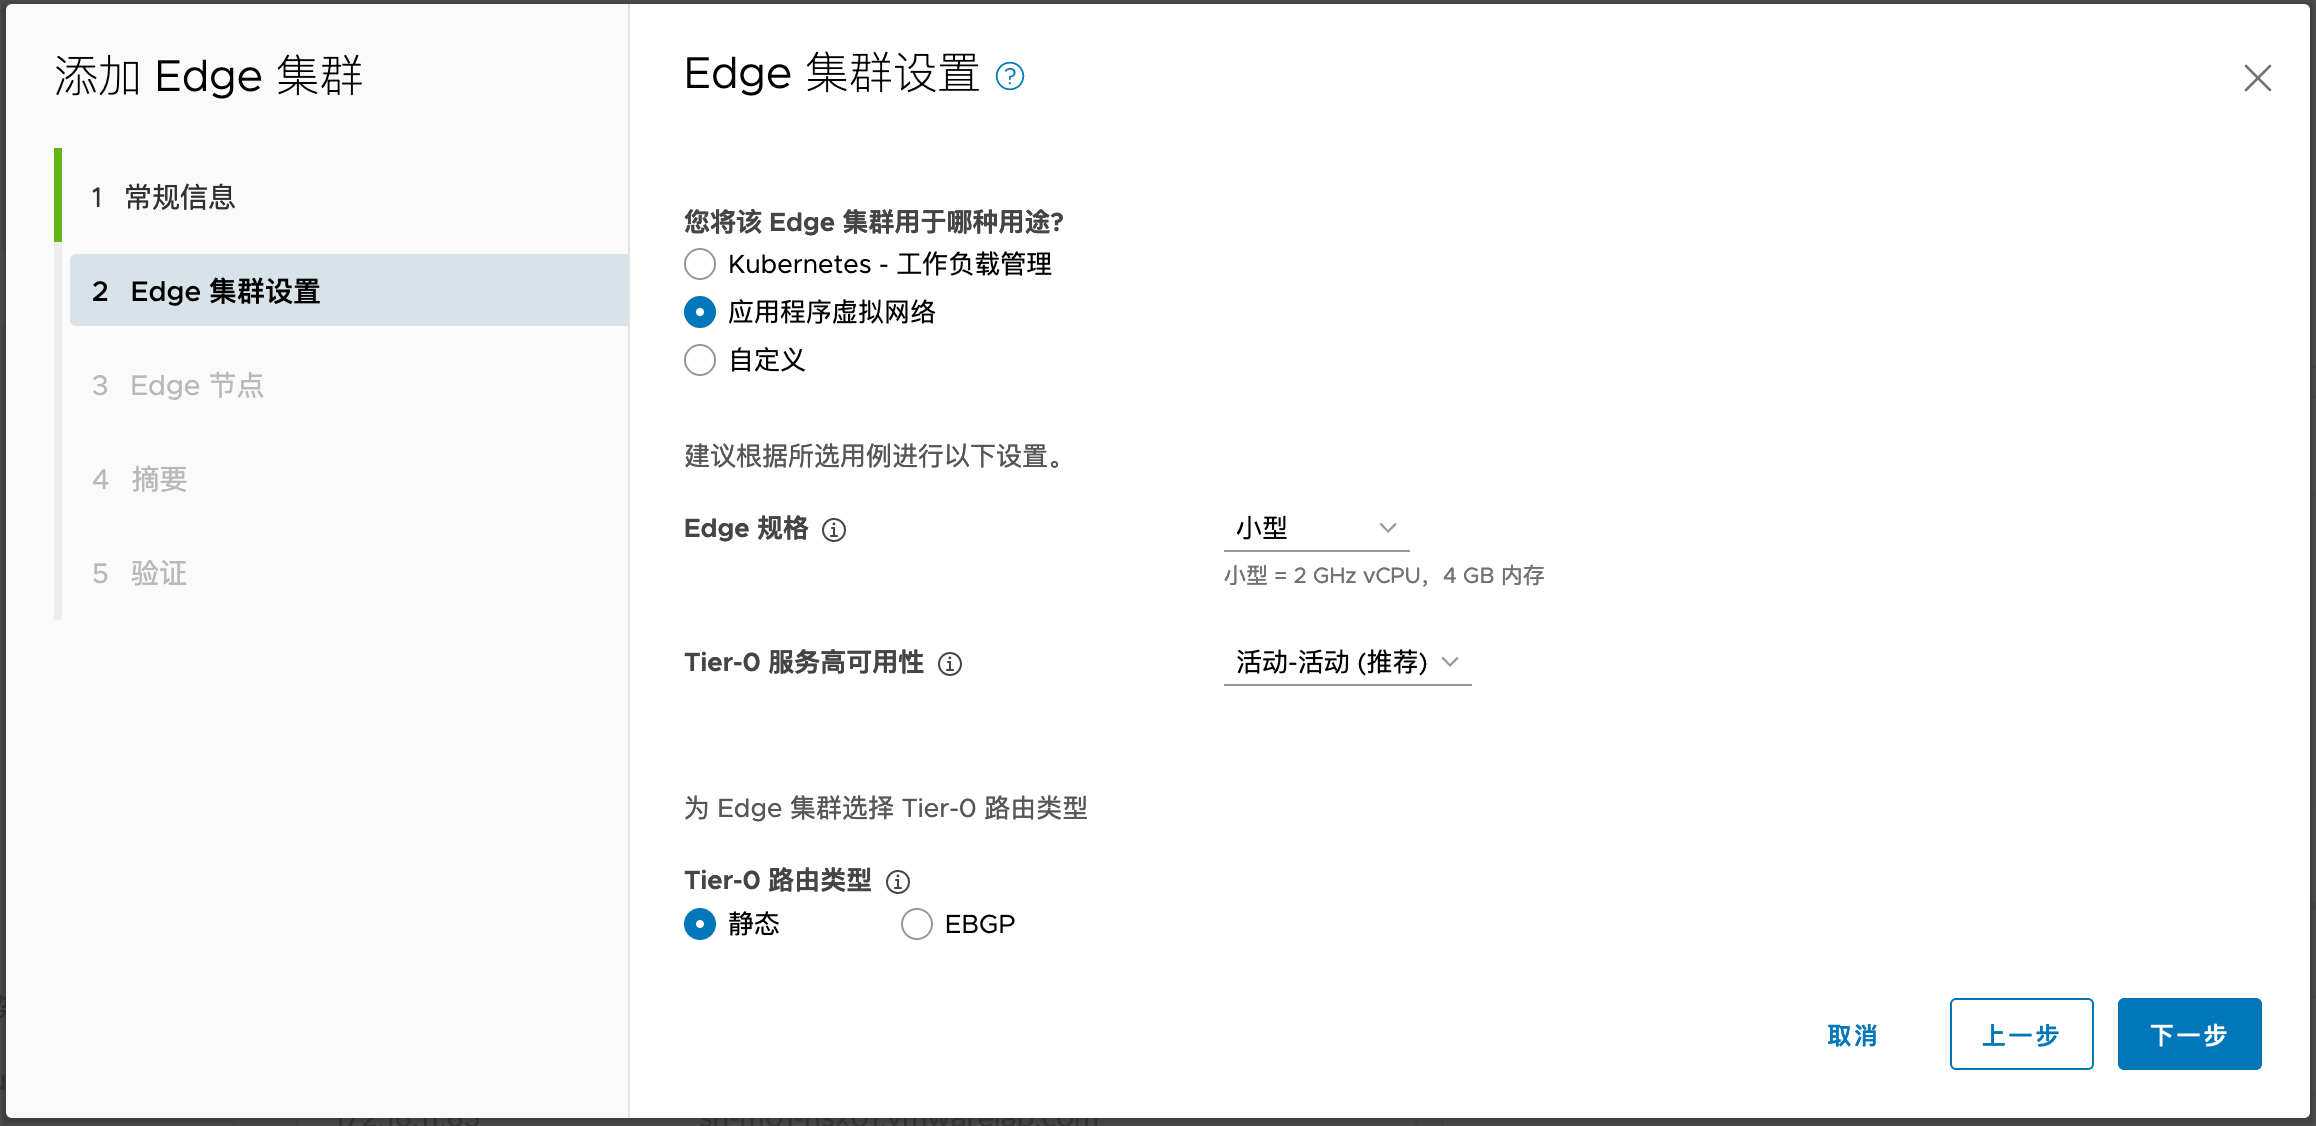
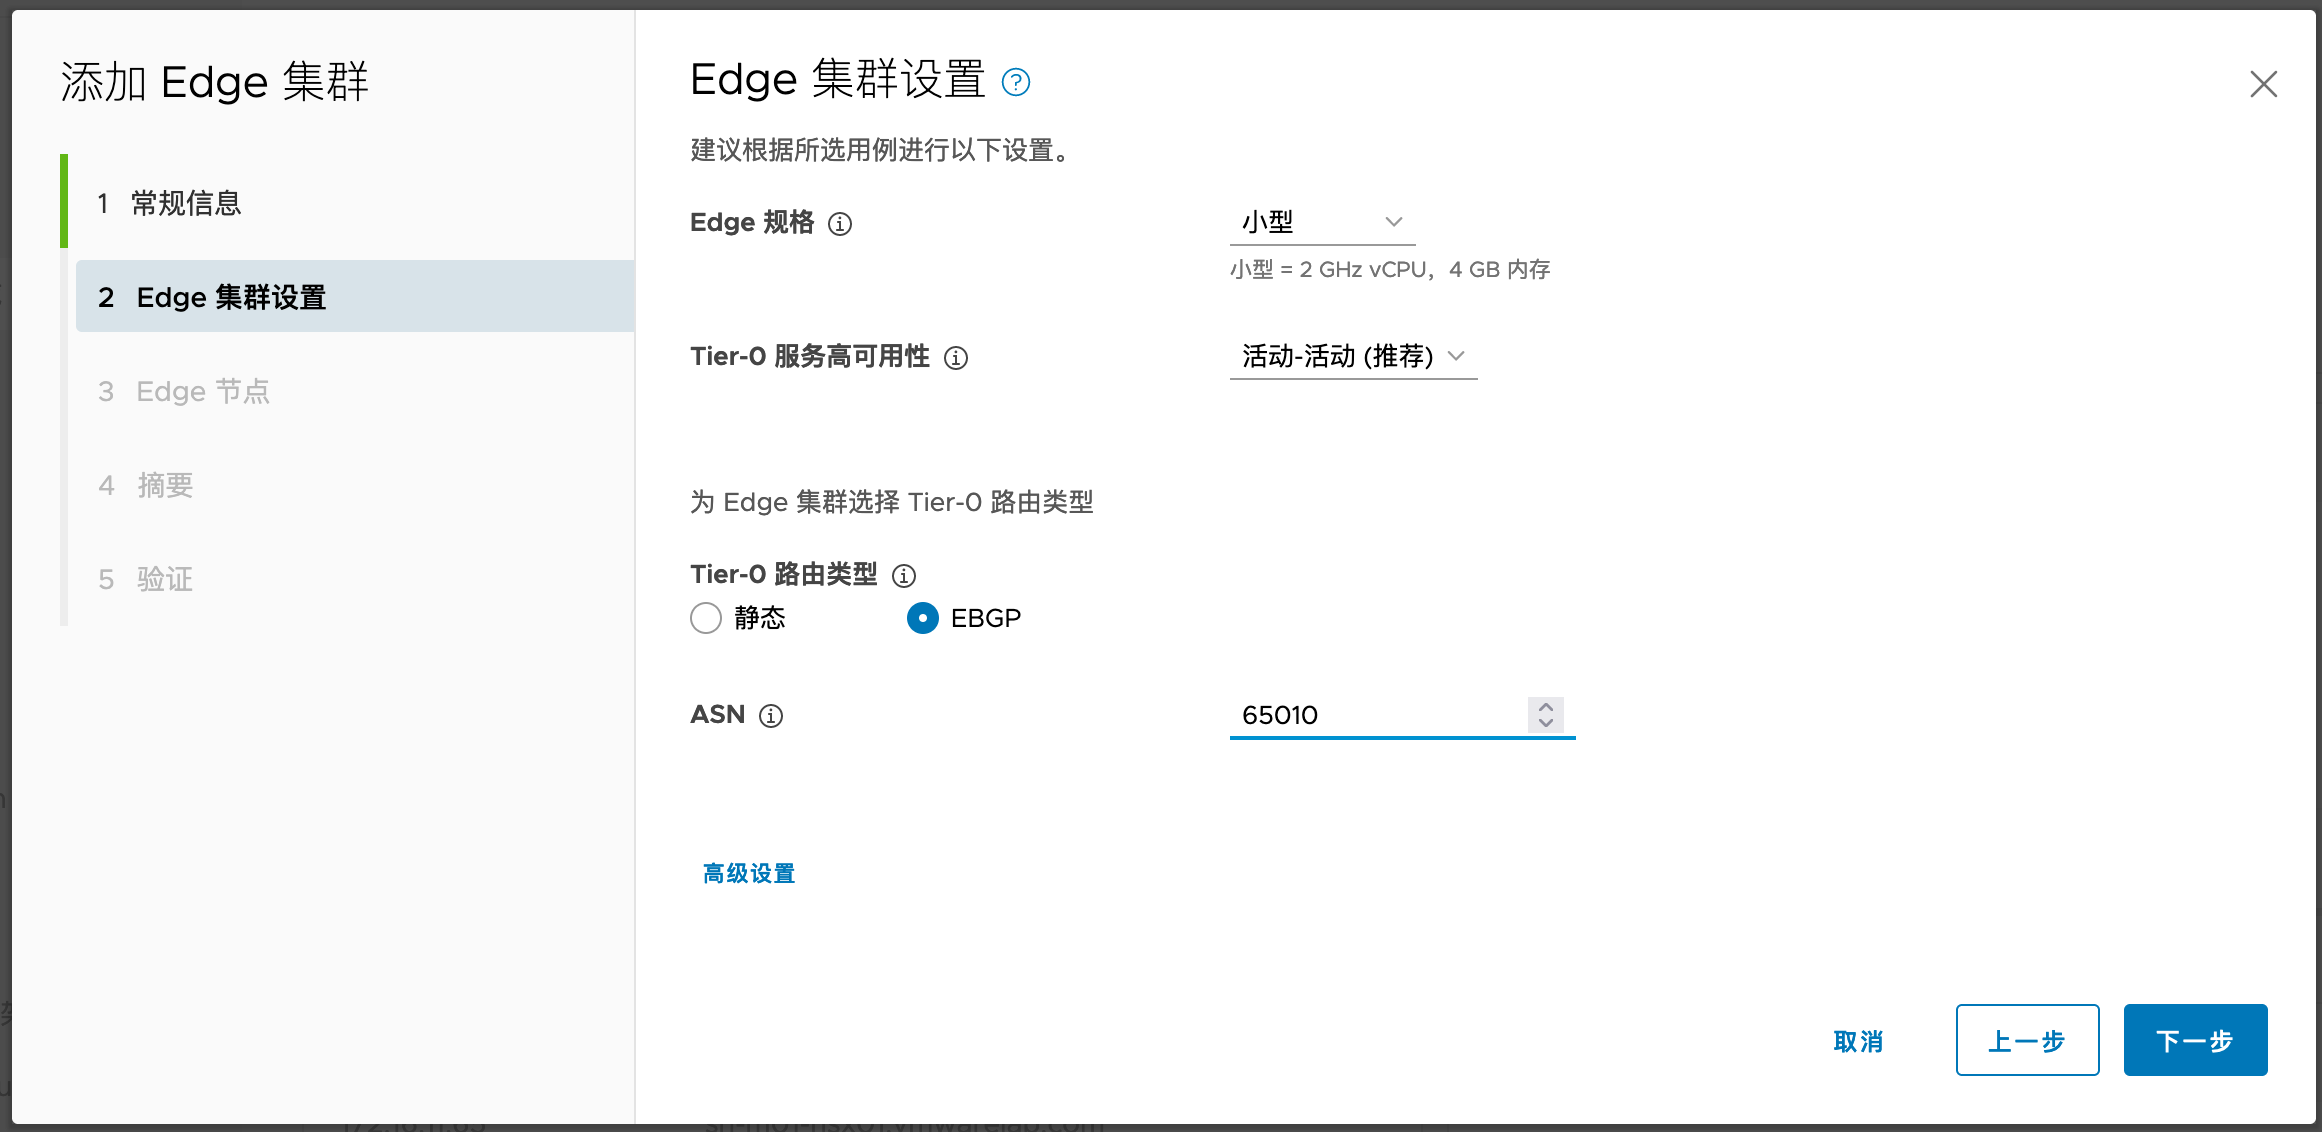
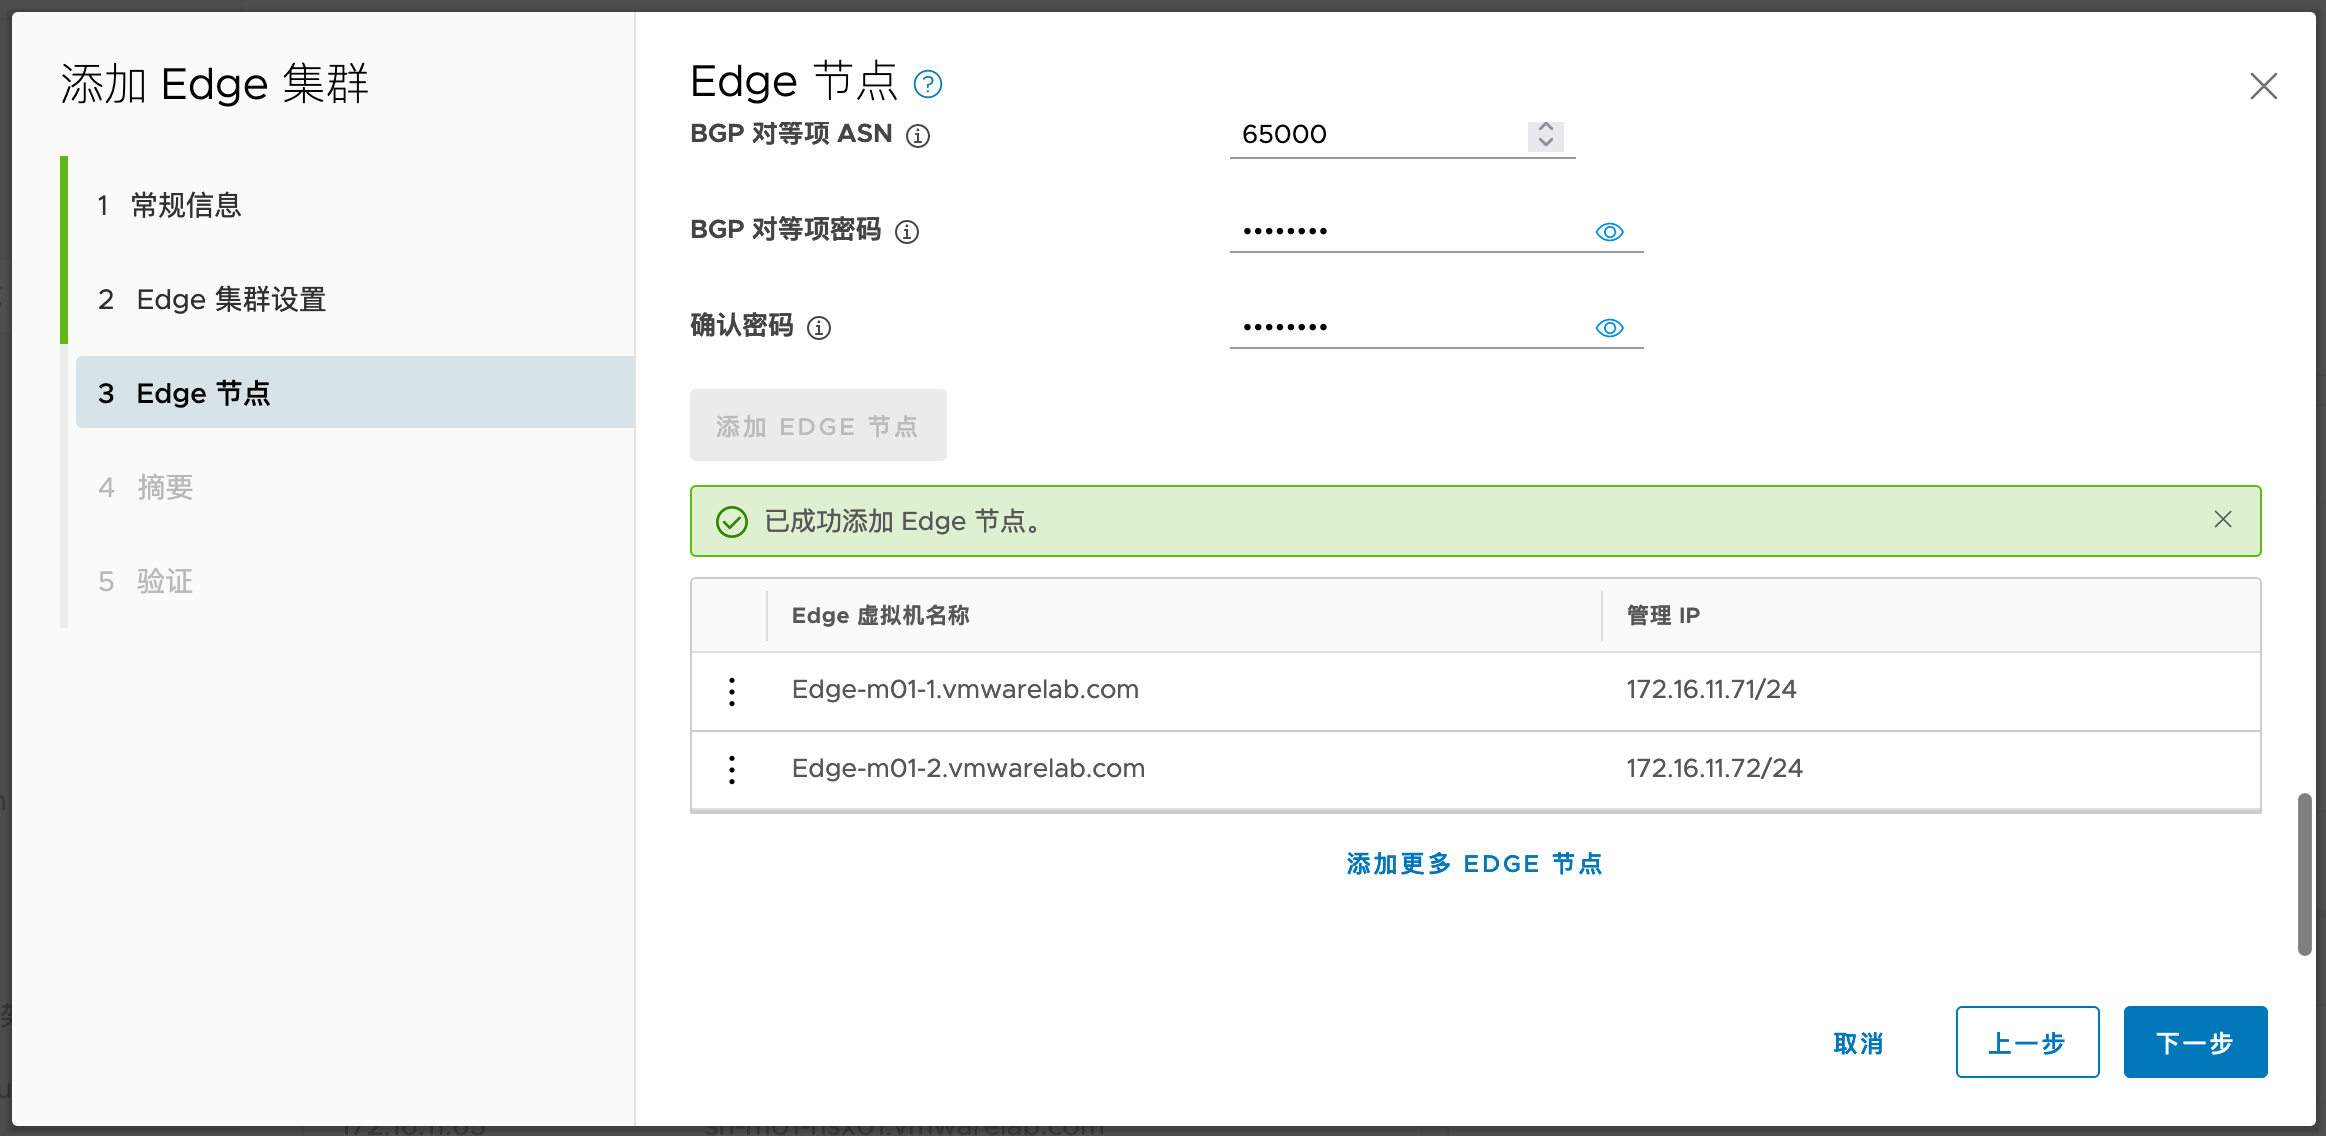
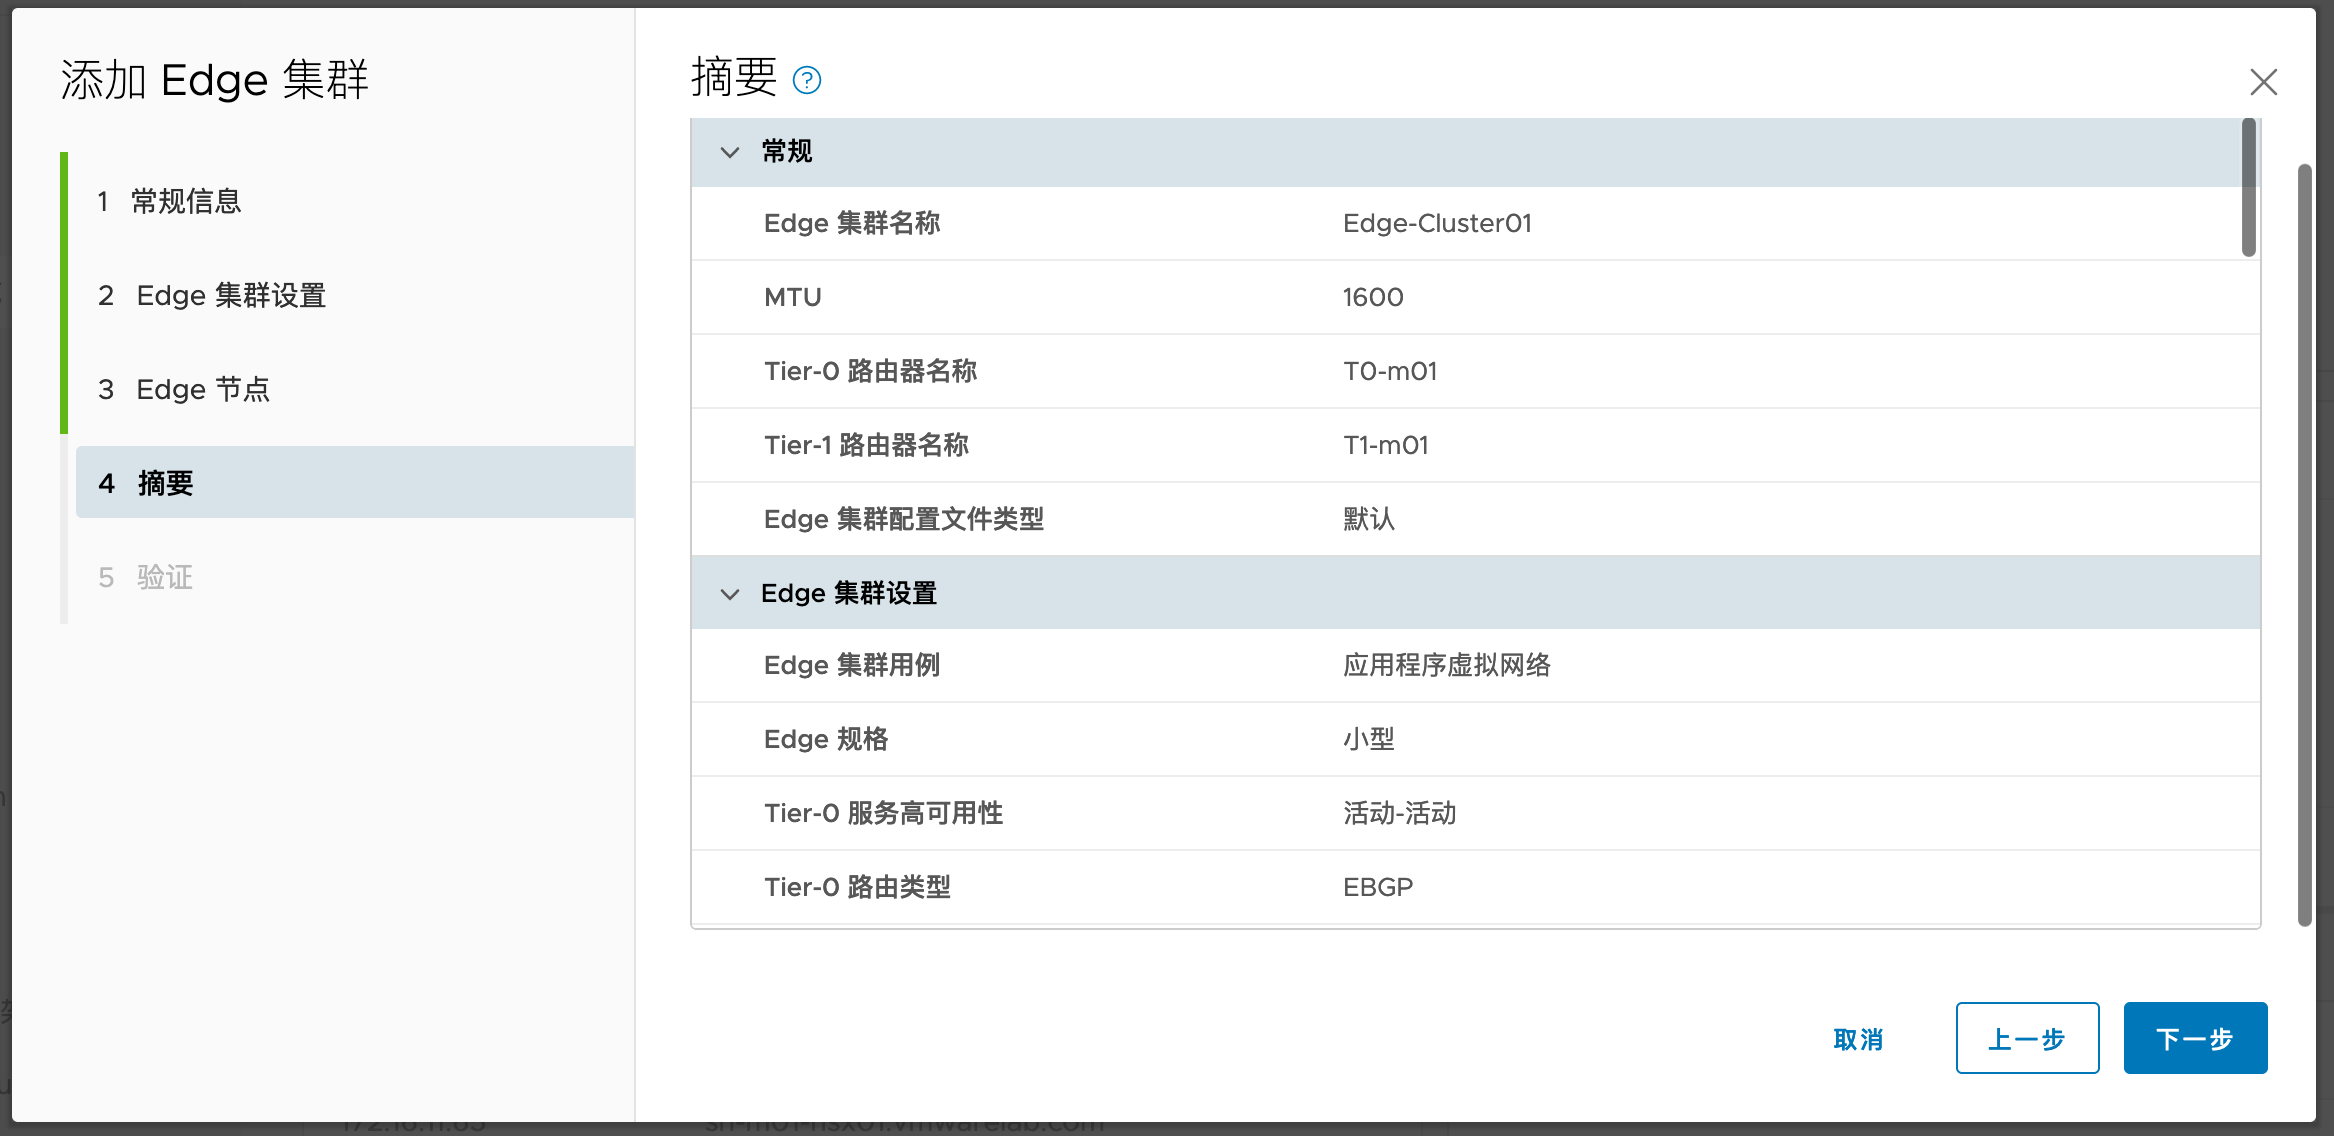
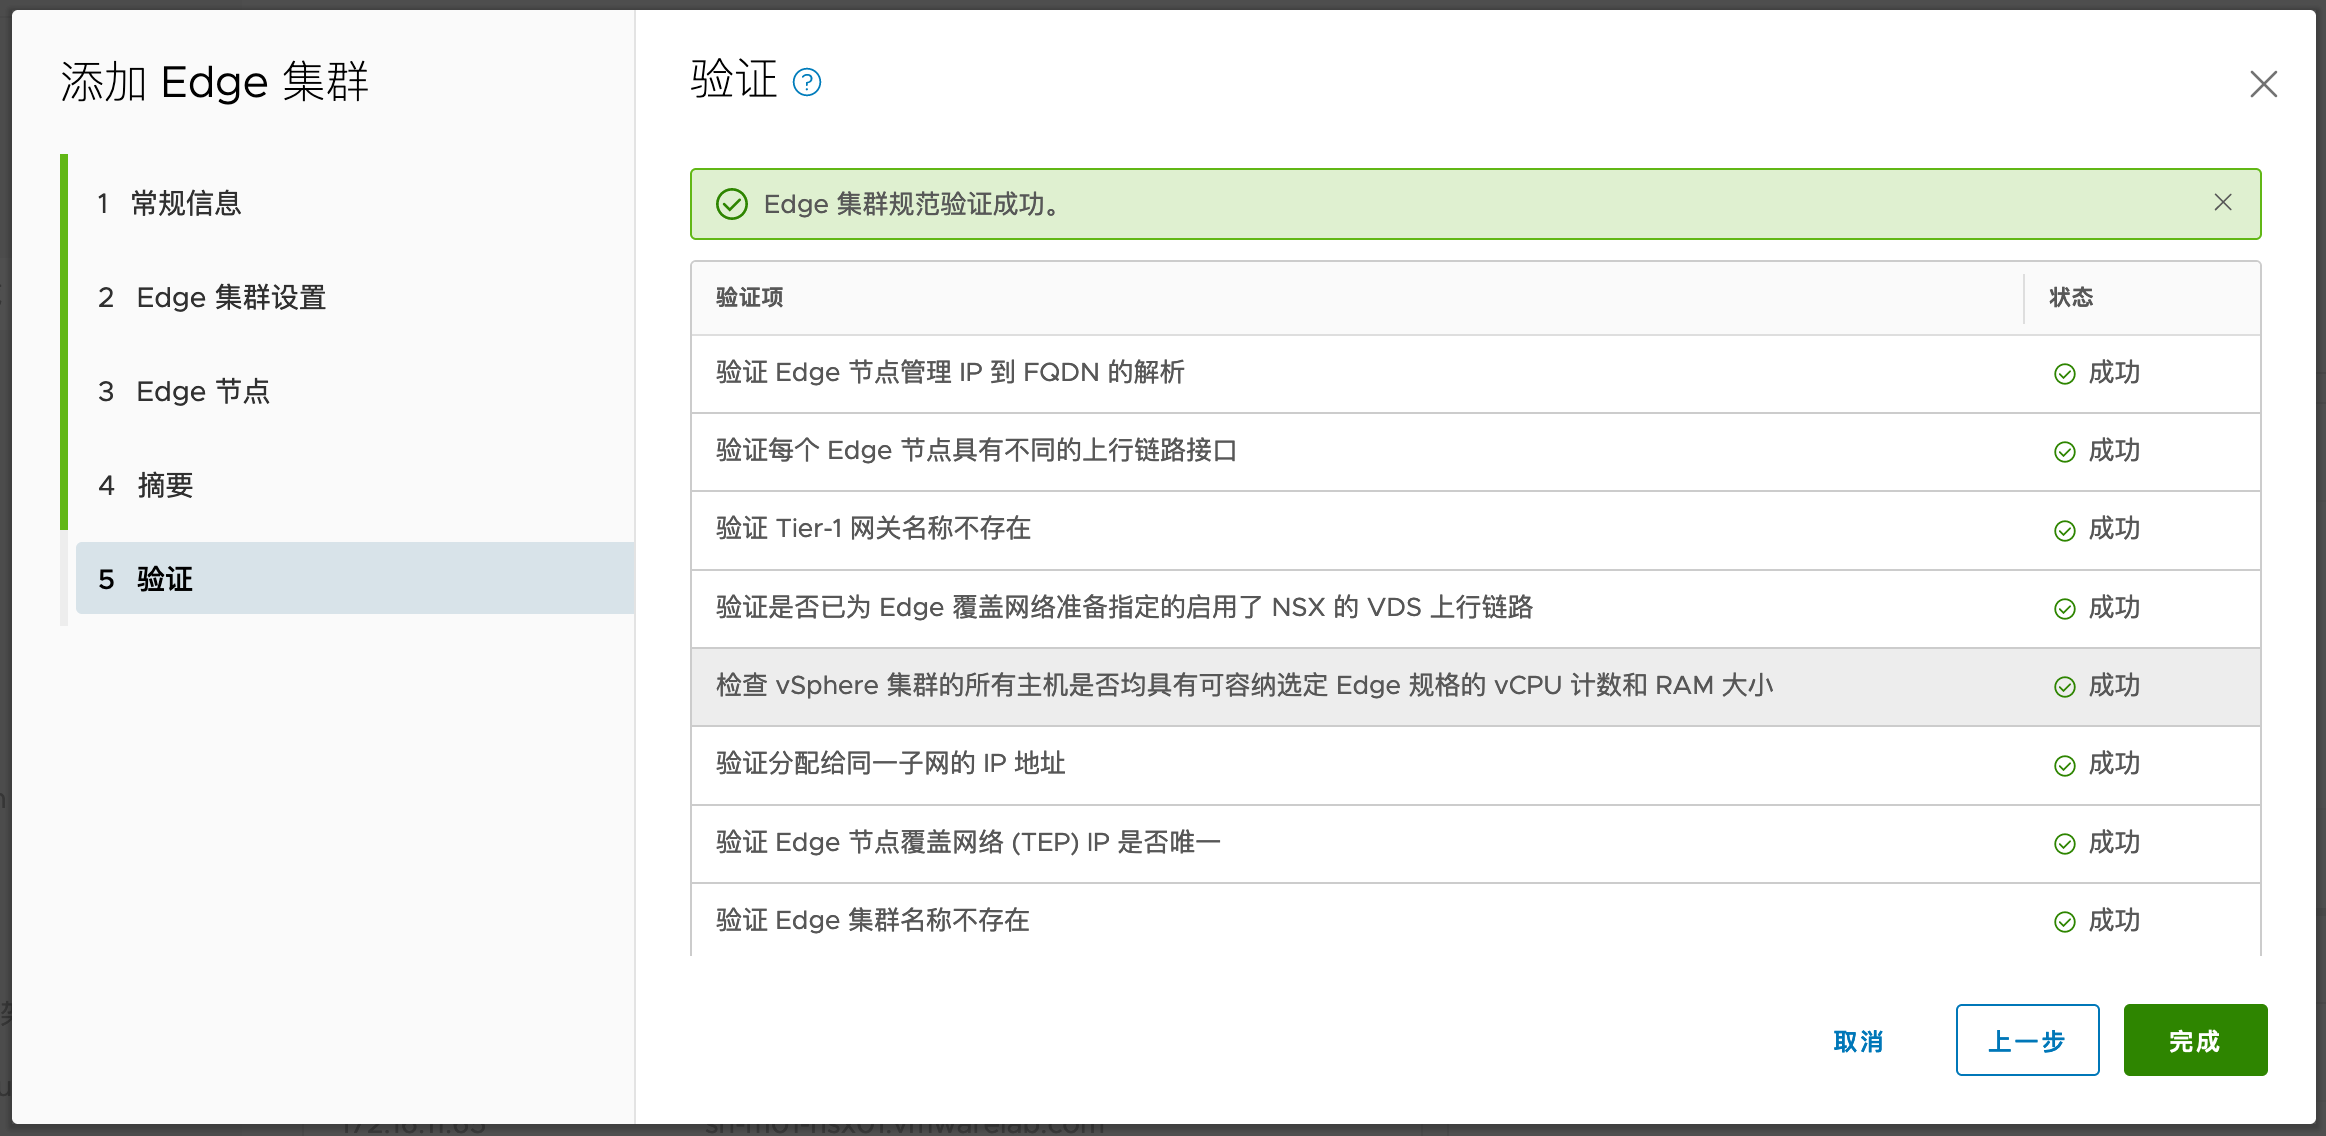
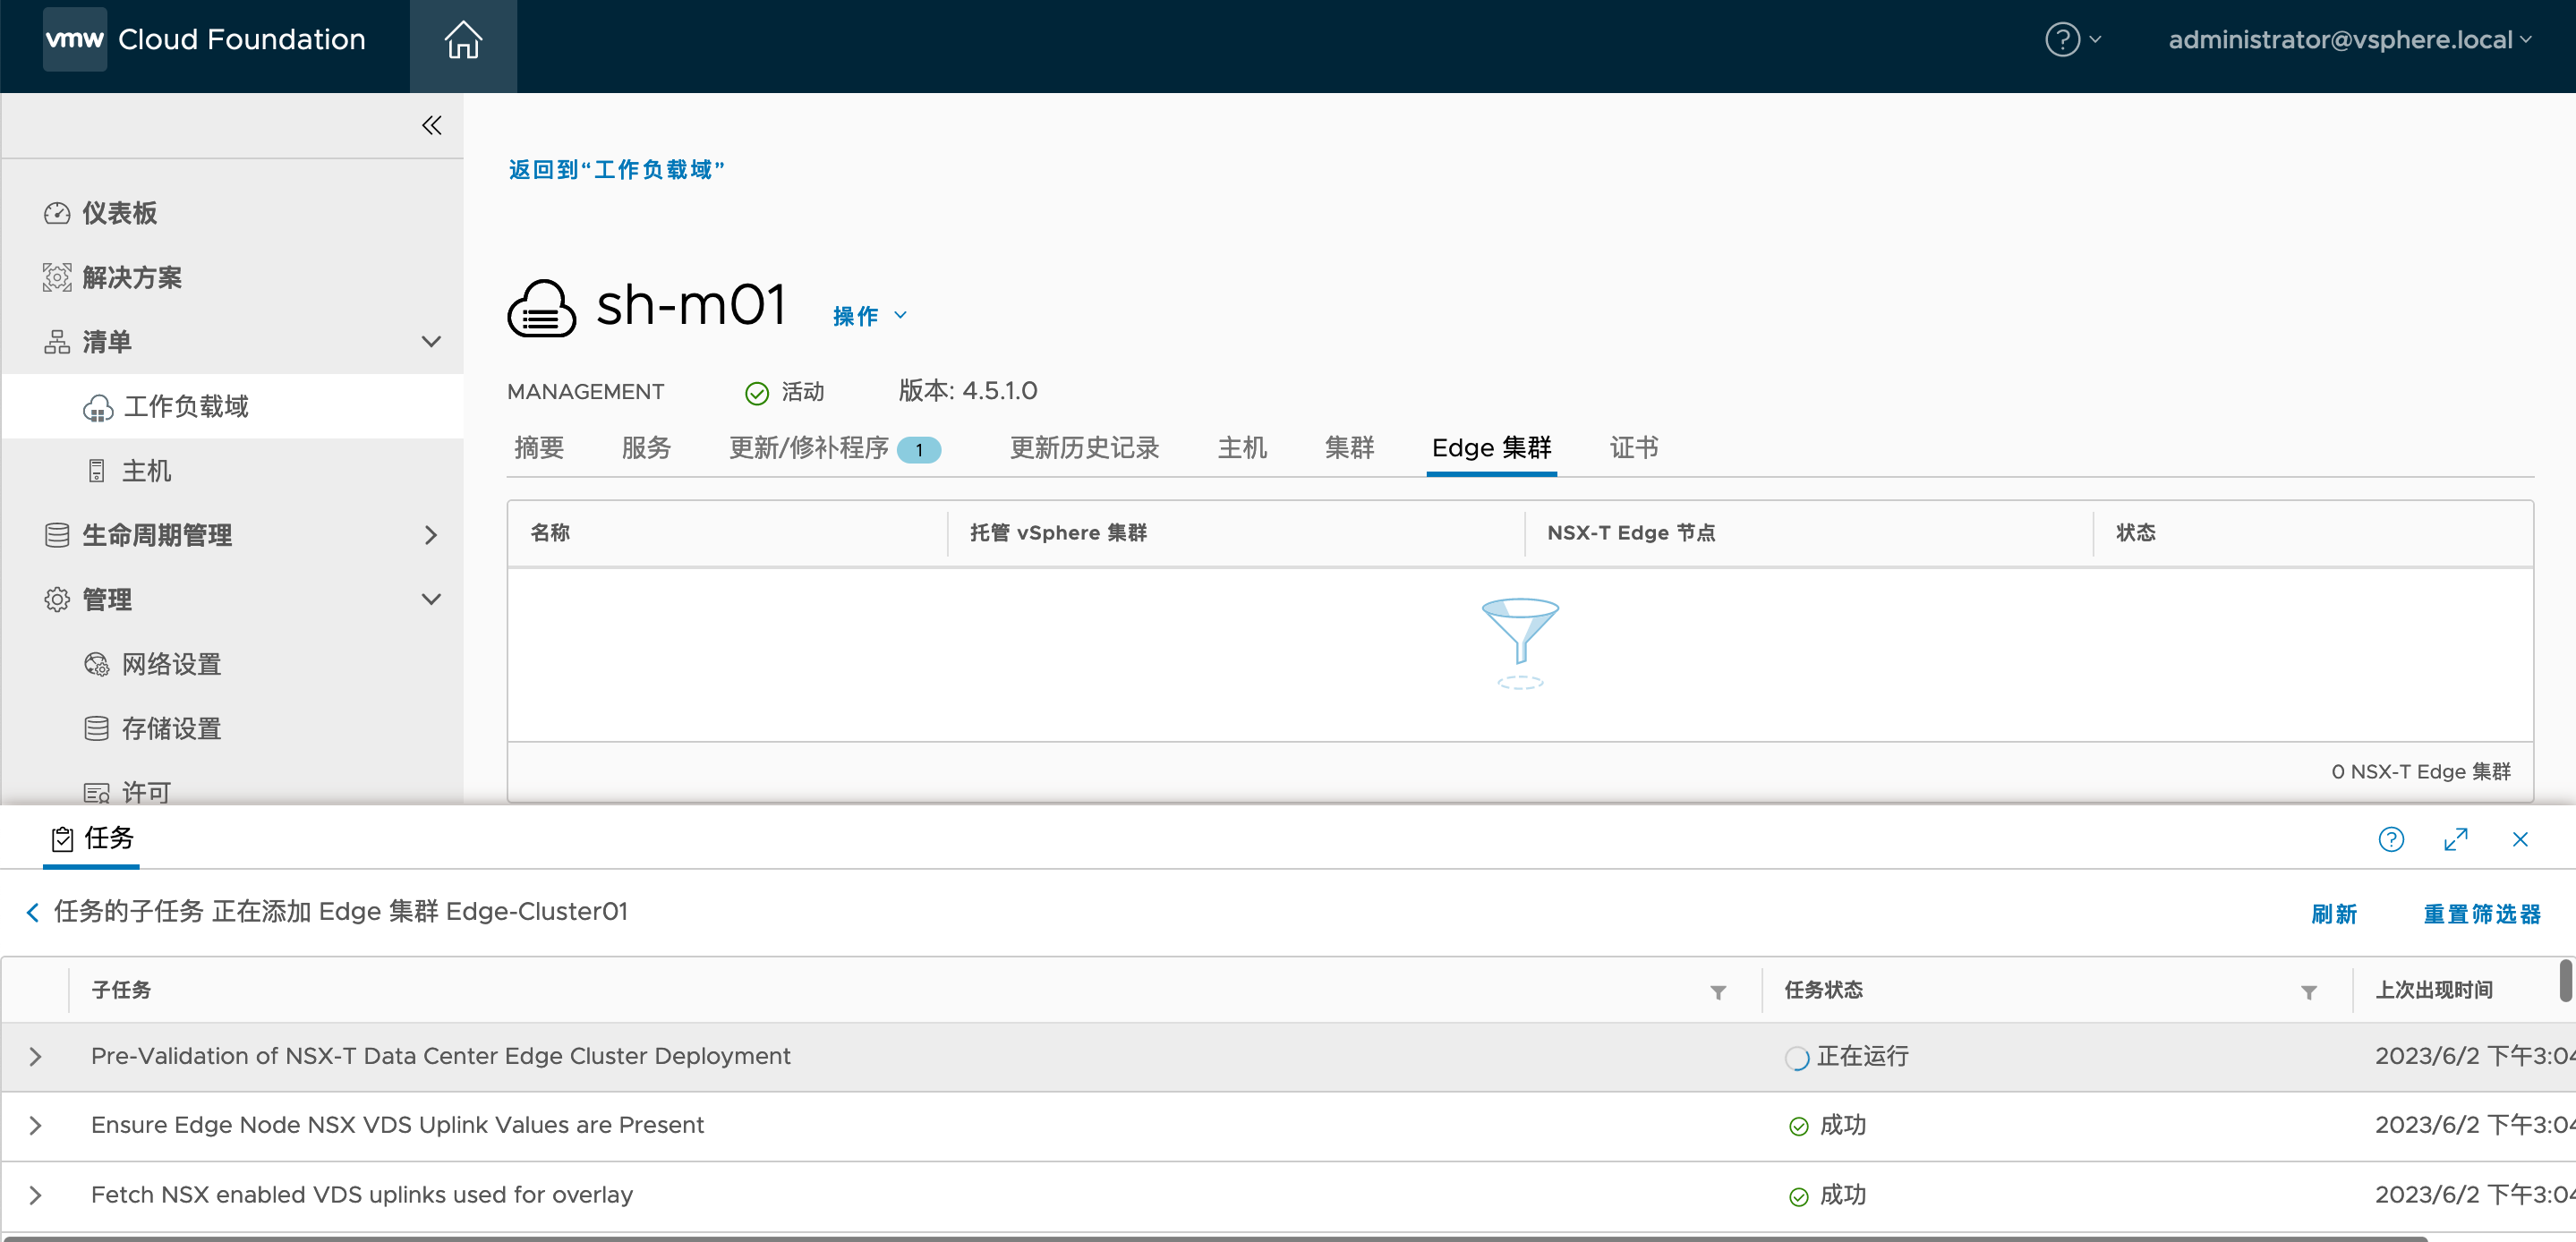
1.6.2. 添加Edge集群
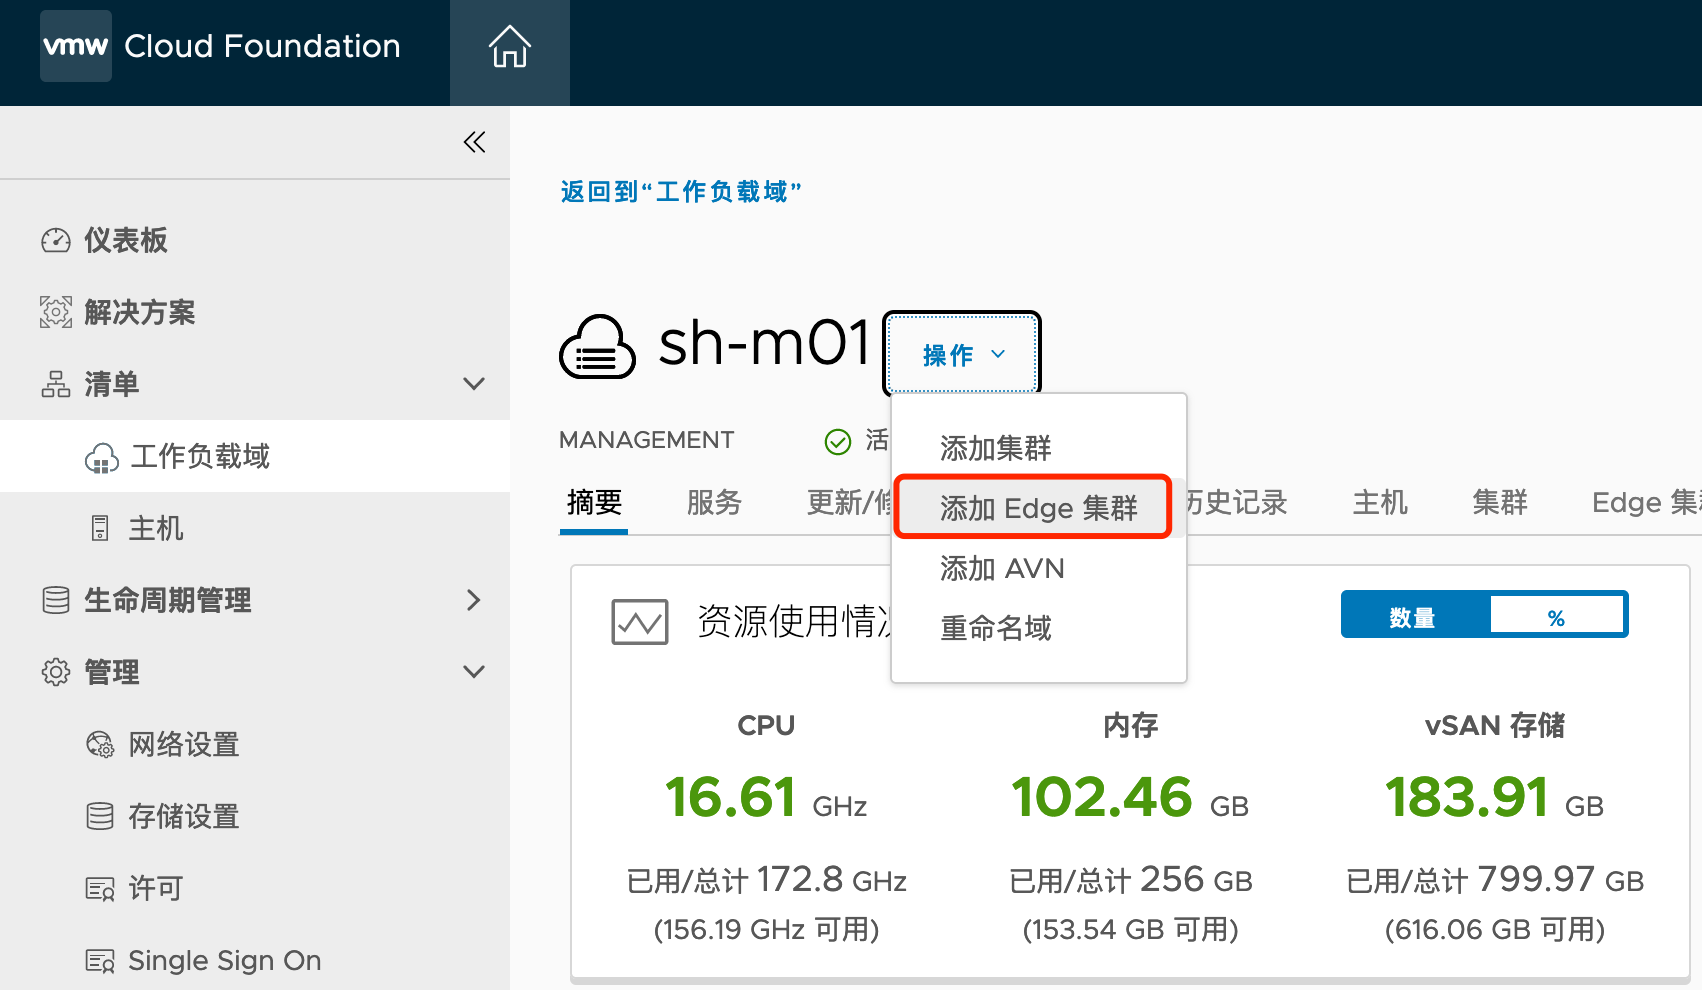
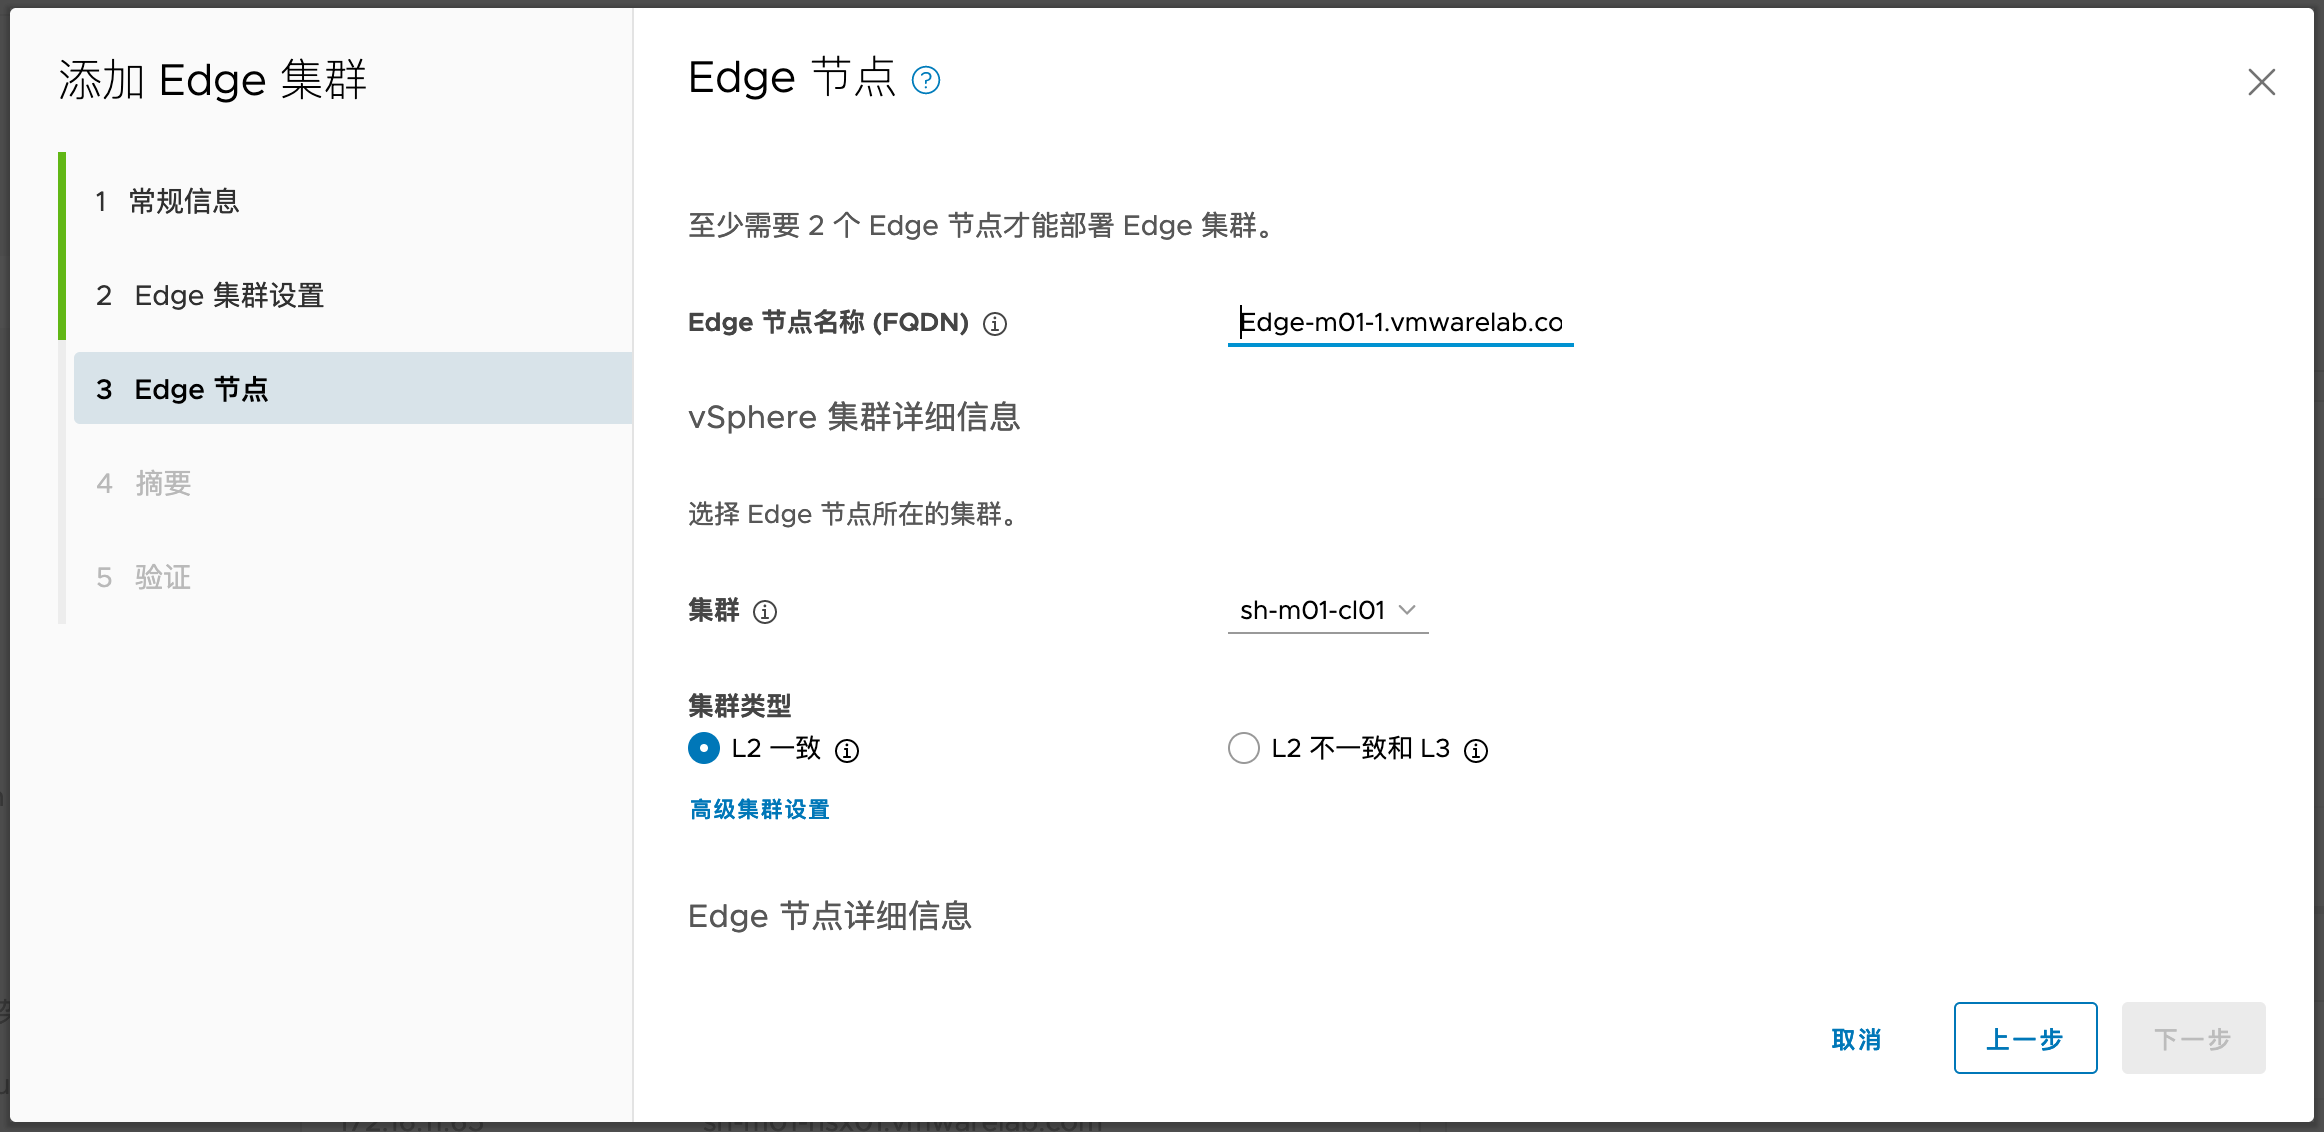

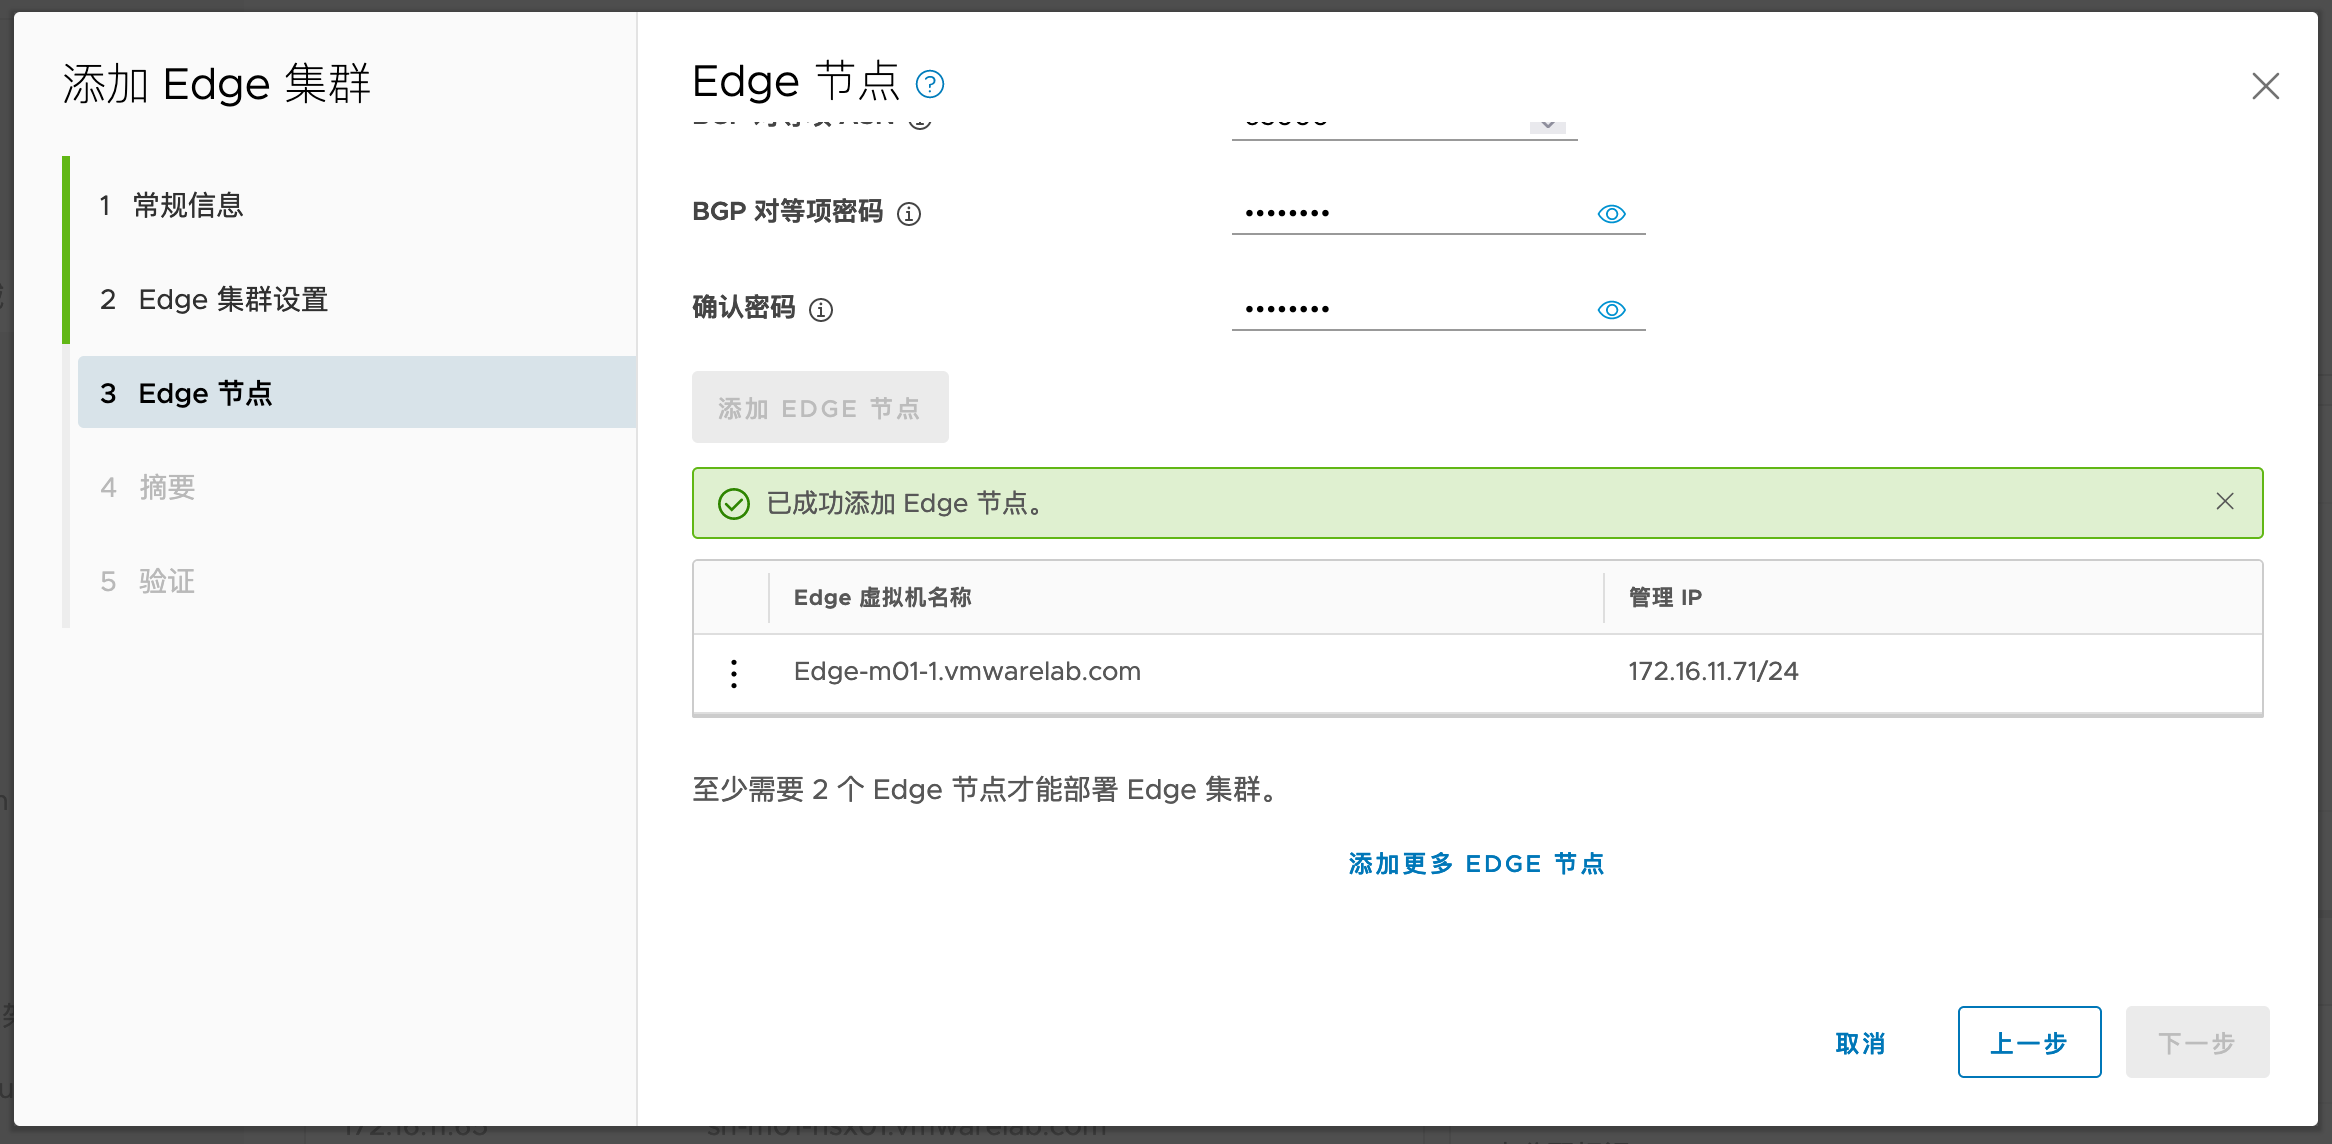
再次添加第二个节点:
1.6.3. Edge相关细化截图
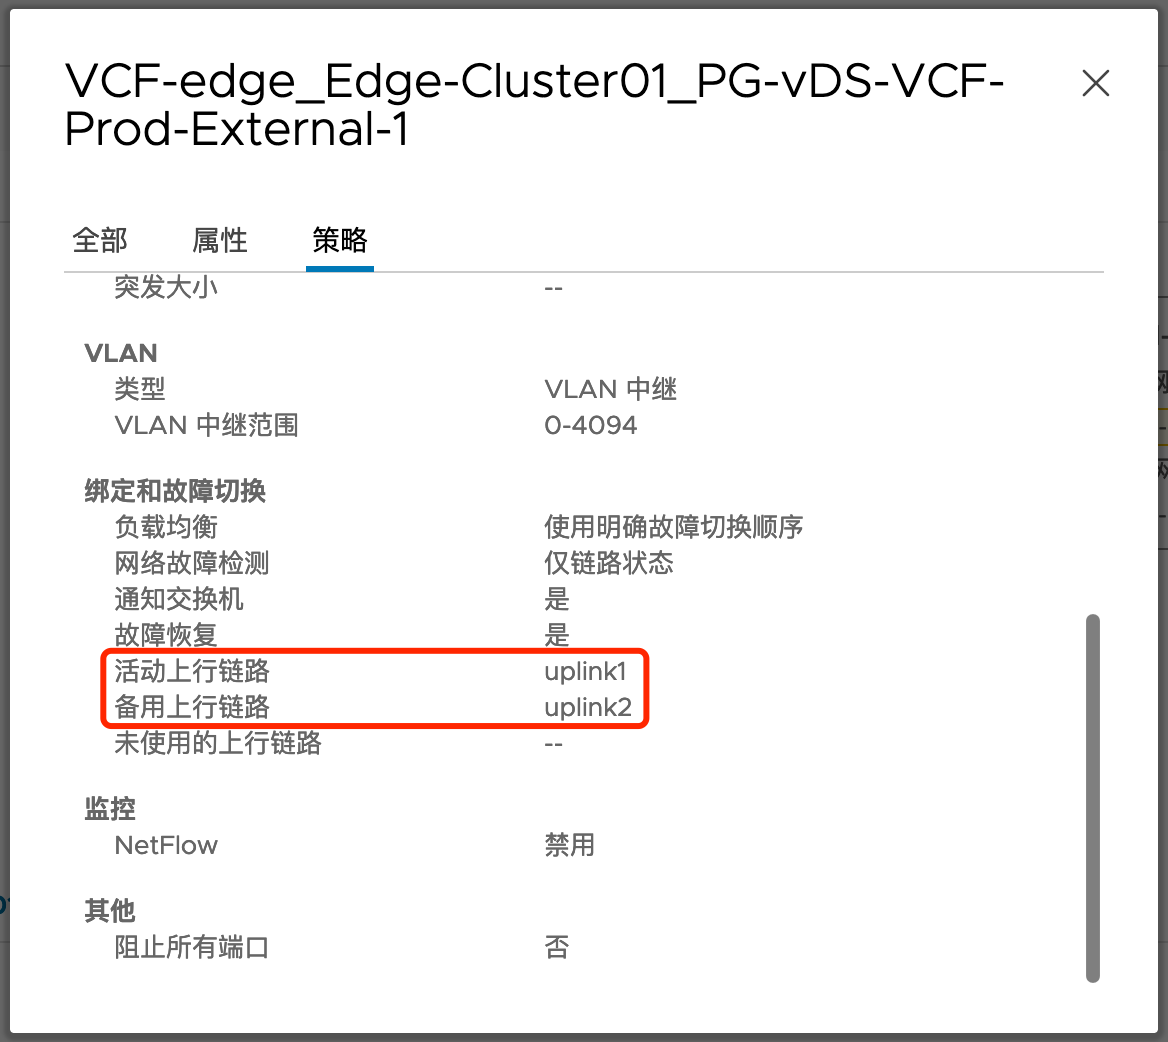
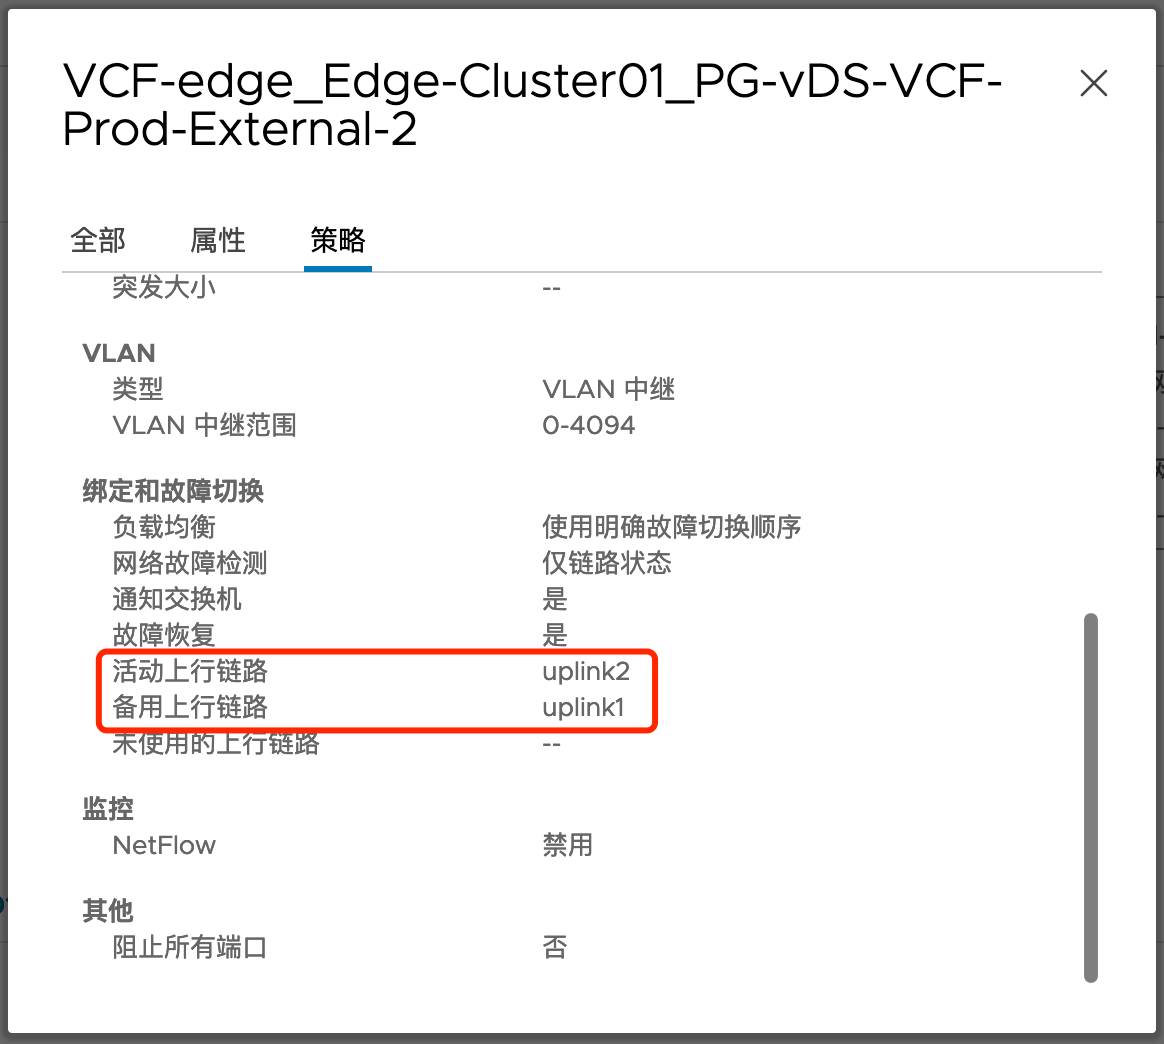
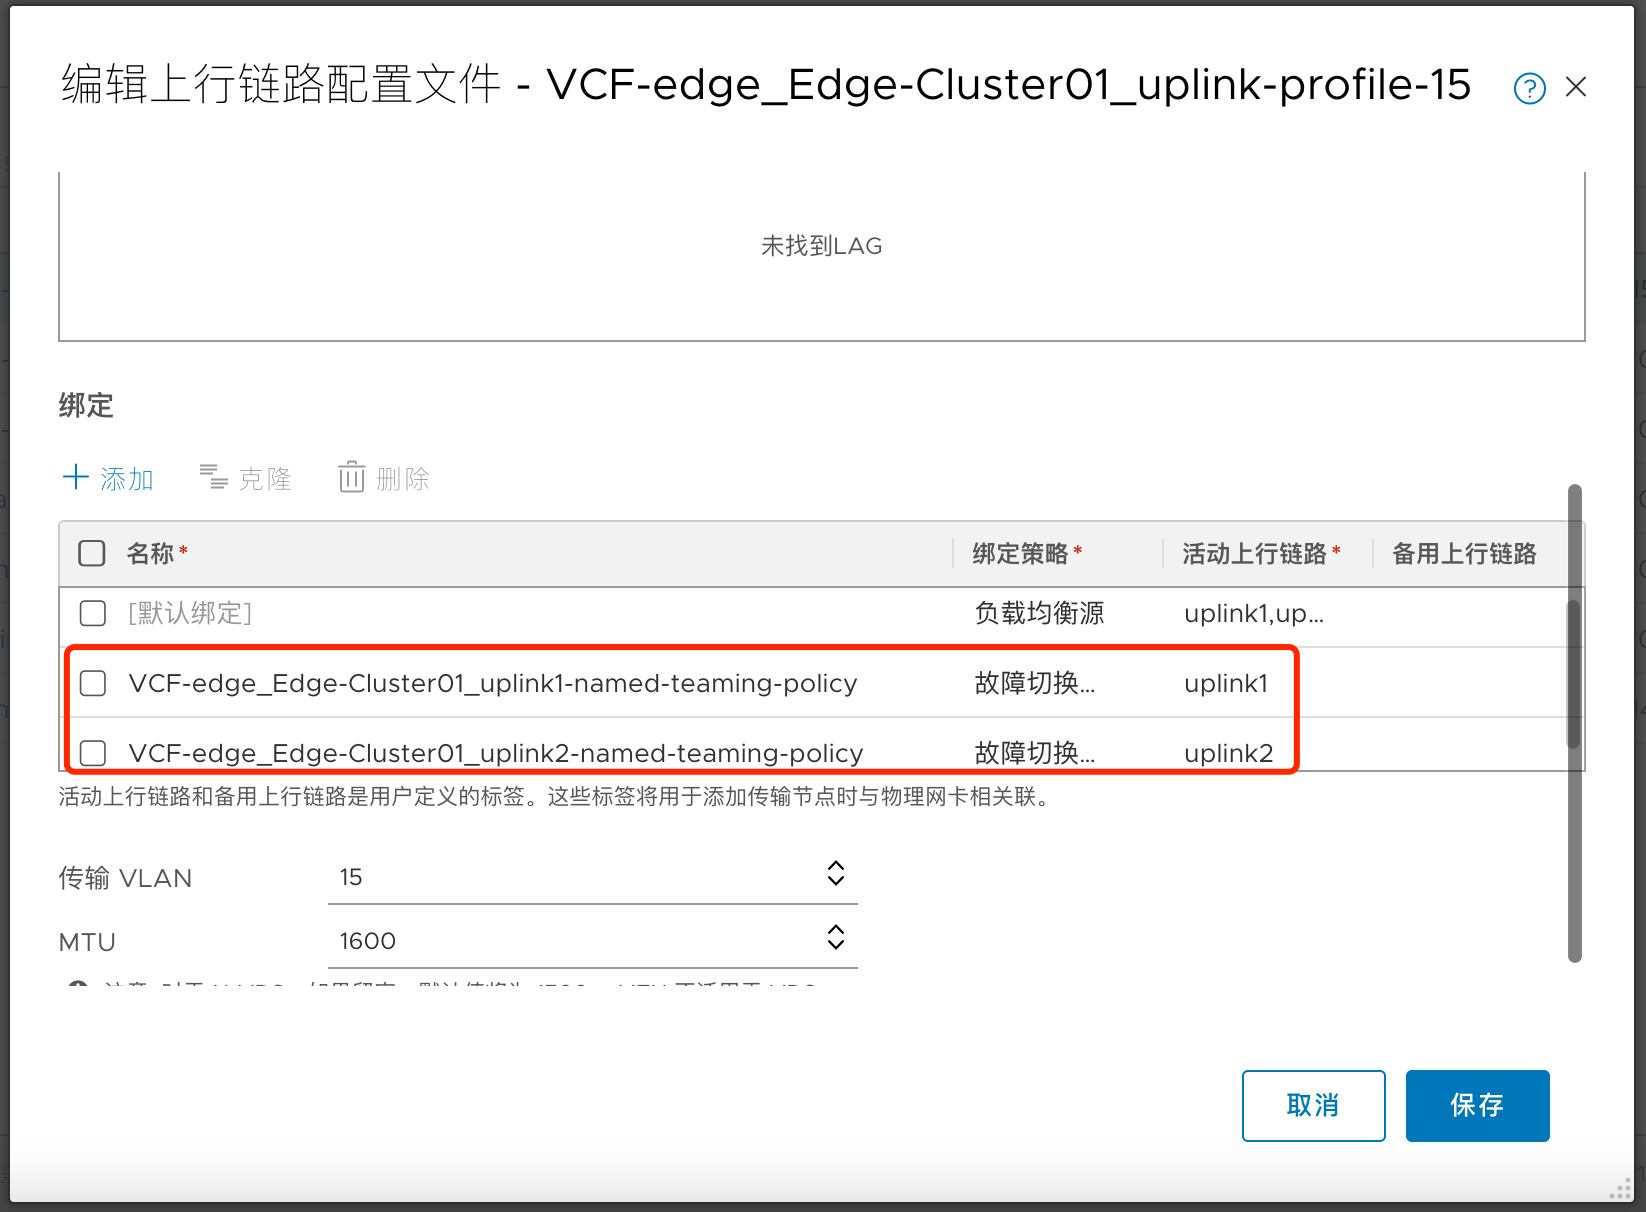
注意:VCF下Edge的两个Uplink分别使用了named teaming绑定策略,这种策略可以保证Edge的两个数据接口最终连接到两个不同的物理交换机上,进而实现分流。为了实现这种配置,从ESXi到Edge内部有6个步骤:
在ESXi上创建两个端口组,每个端口组的Active Uplink仅使用一个vmnic,另一个vmnic作为Standby
为Edge设置Uplink配置文件,定义Named Teaming Policy
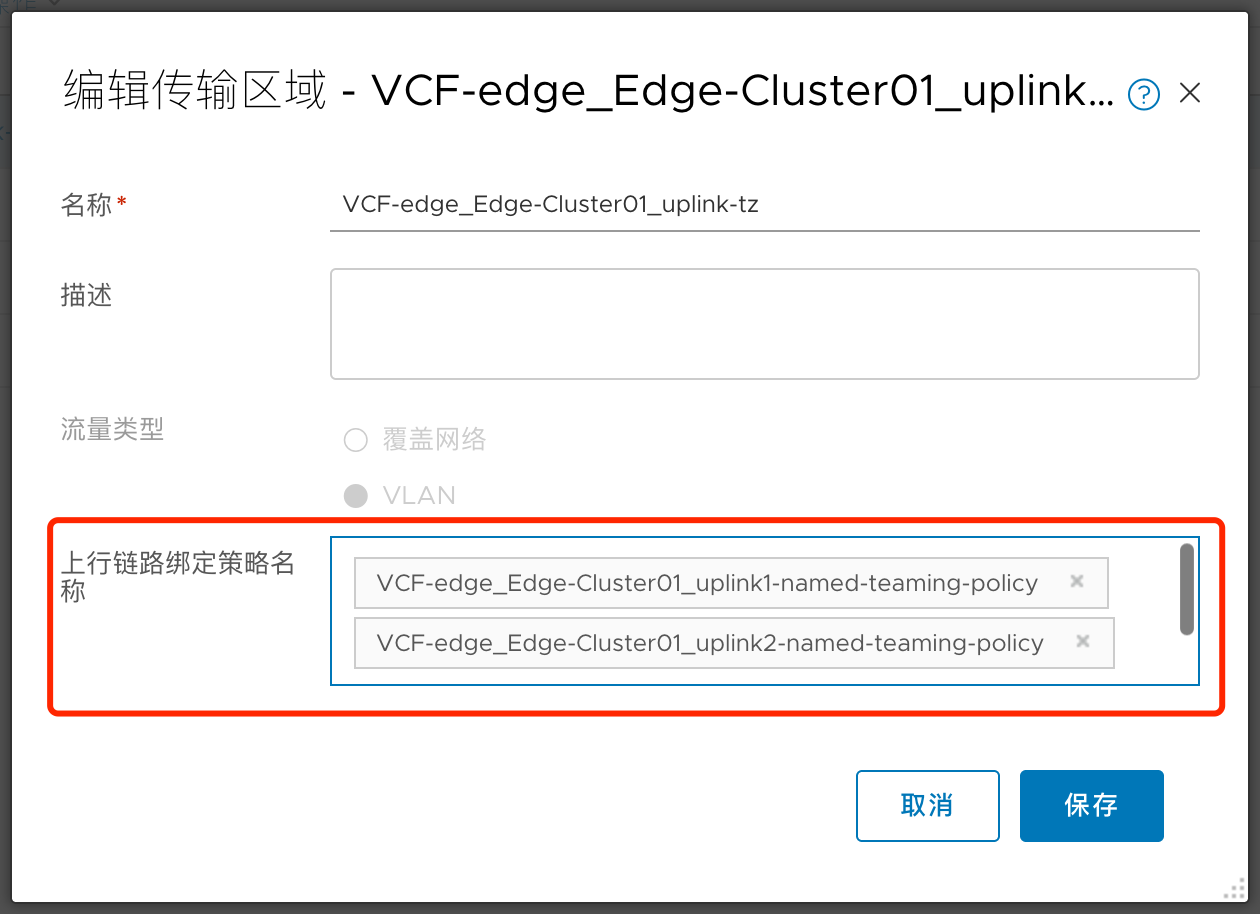
为Edge创建一个 VLAN 传输区域,设置传输区域级别的Named Teaming Policy绑定
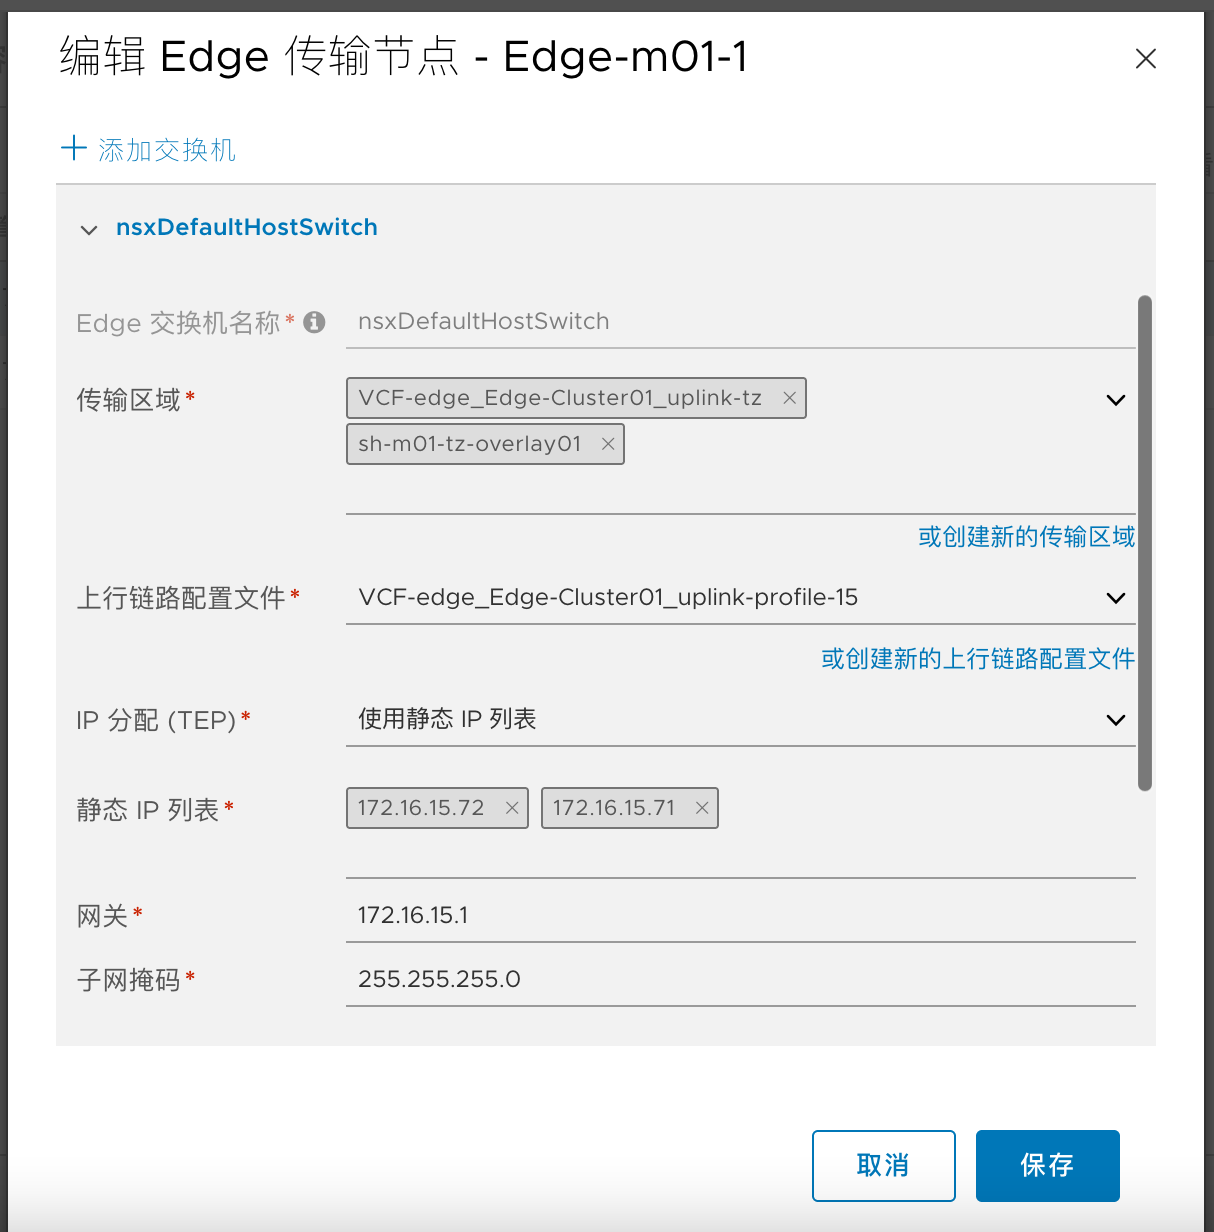
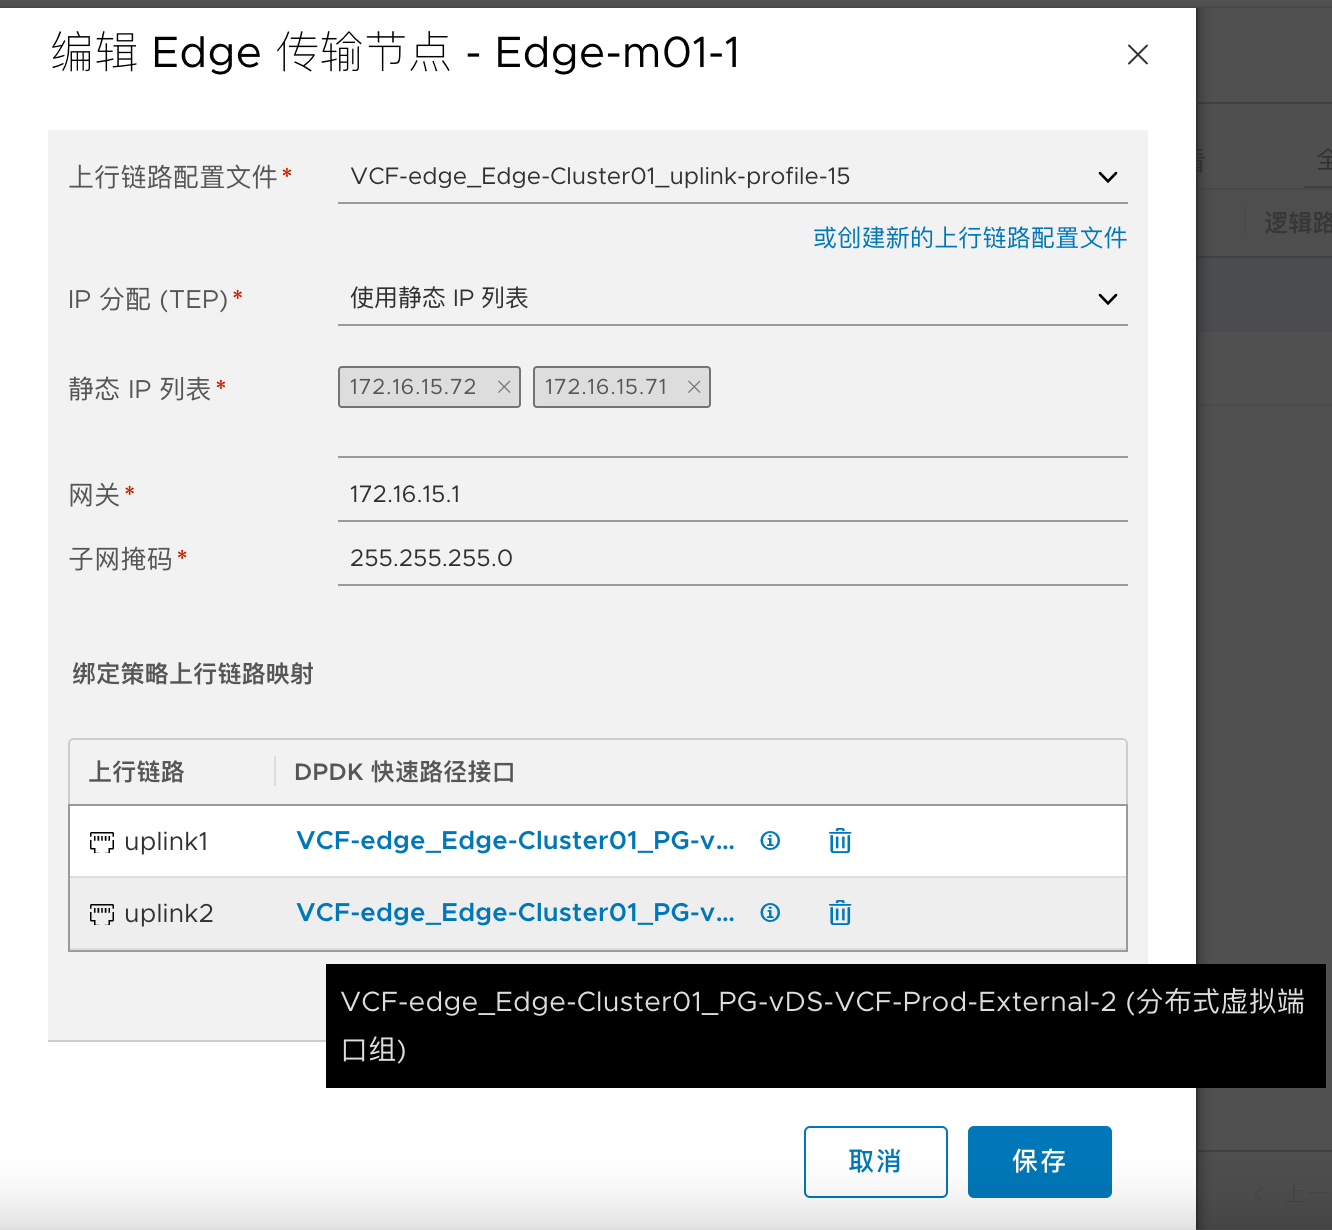
在部署Edge时创建一个NVDS,分别关联到第一步的两个端口组,添加两个接口,每个接口对应到上一步的两个Uplink
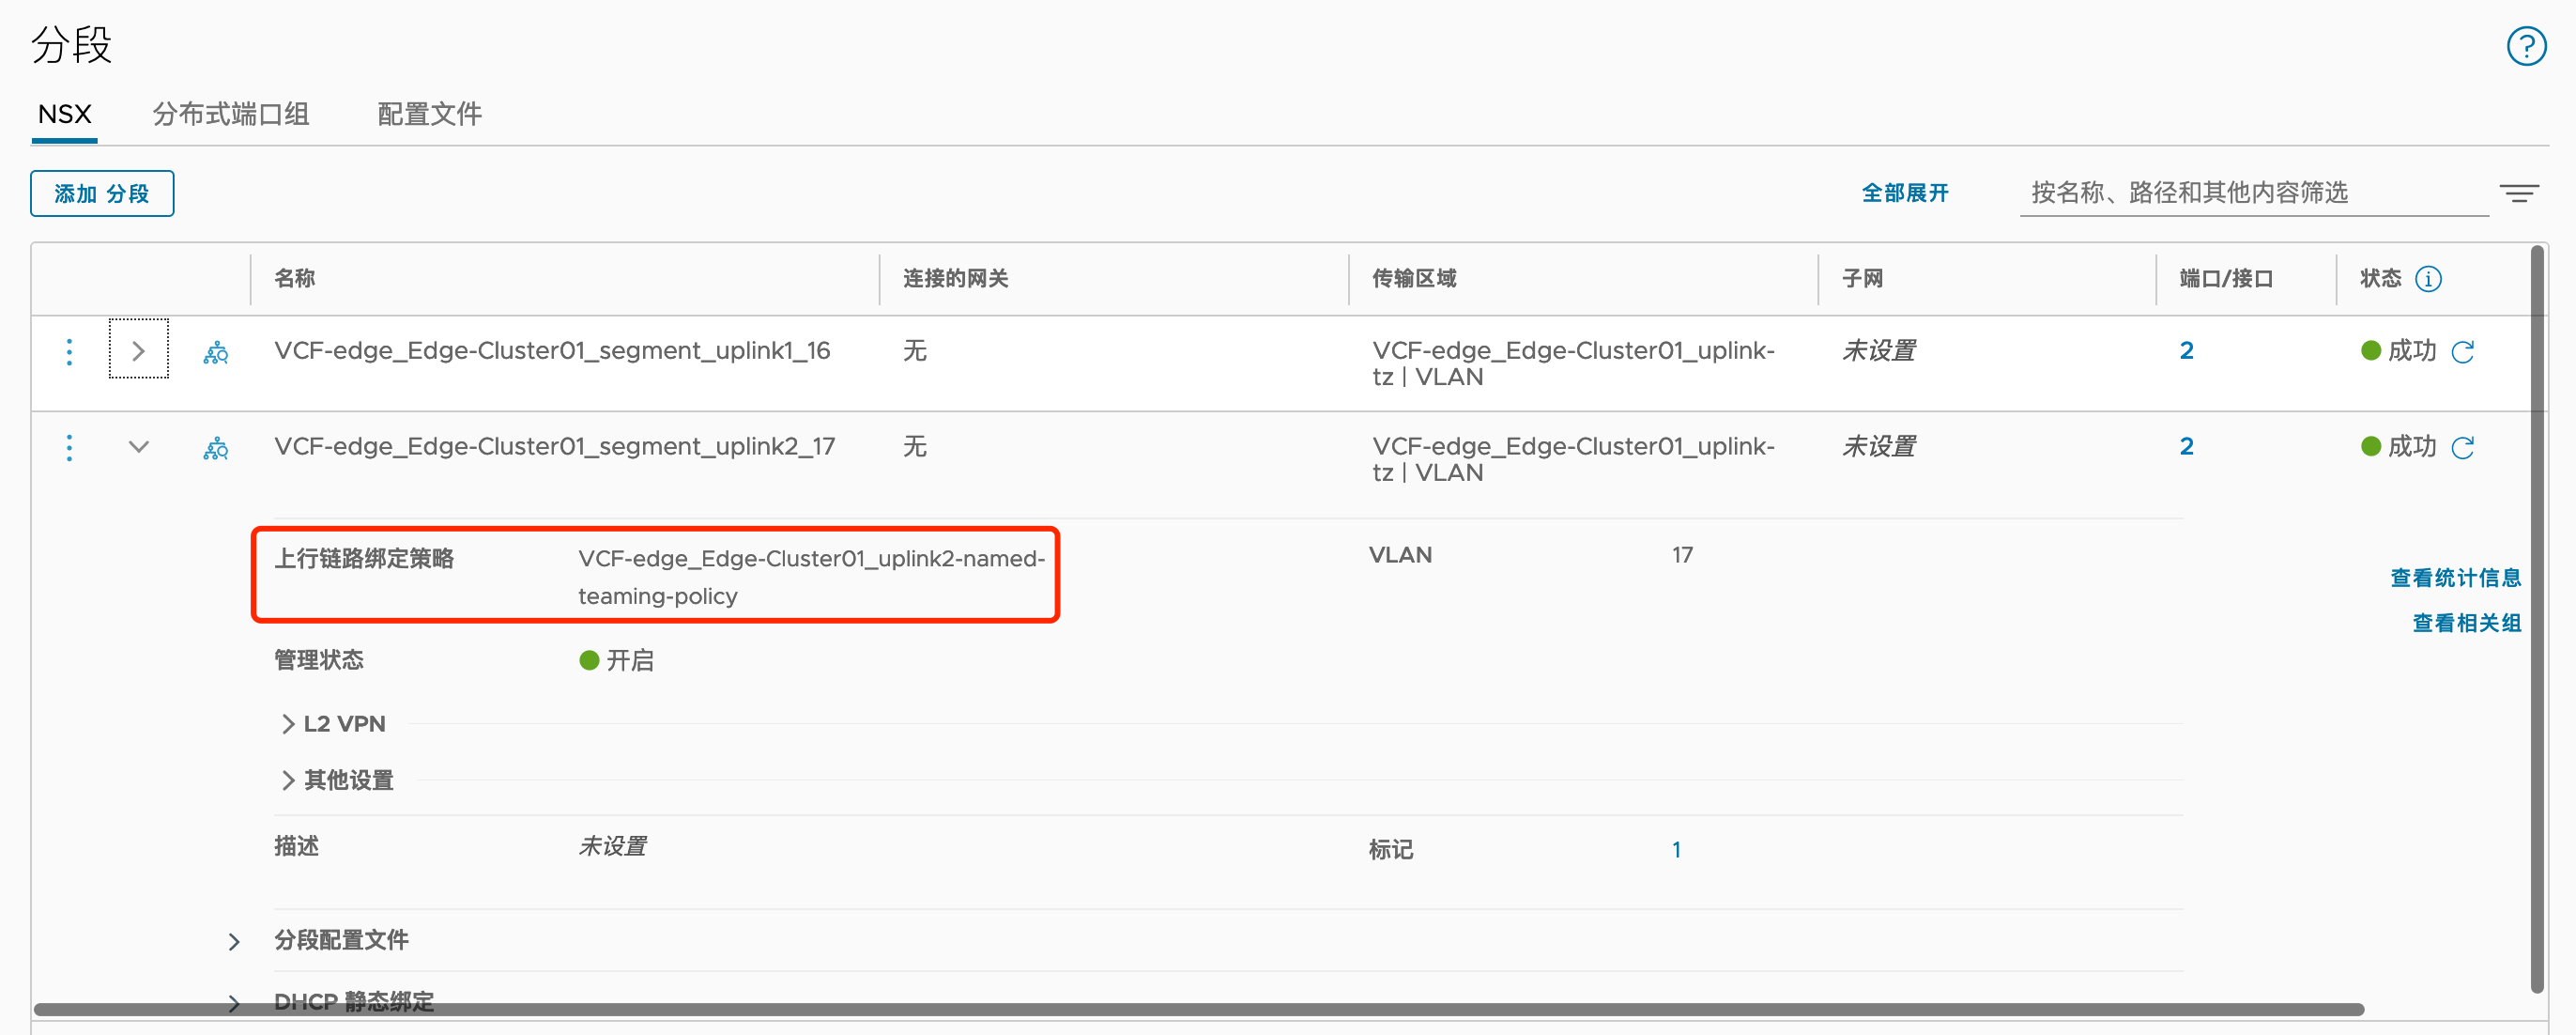
为Edge创建两个 Uplink Segment,关联到Edge的VLAN传输区域,通过绑定策略限制每个 Segment 只走一个Uplink
1.6.3.1. Edge vDS配置

1.6.3.2. vDS端口组Teaming配置
1.6.3.3. Edge 上行链路配置文件中的named teaming policy配置
1.6.3.4. 在VLAN传输区域中调用Named Teaming Policy
1.6.3.5. Edge节点配置NVDS及接口配置
1.6.3.6. Uplink Segment的teaming配置

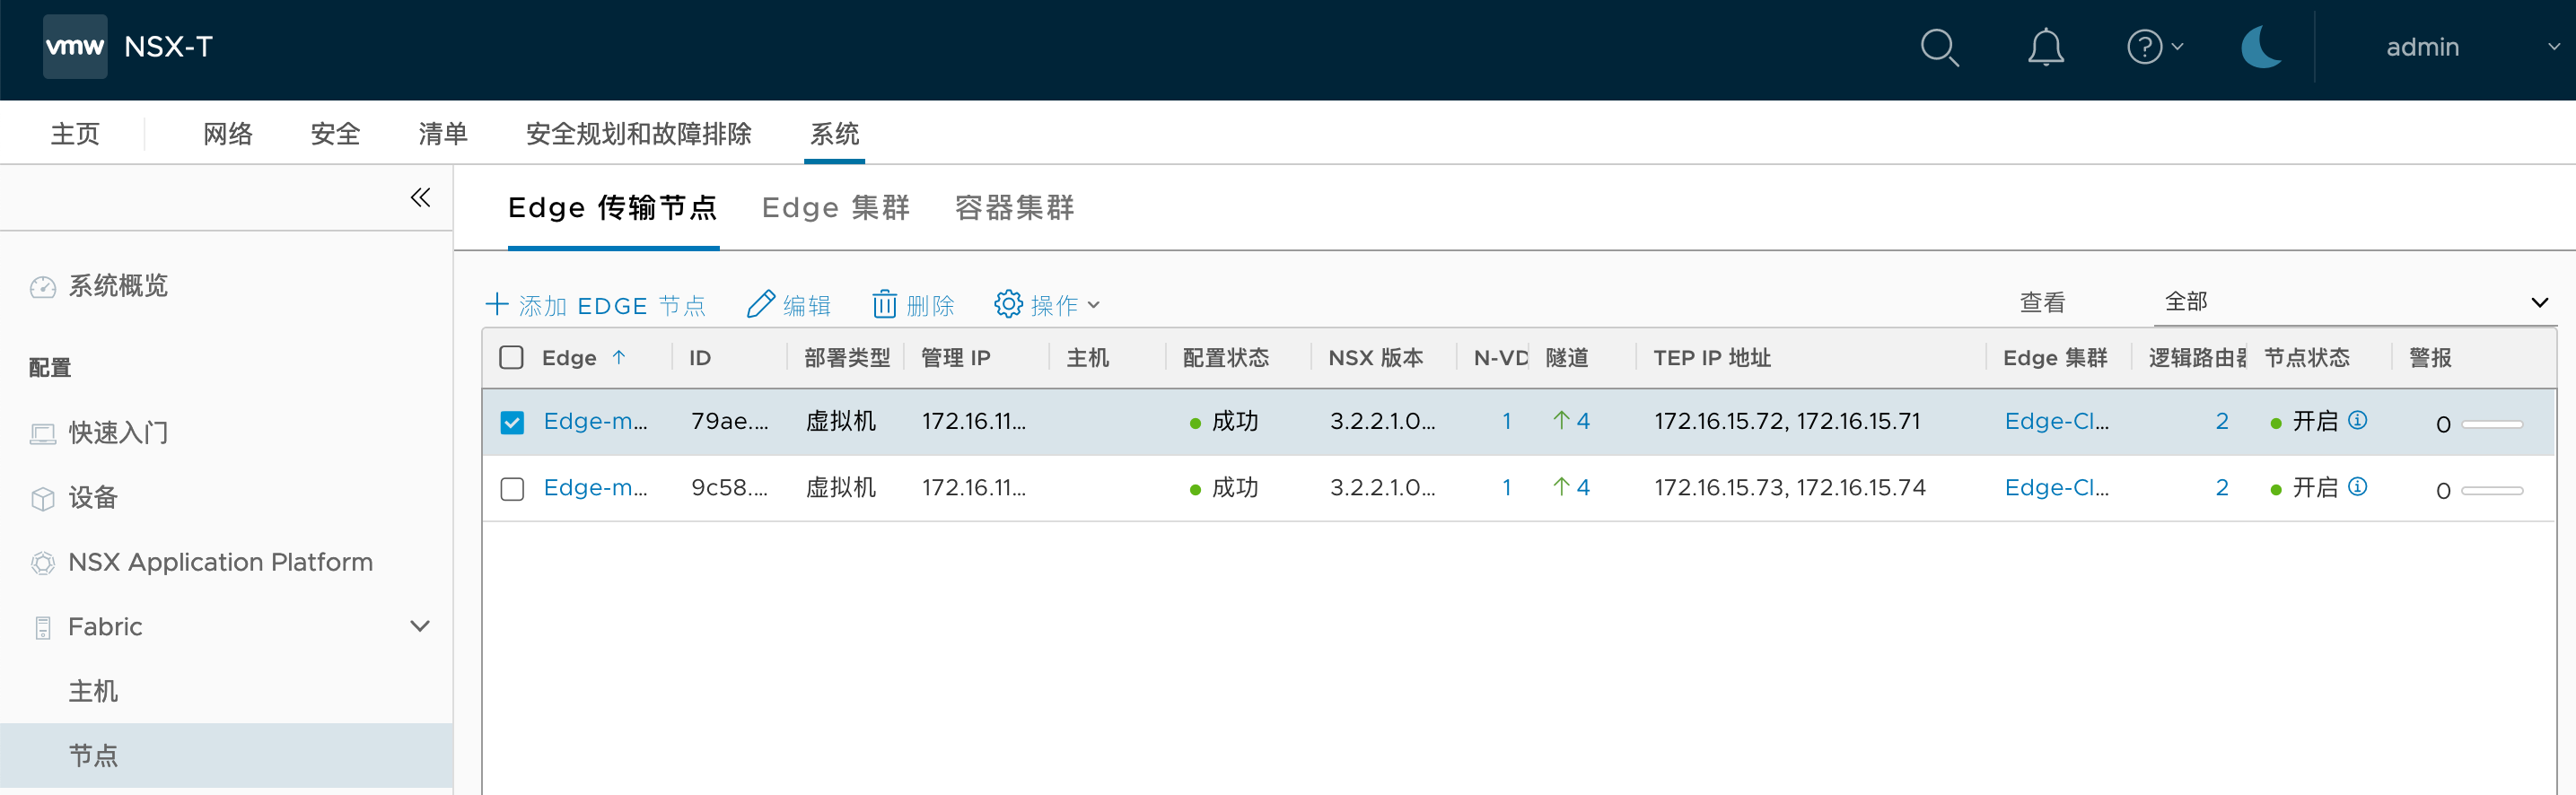
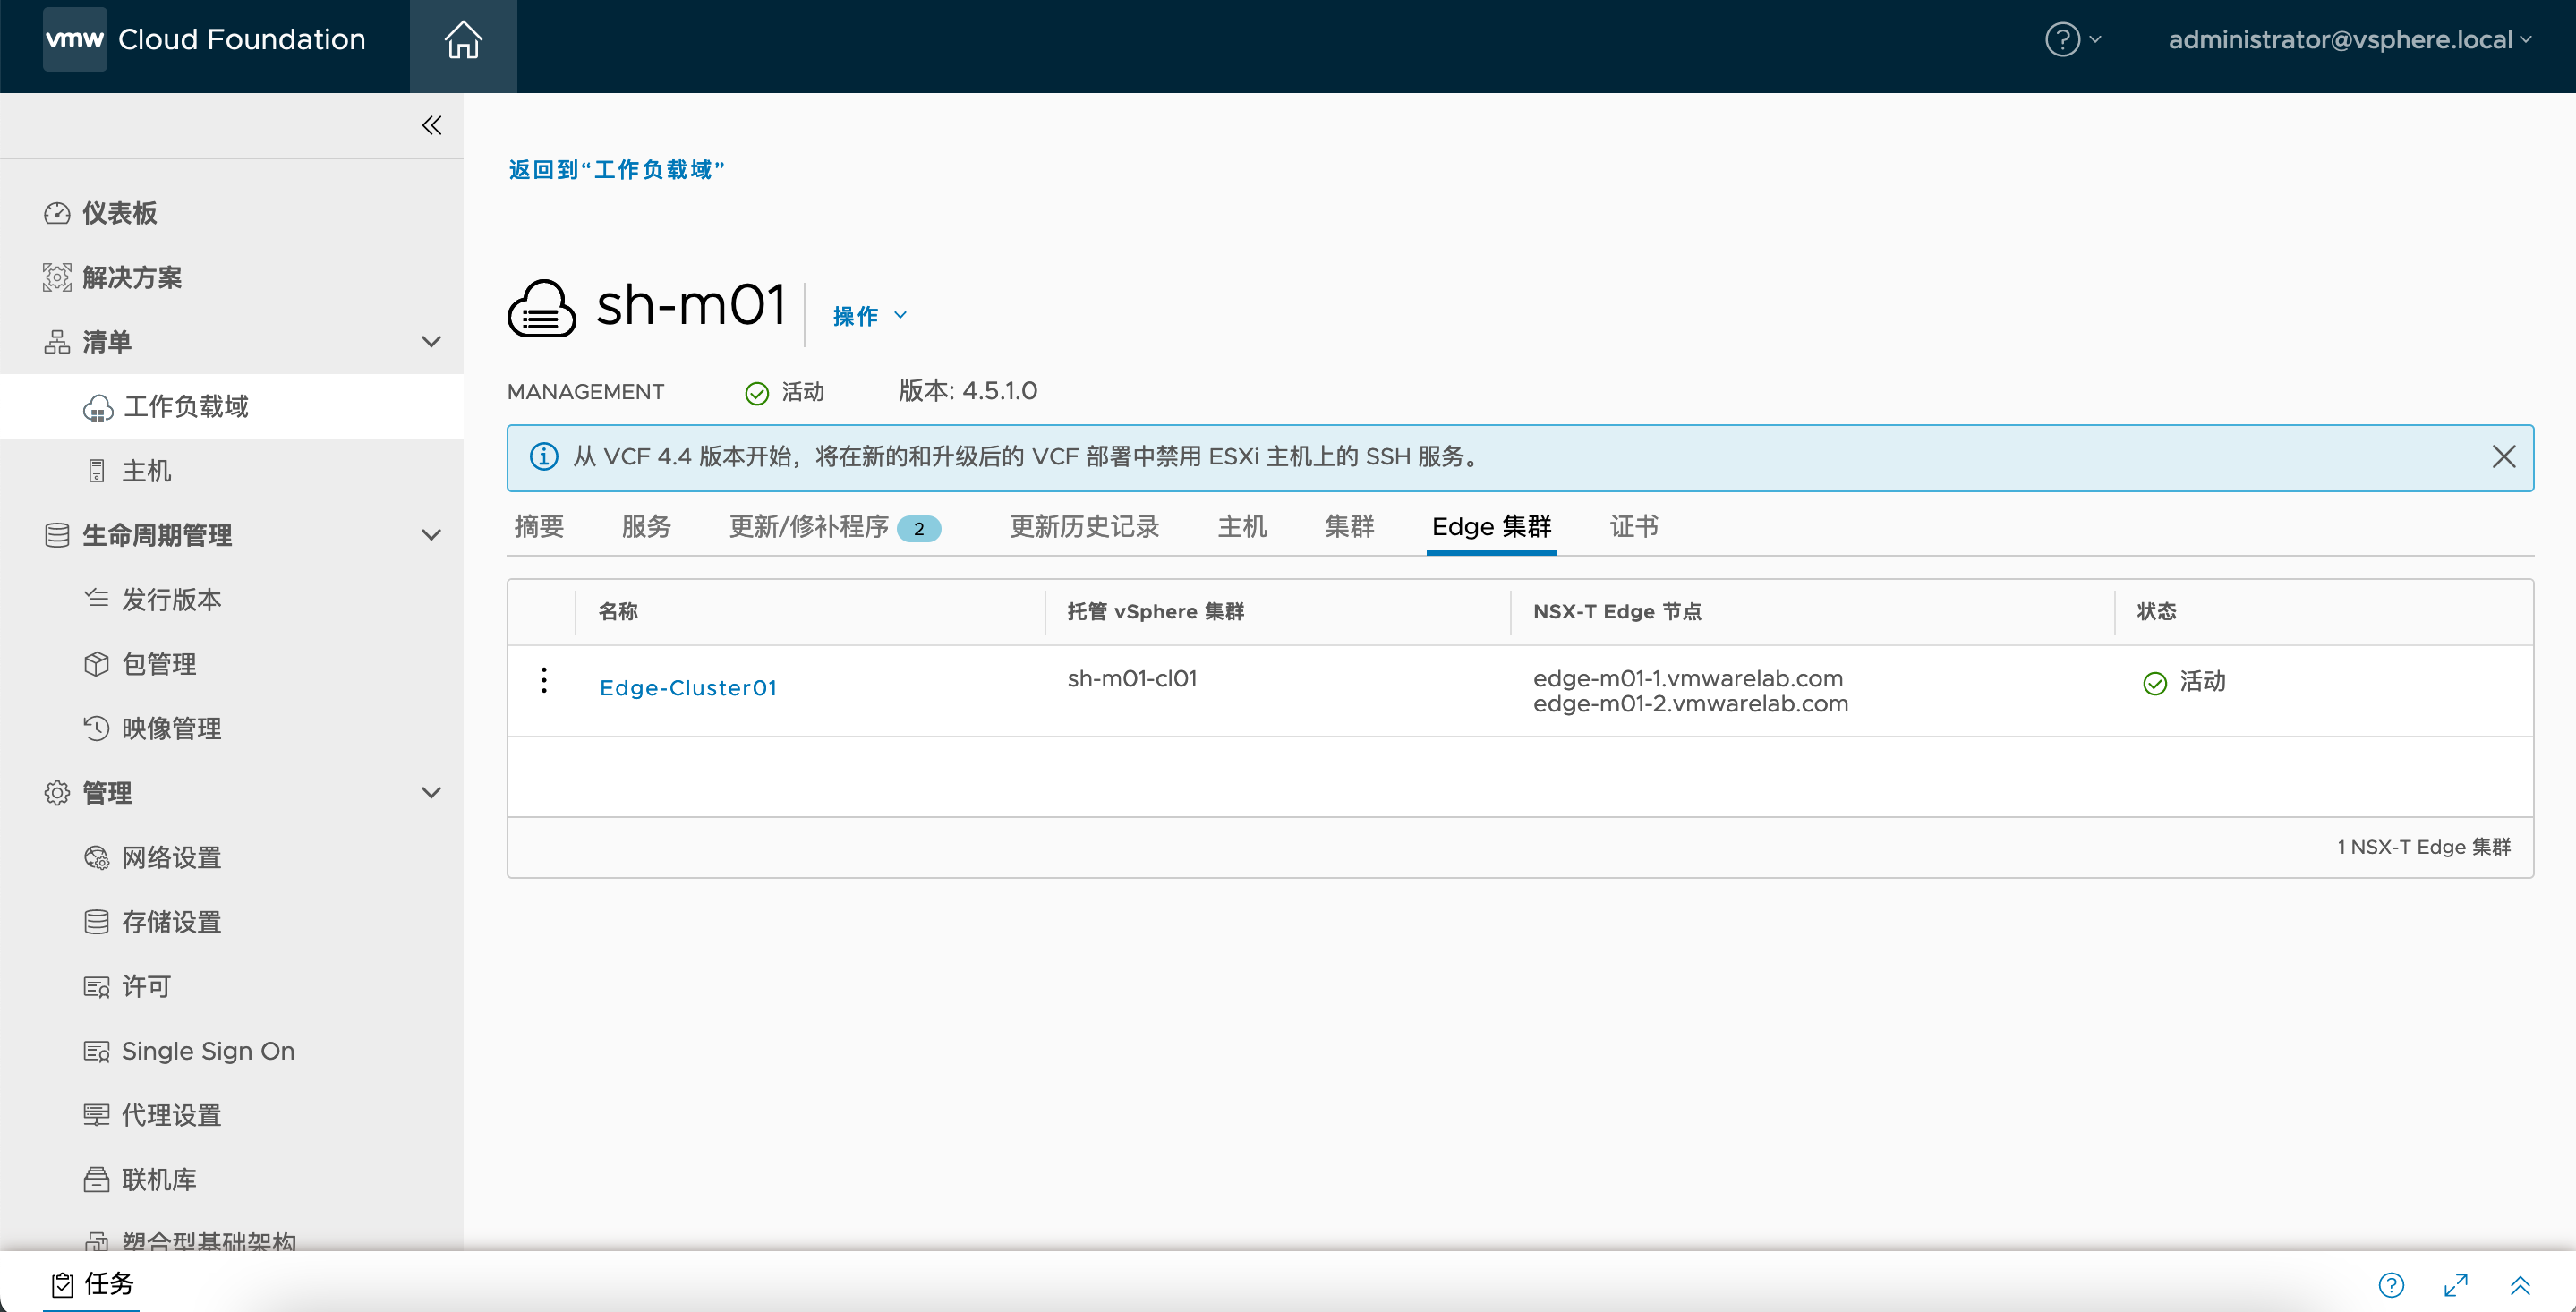
1.6.4. Edge节点及集群创建完毕
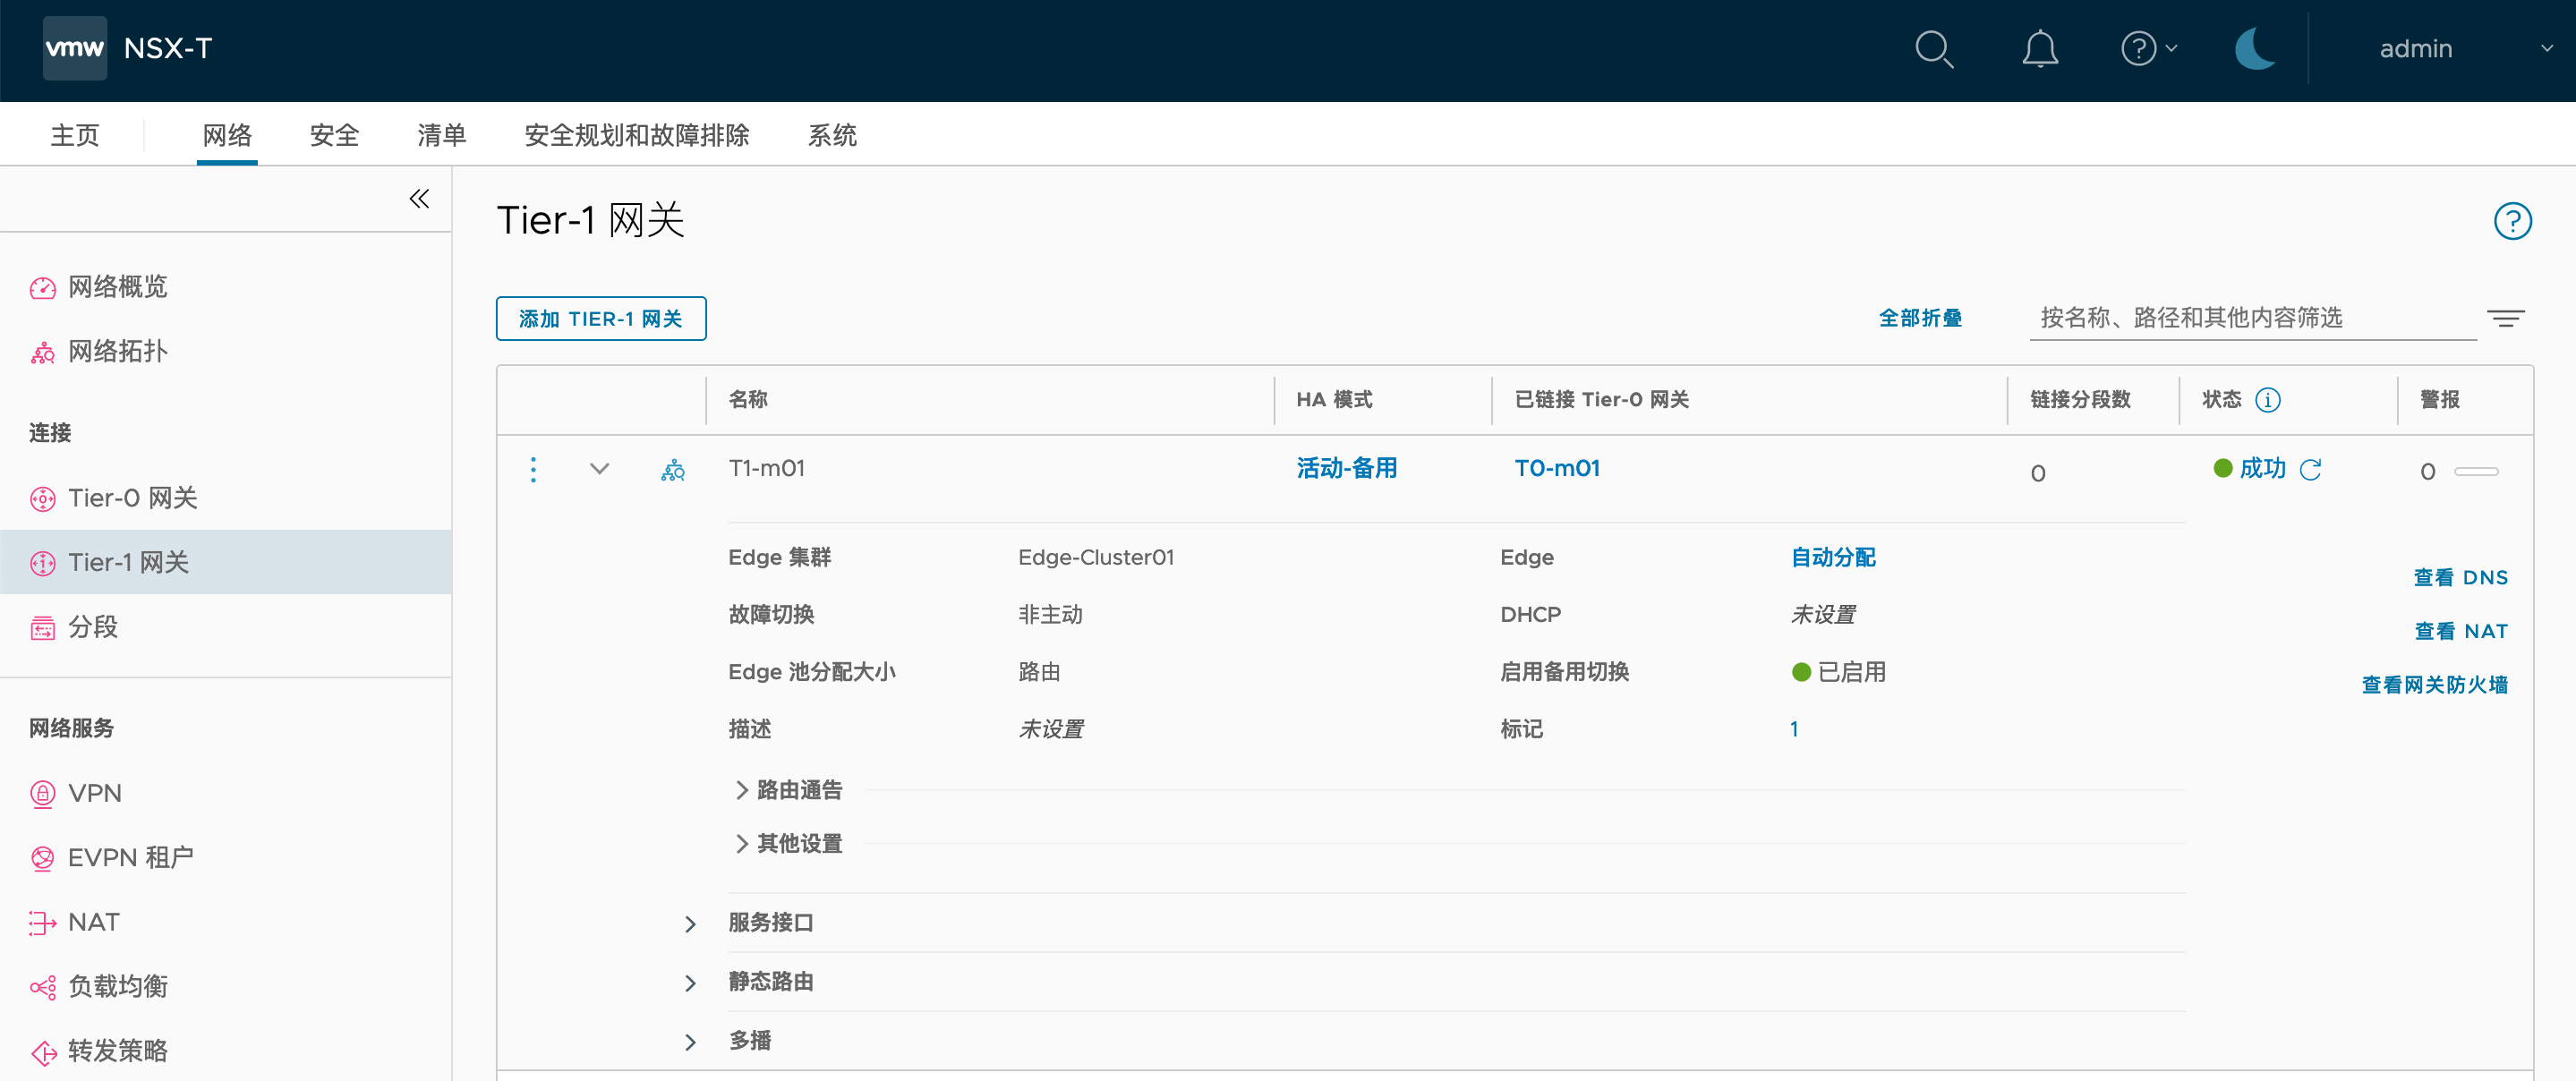
1.6.5. T1配置
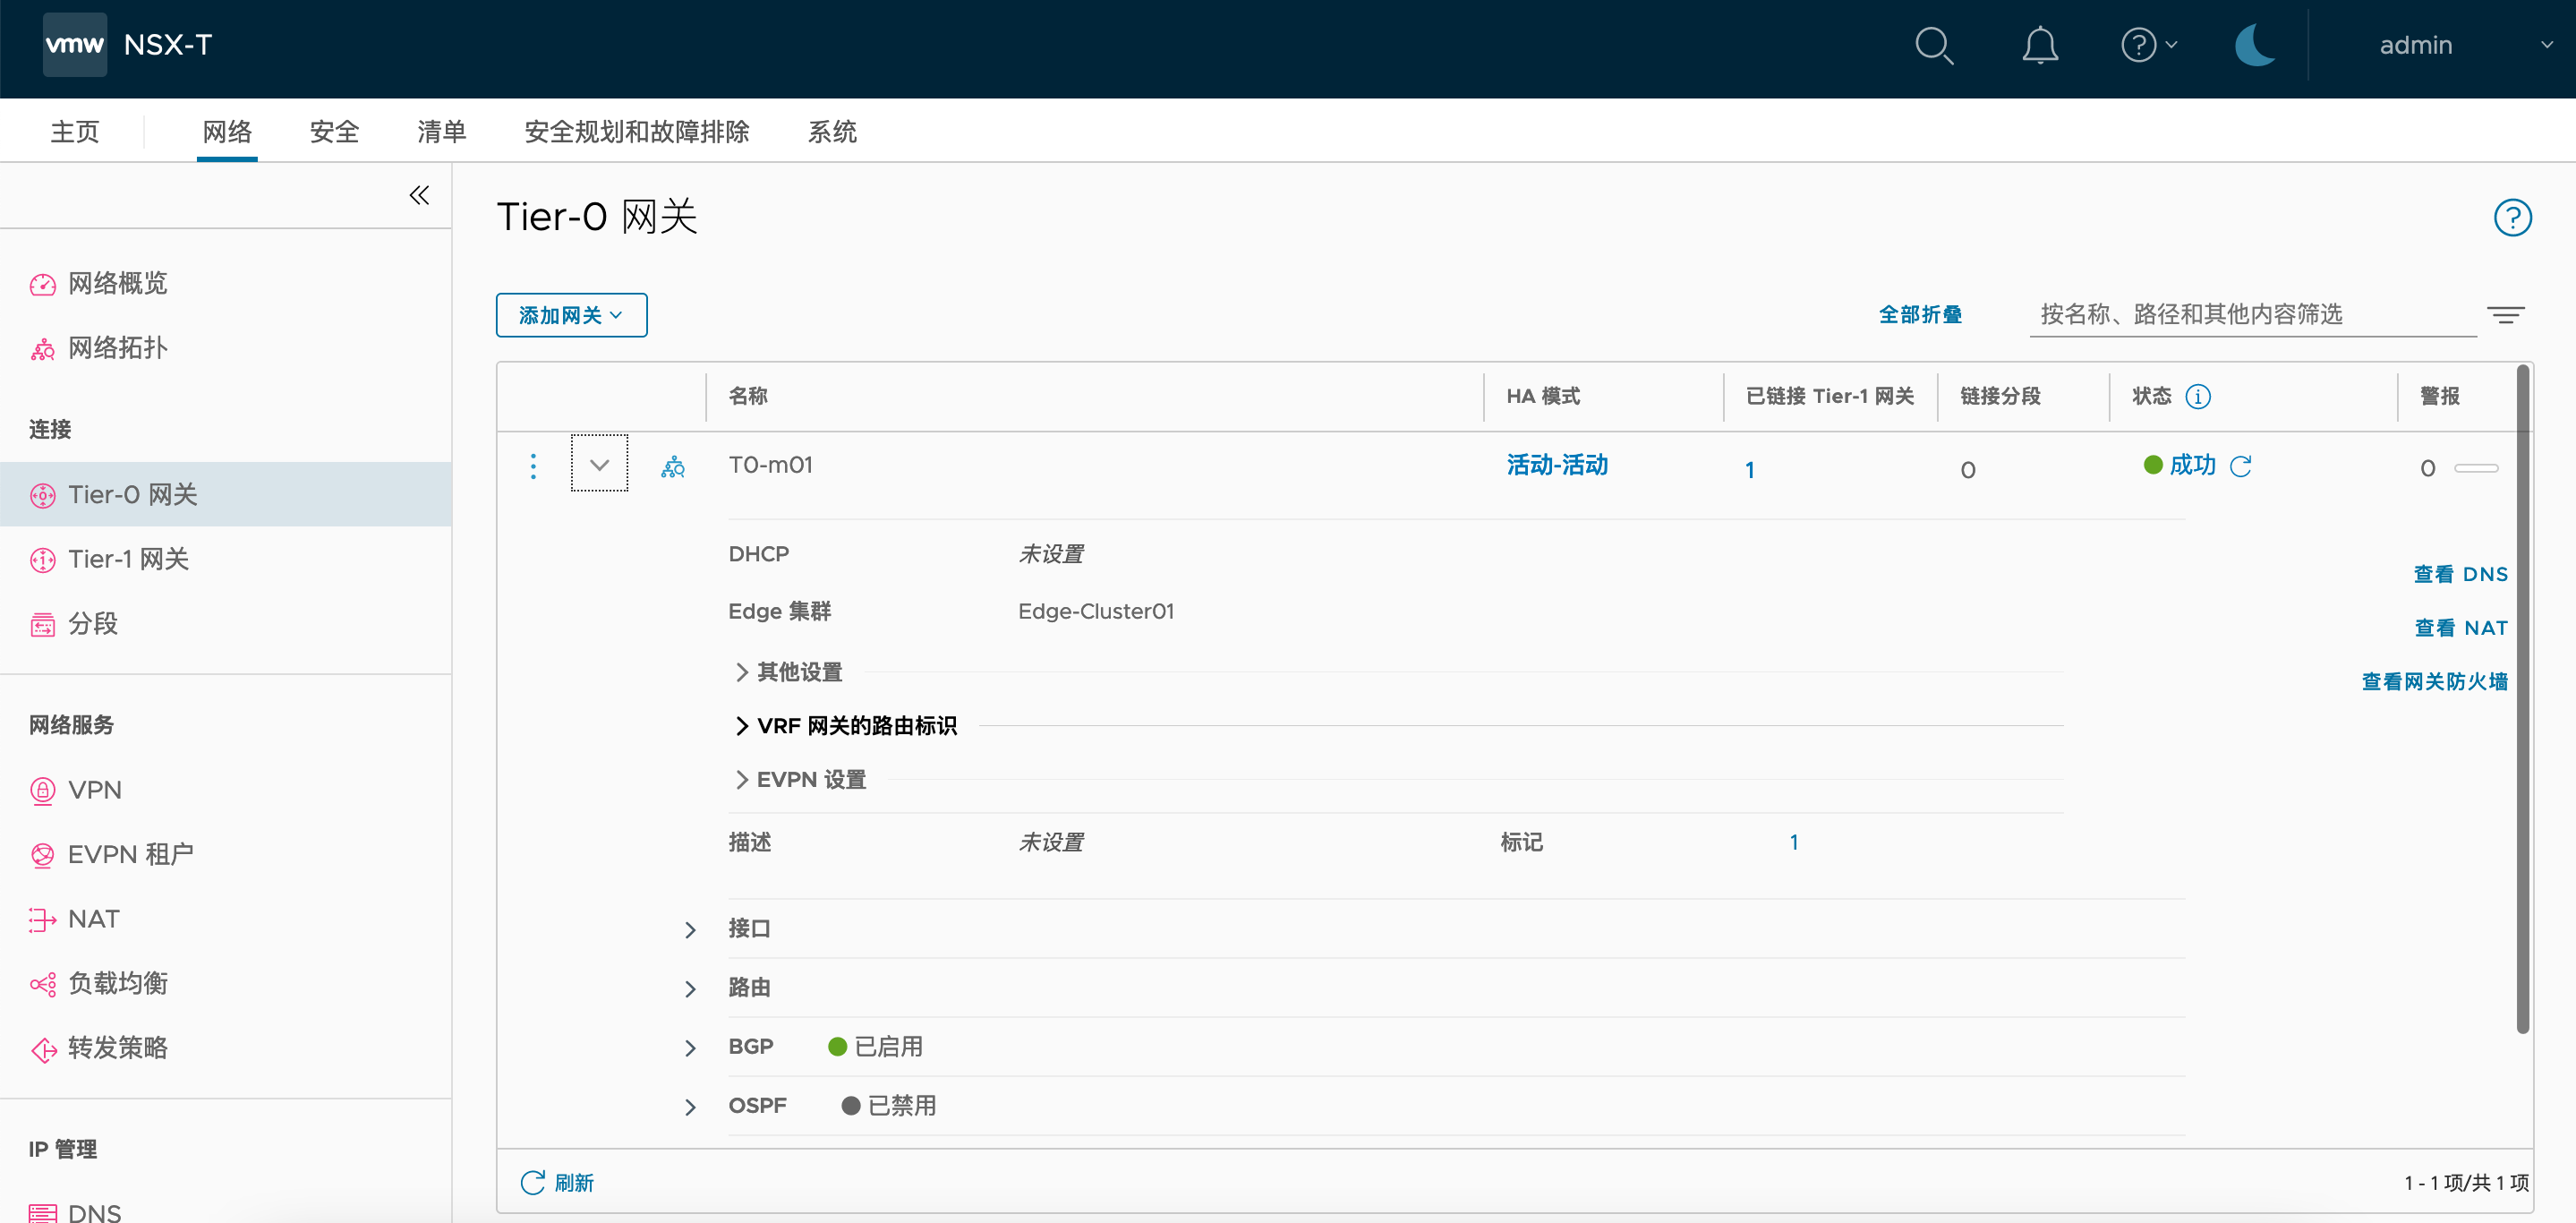
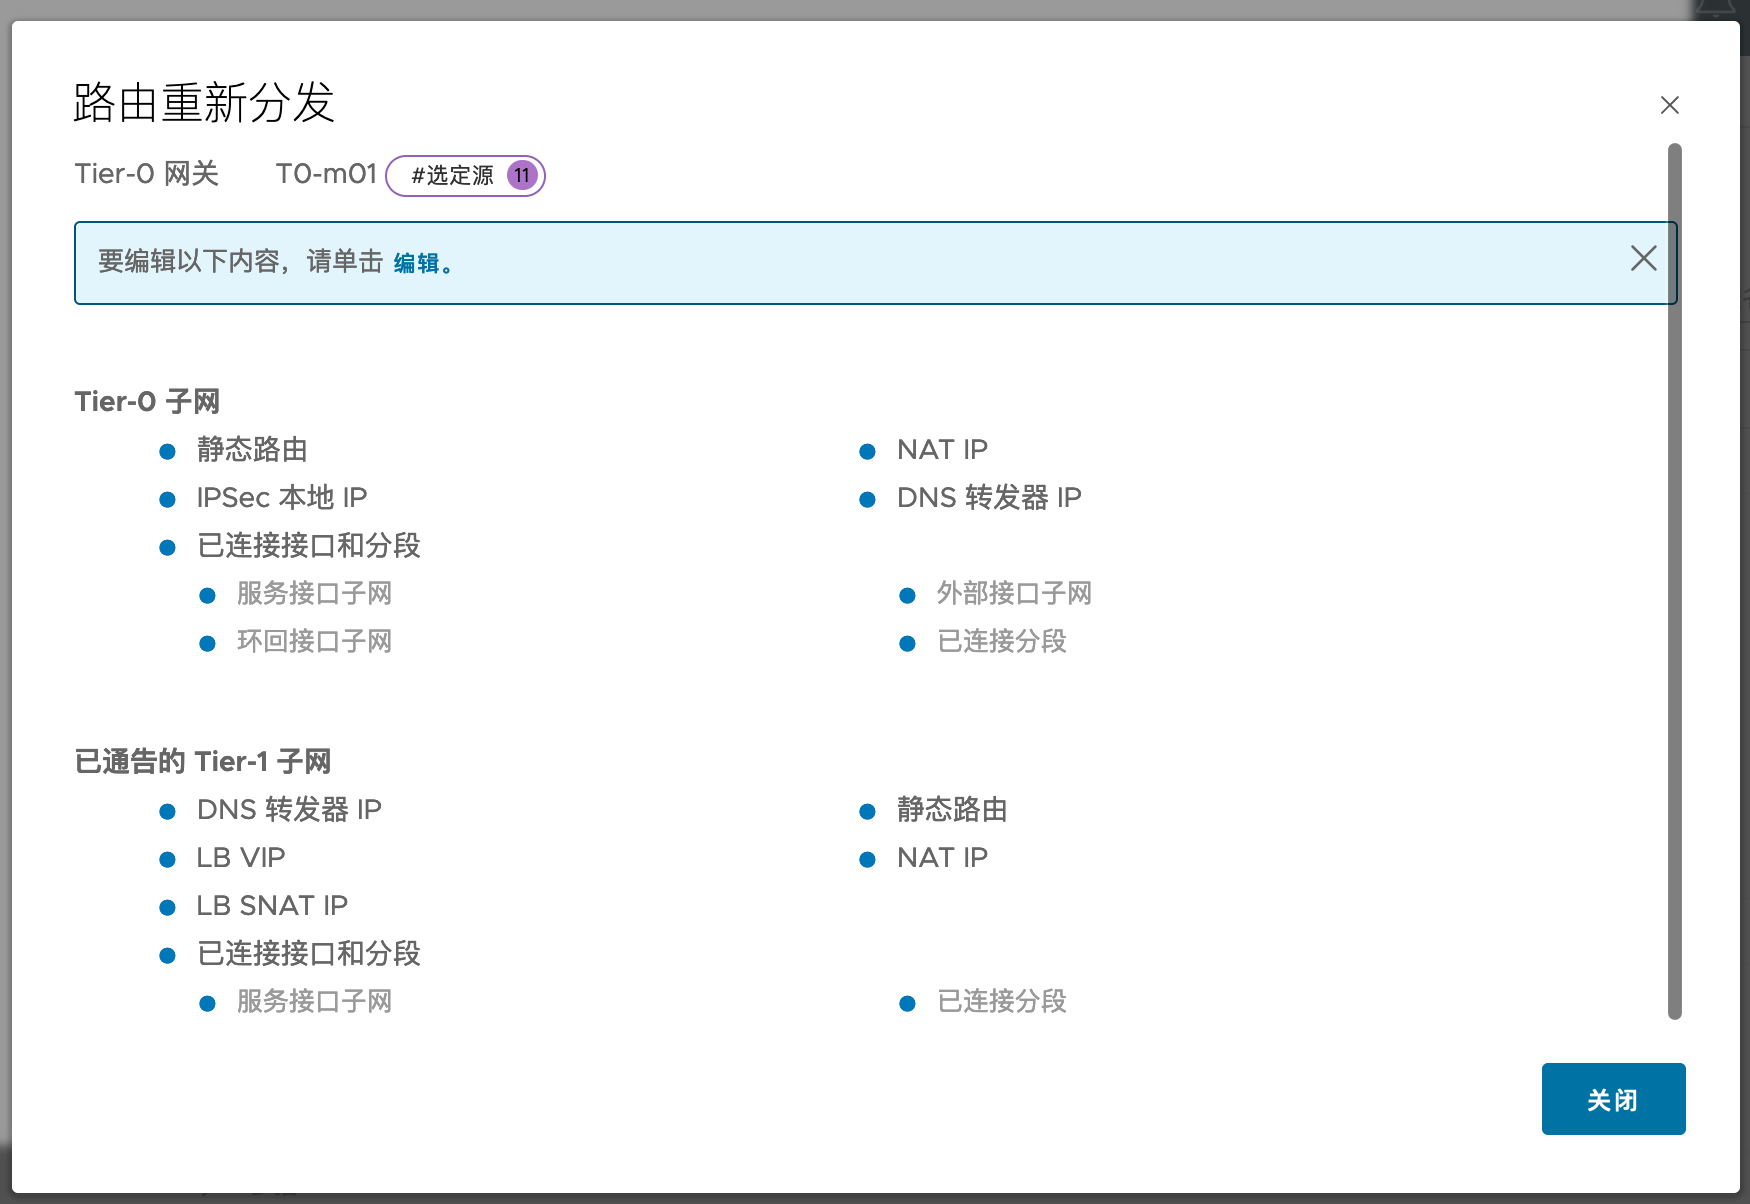
1.6.6. T0配置
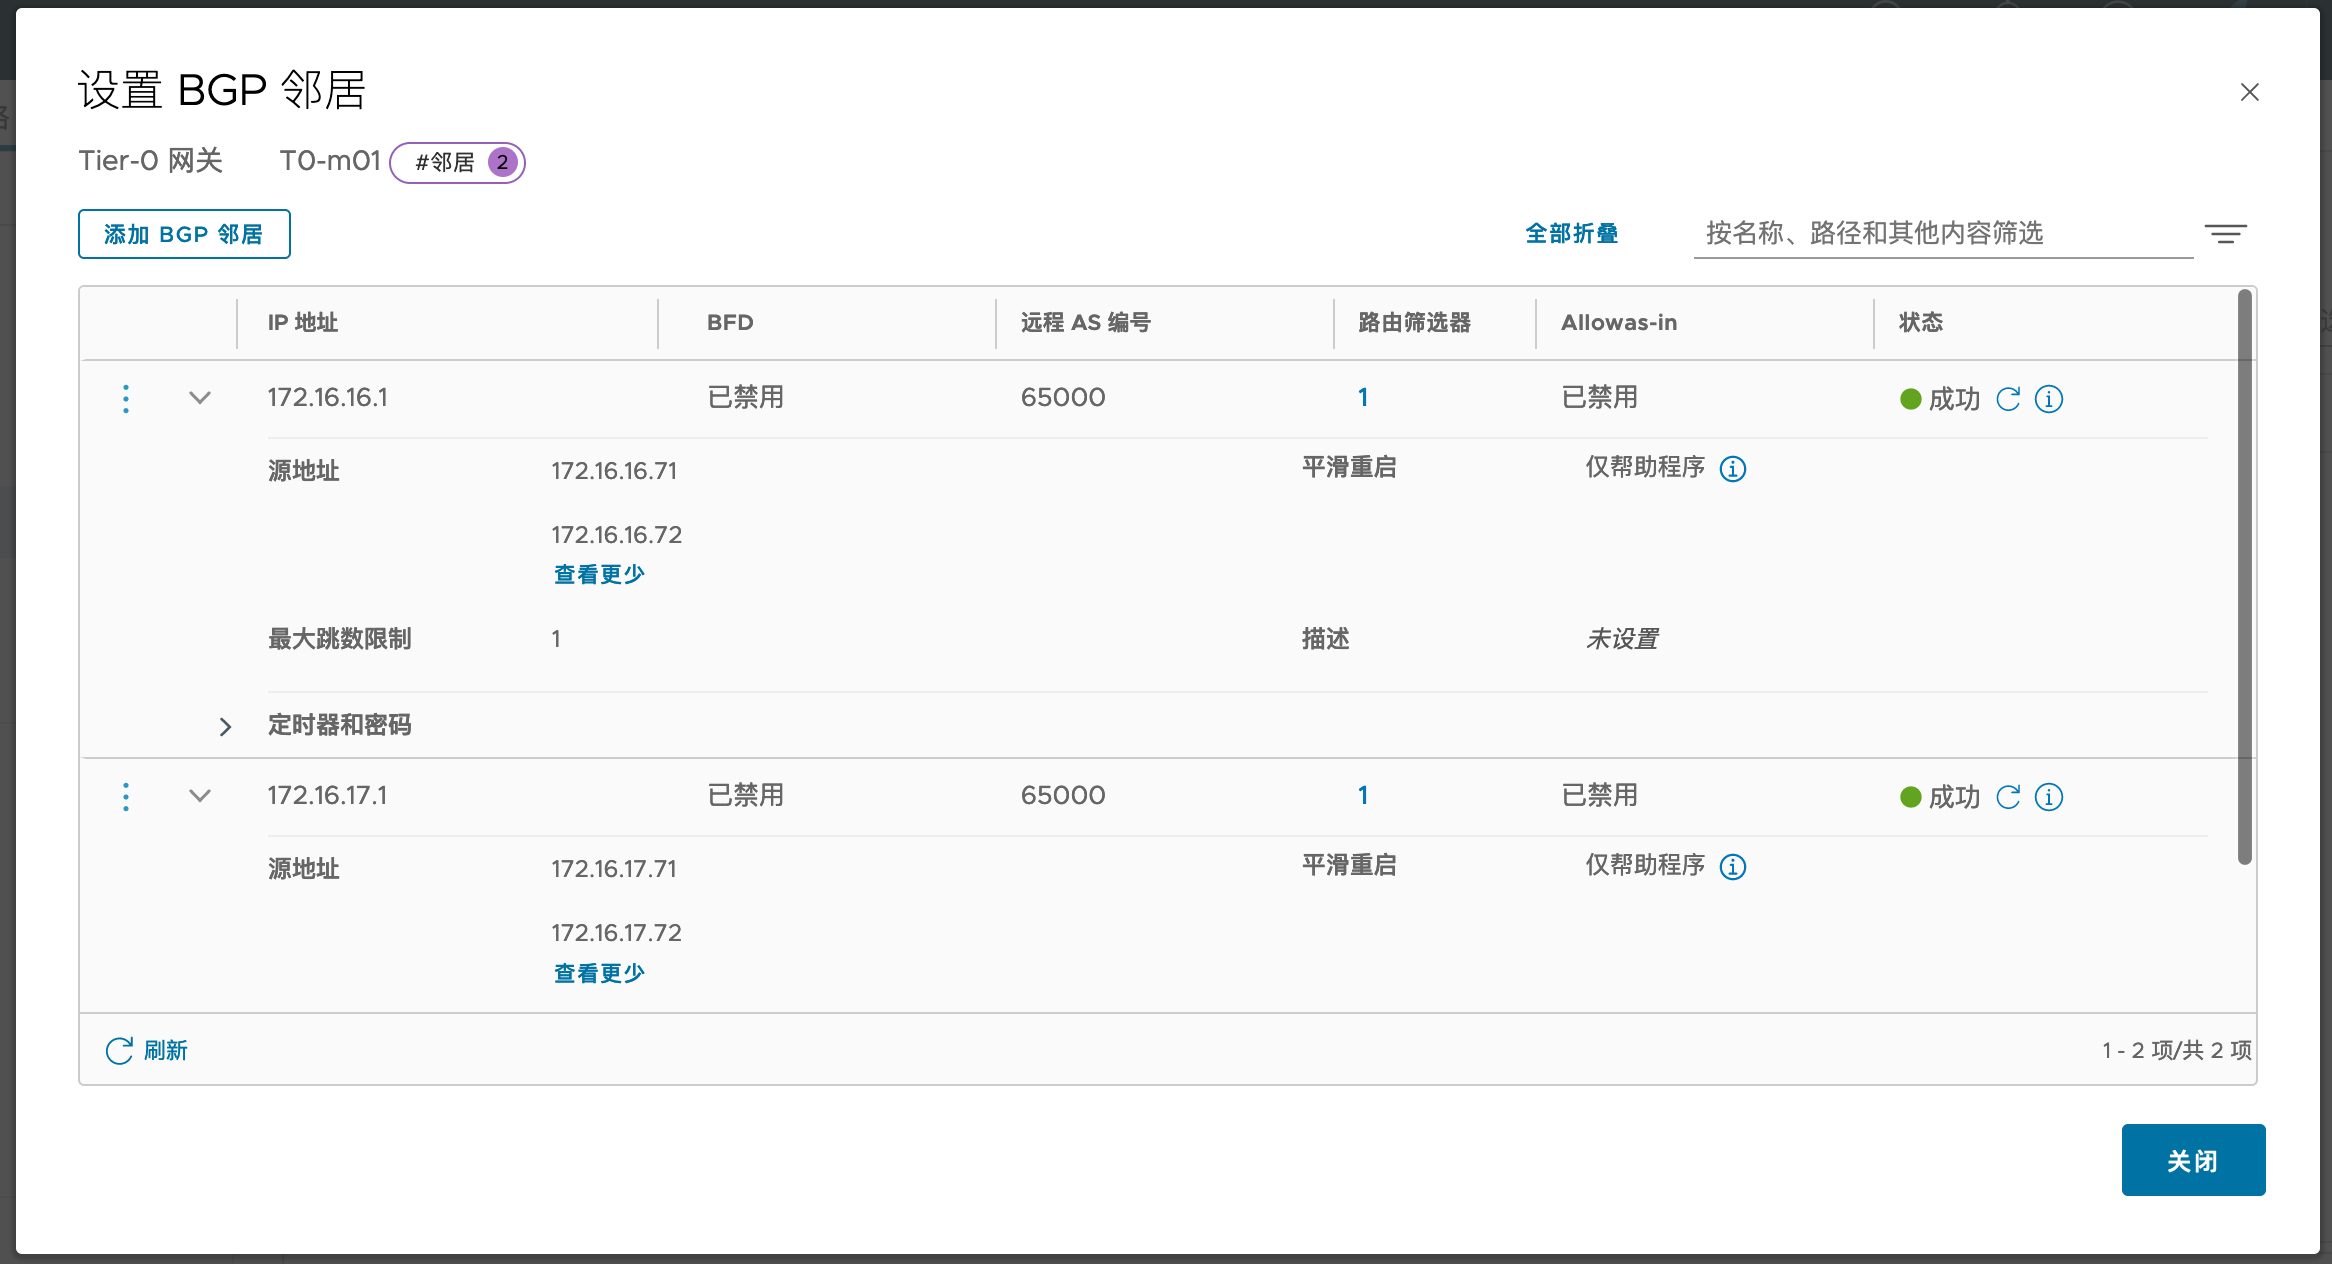
交换机端看到BGP Peer状态为Established

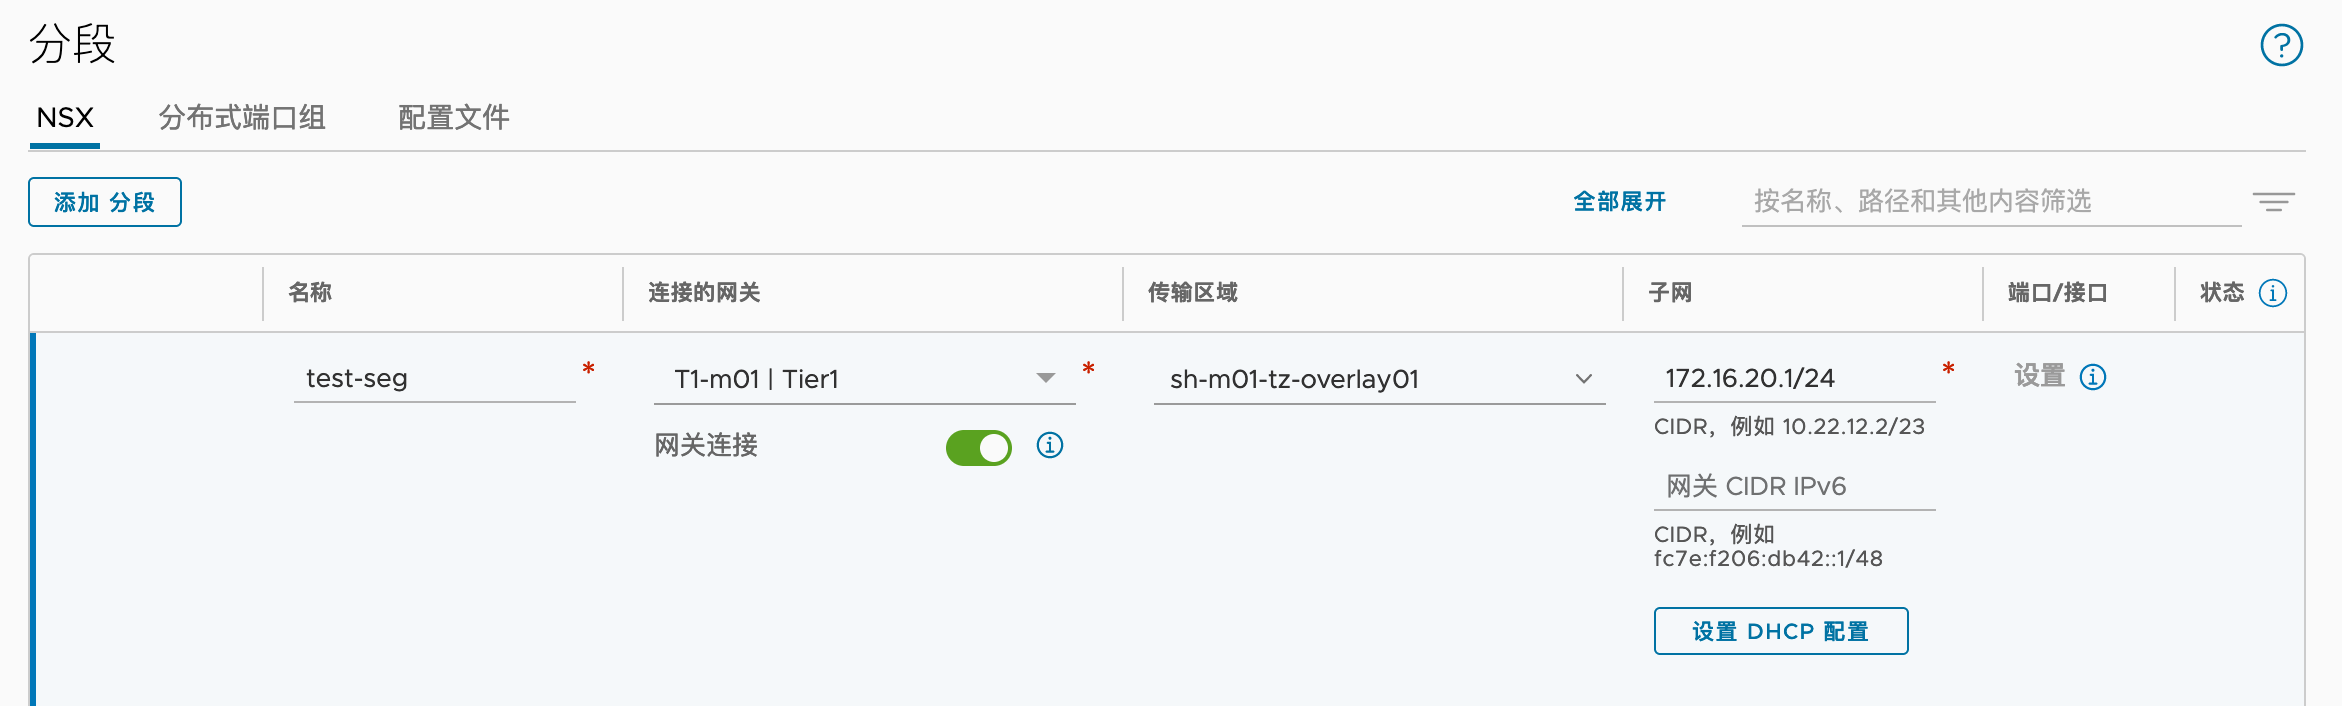
1.6.7. 创建测试分段
之后在物理交换机上即可看到通过BGP学到了路由:

2. 环境升级
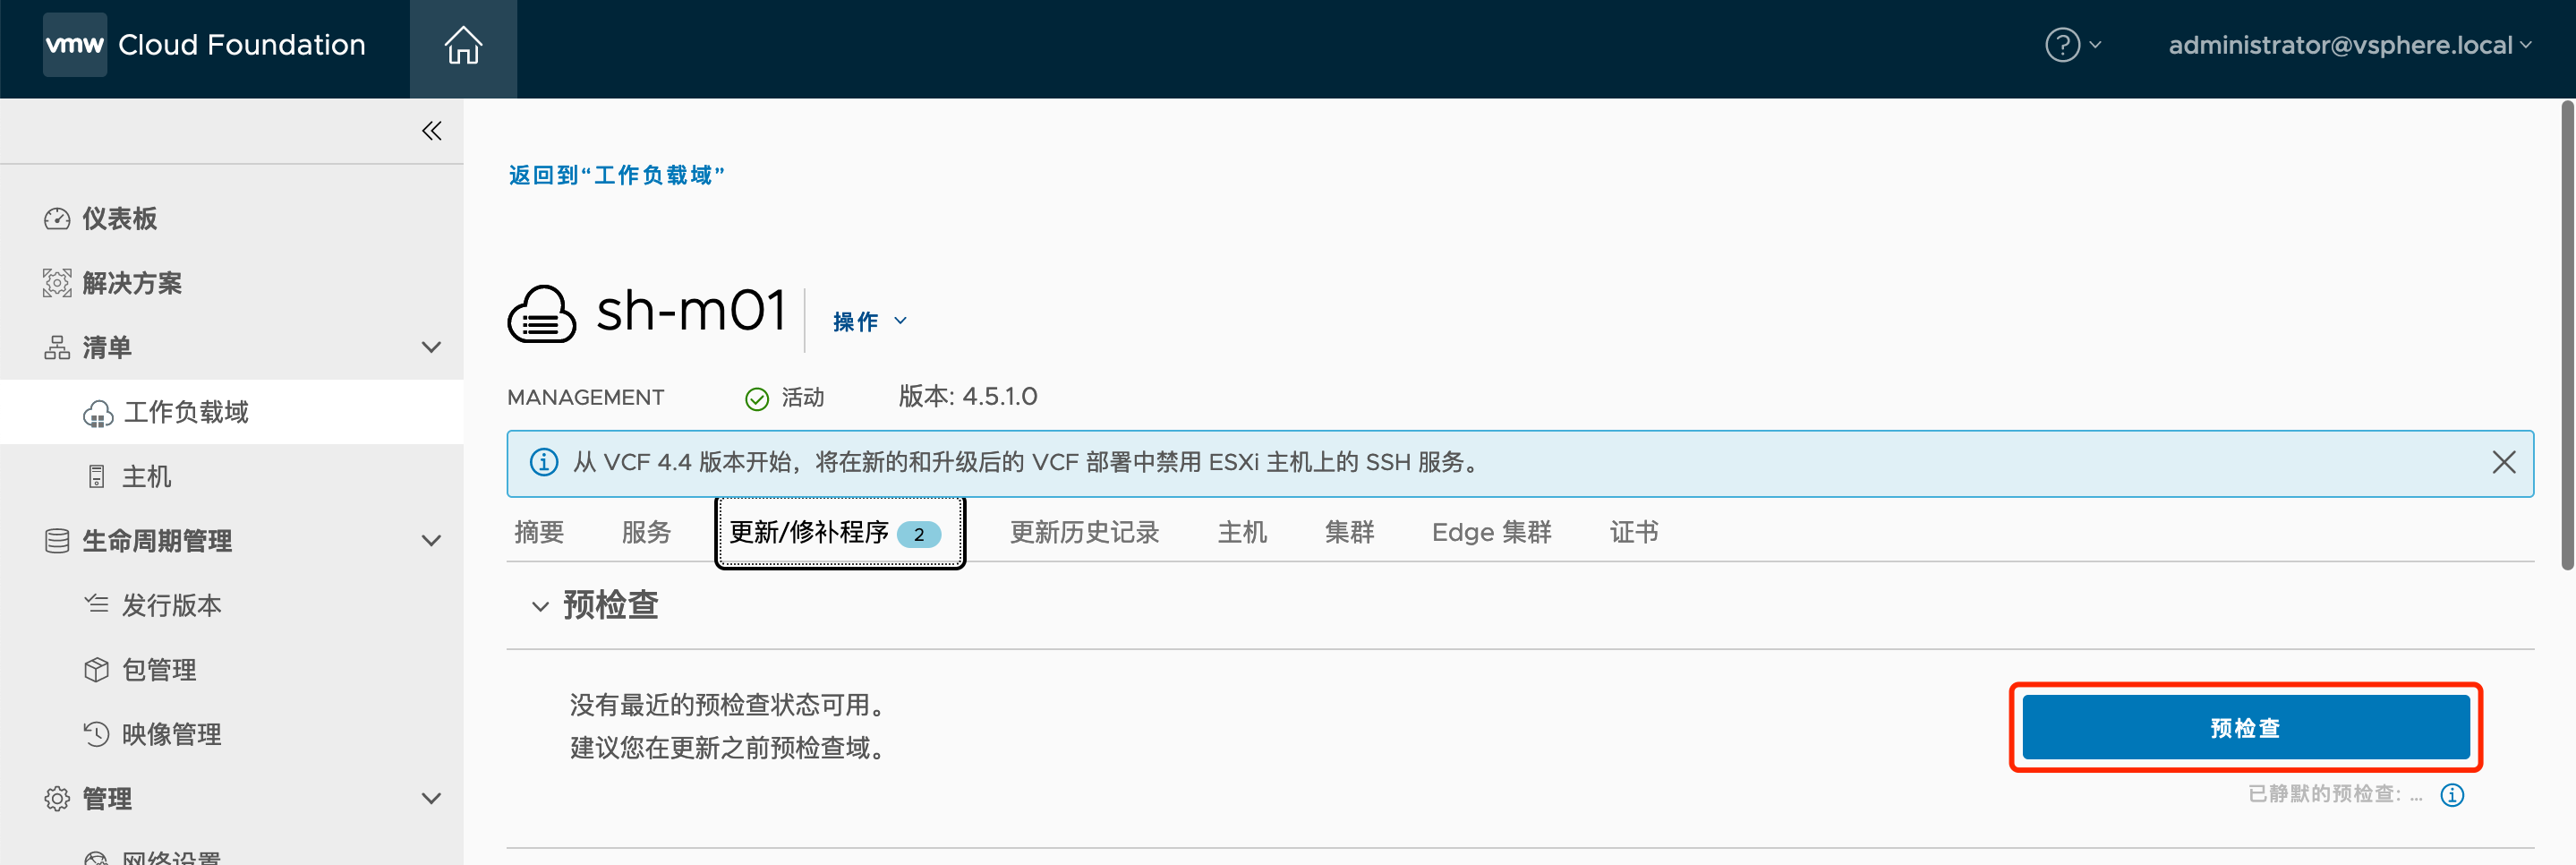
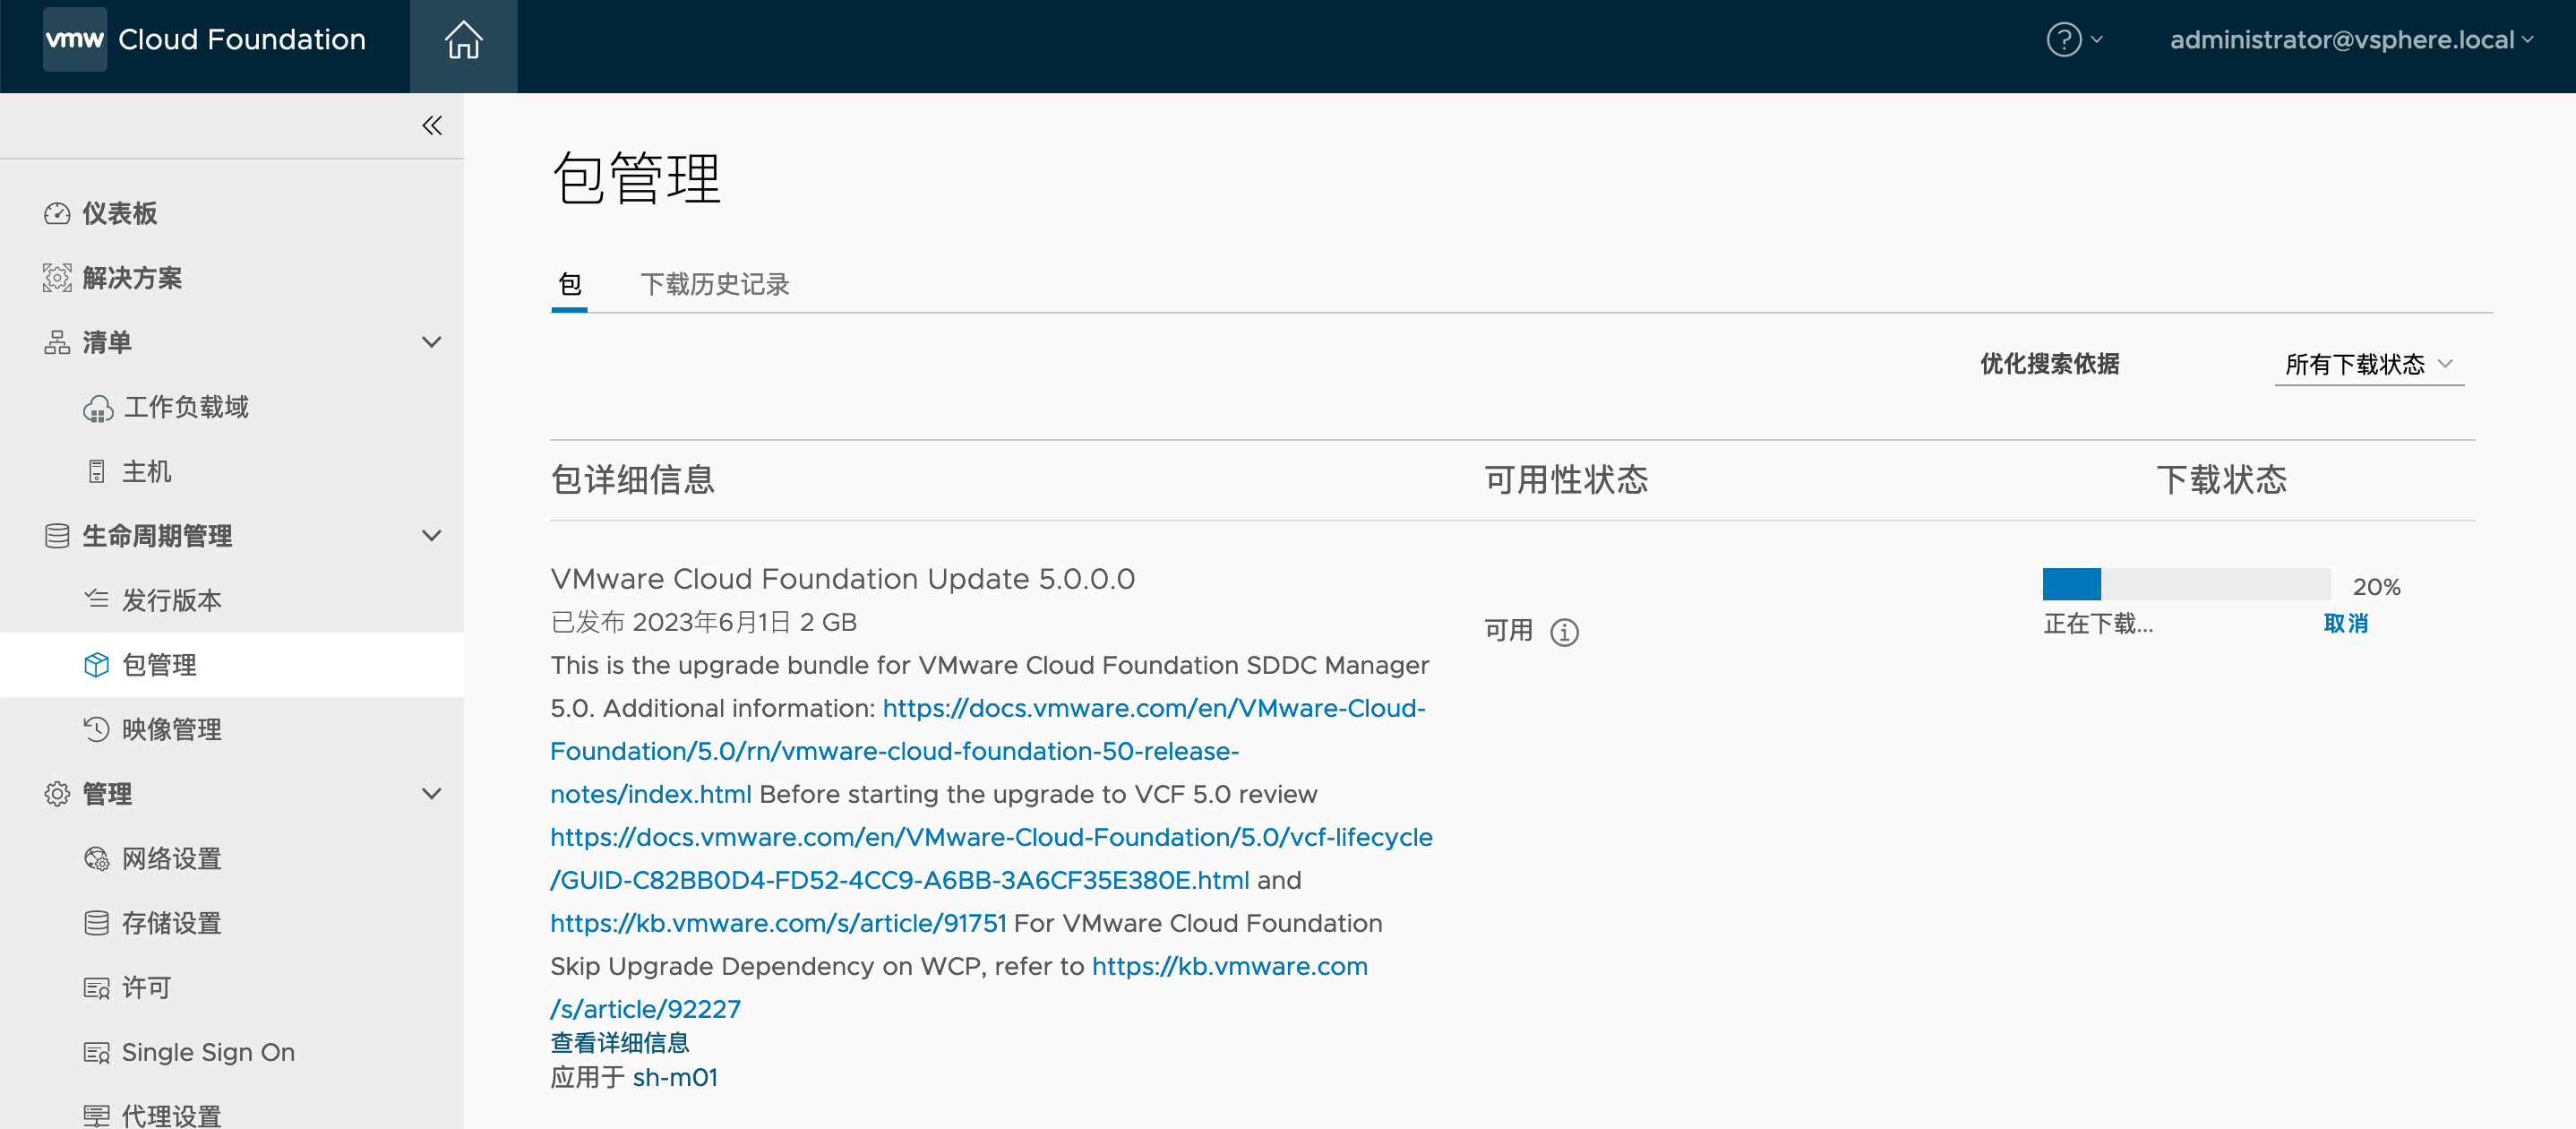
2.1. 升级SDDC Manager
在SDDC Manager中找到管理域的集群,在更新/修补程序中点击预检查:
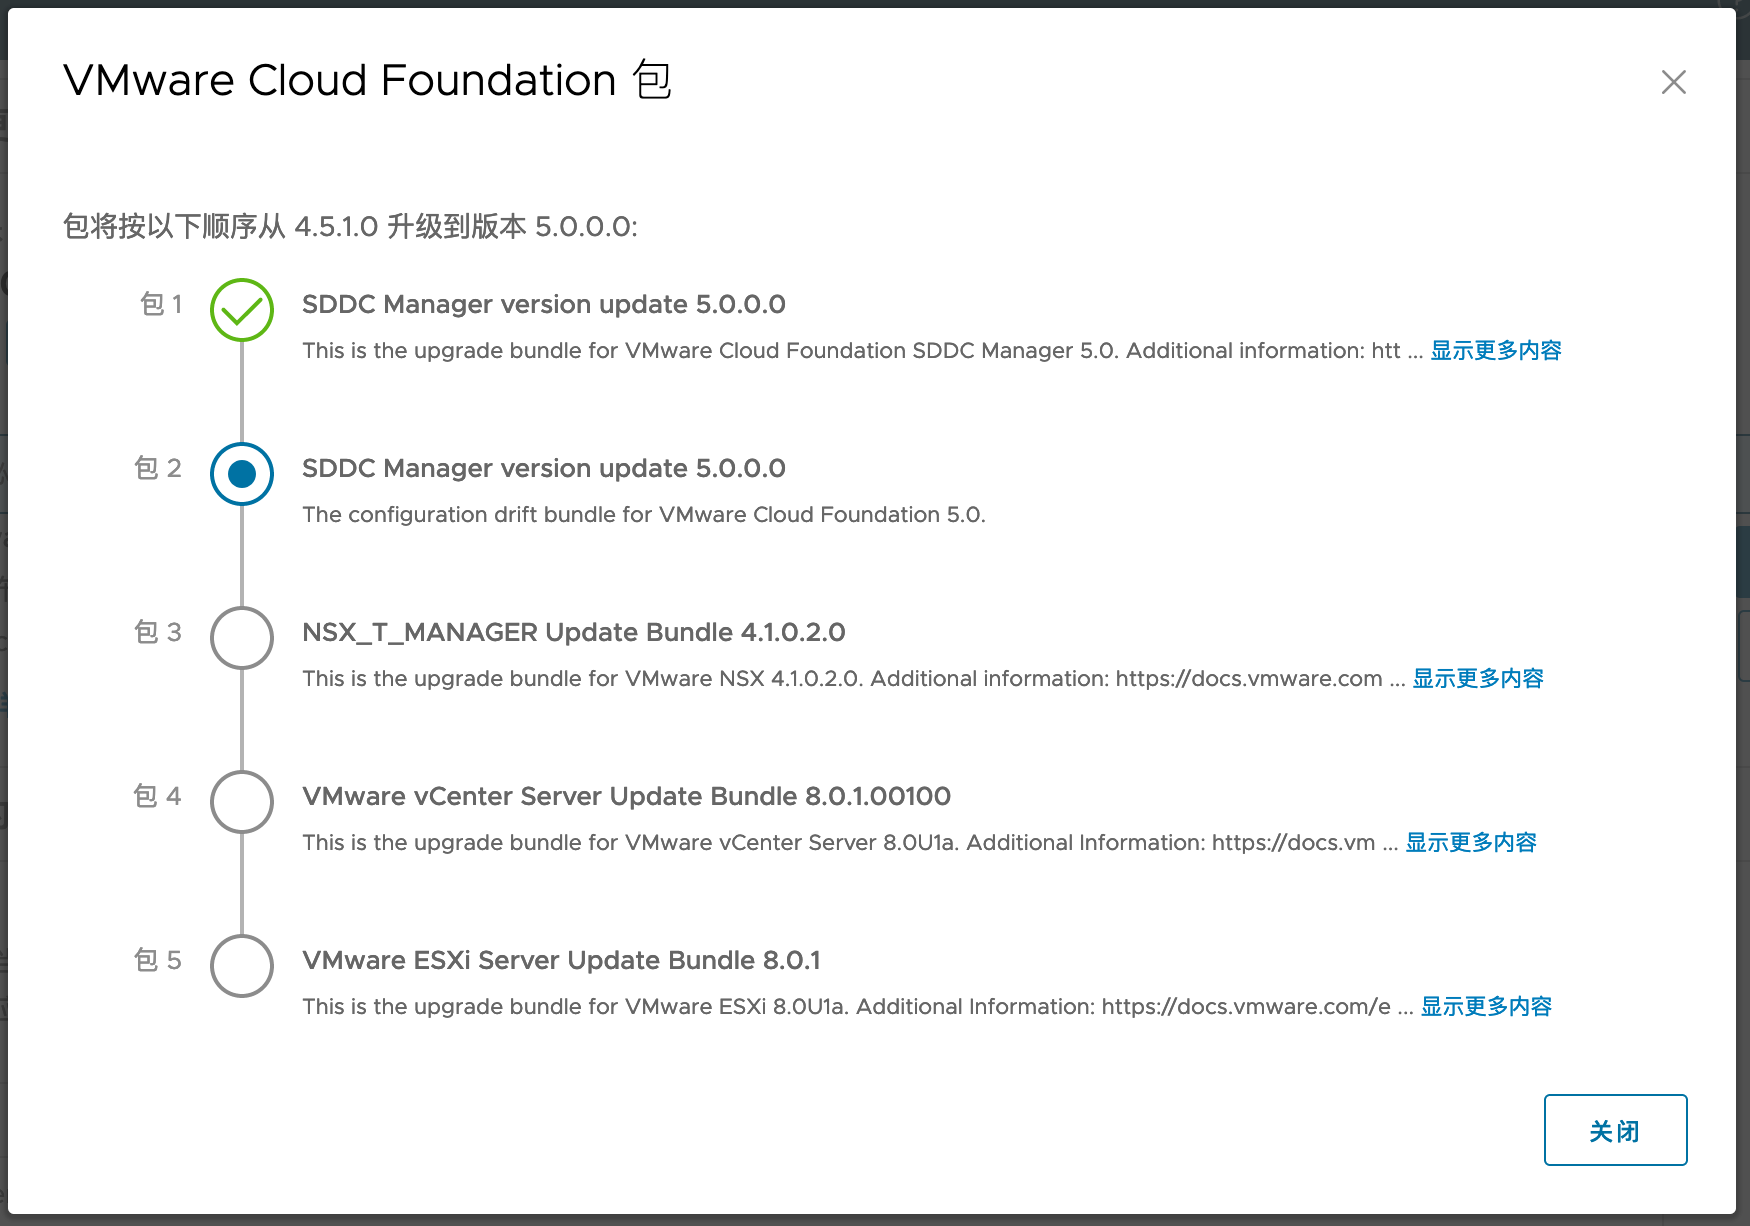
确保没有报错后,下载更新:
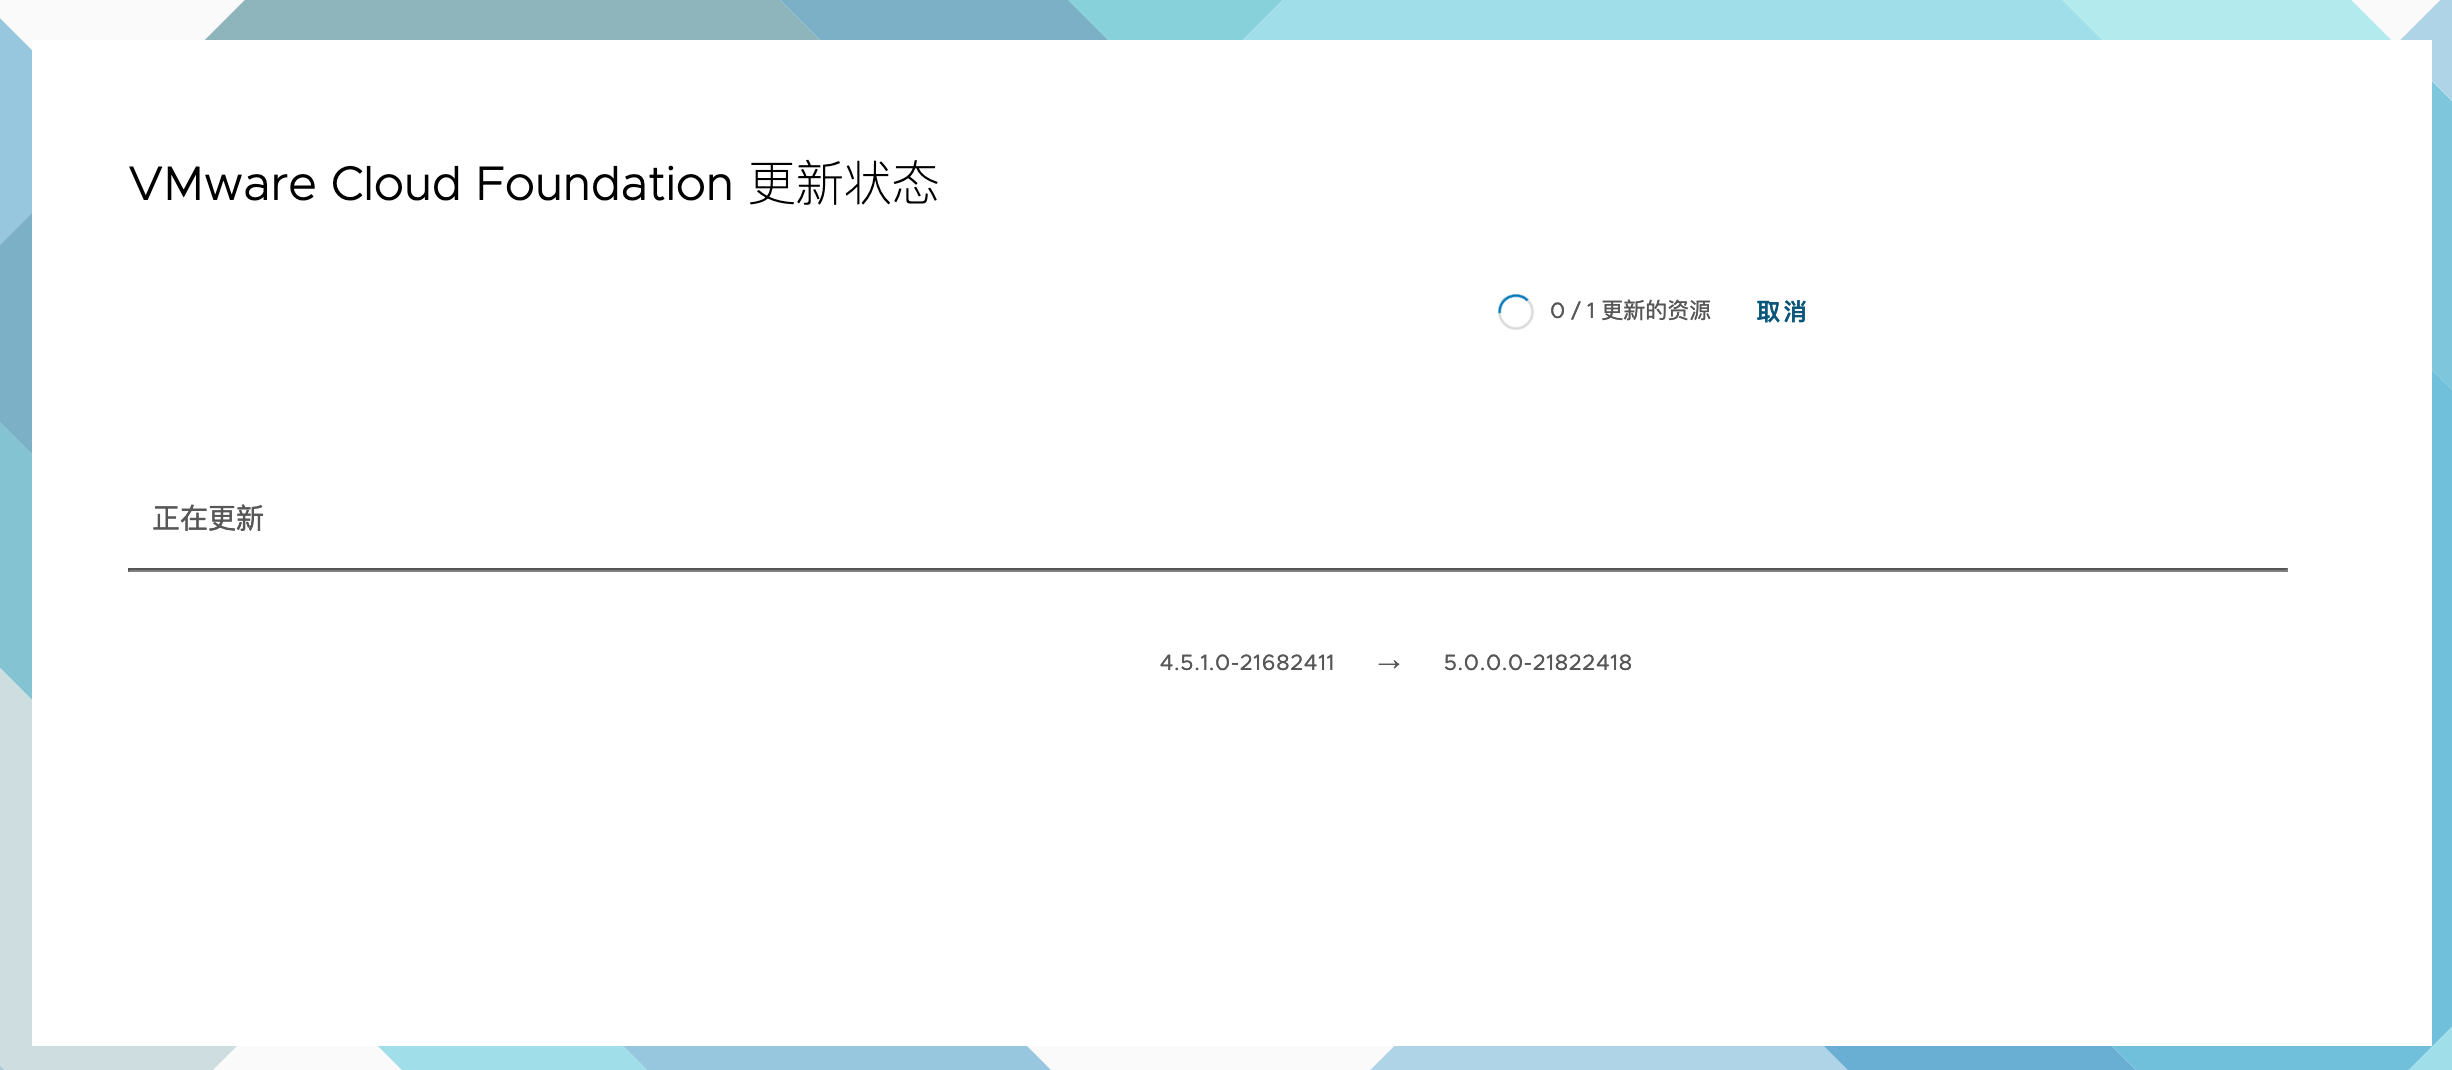
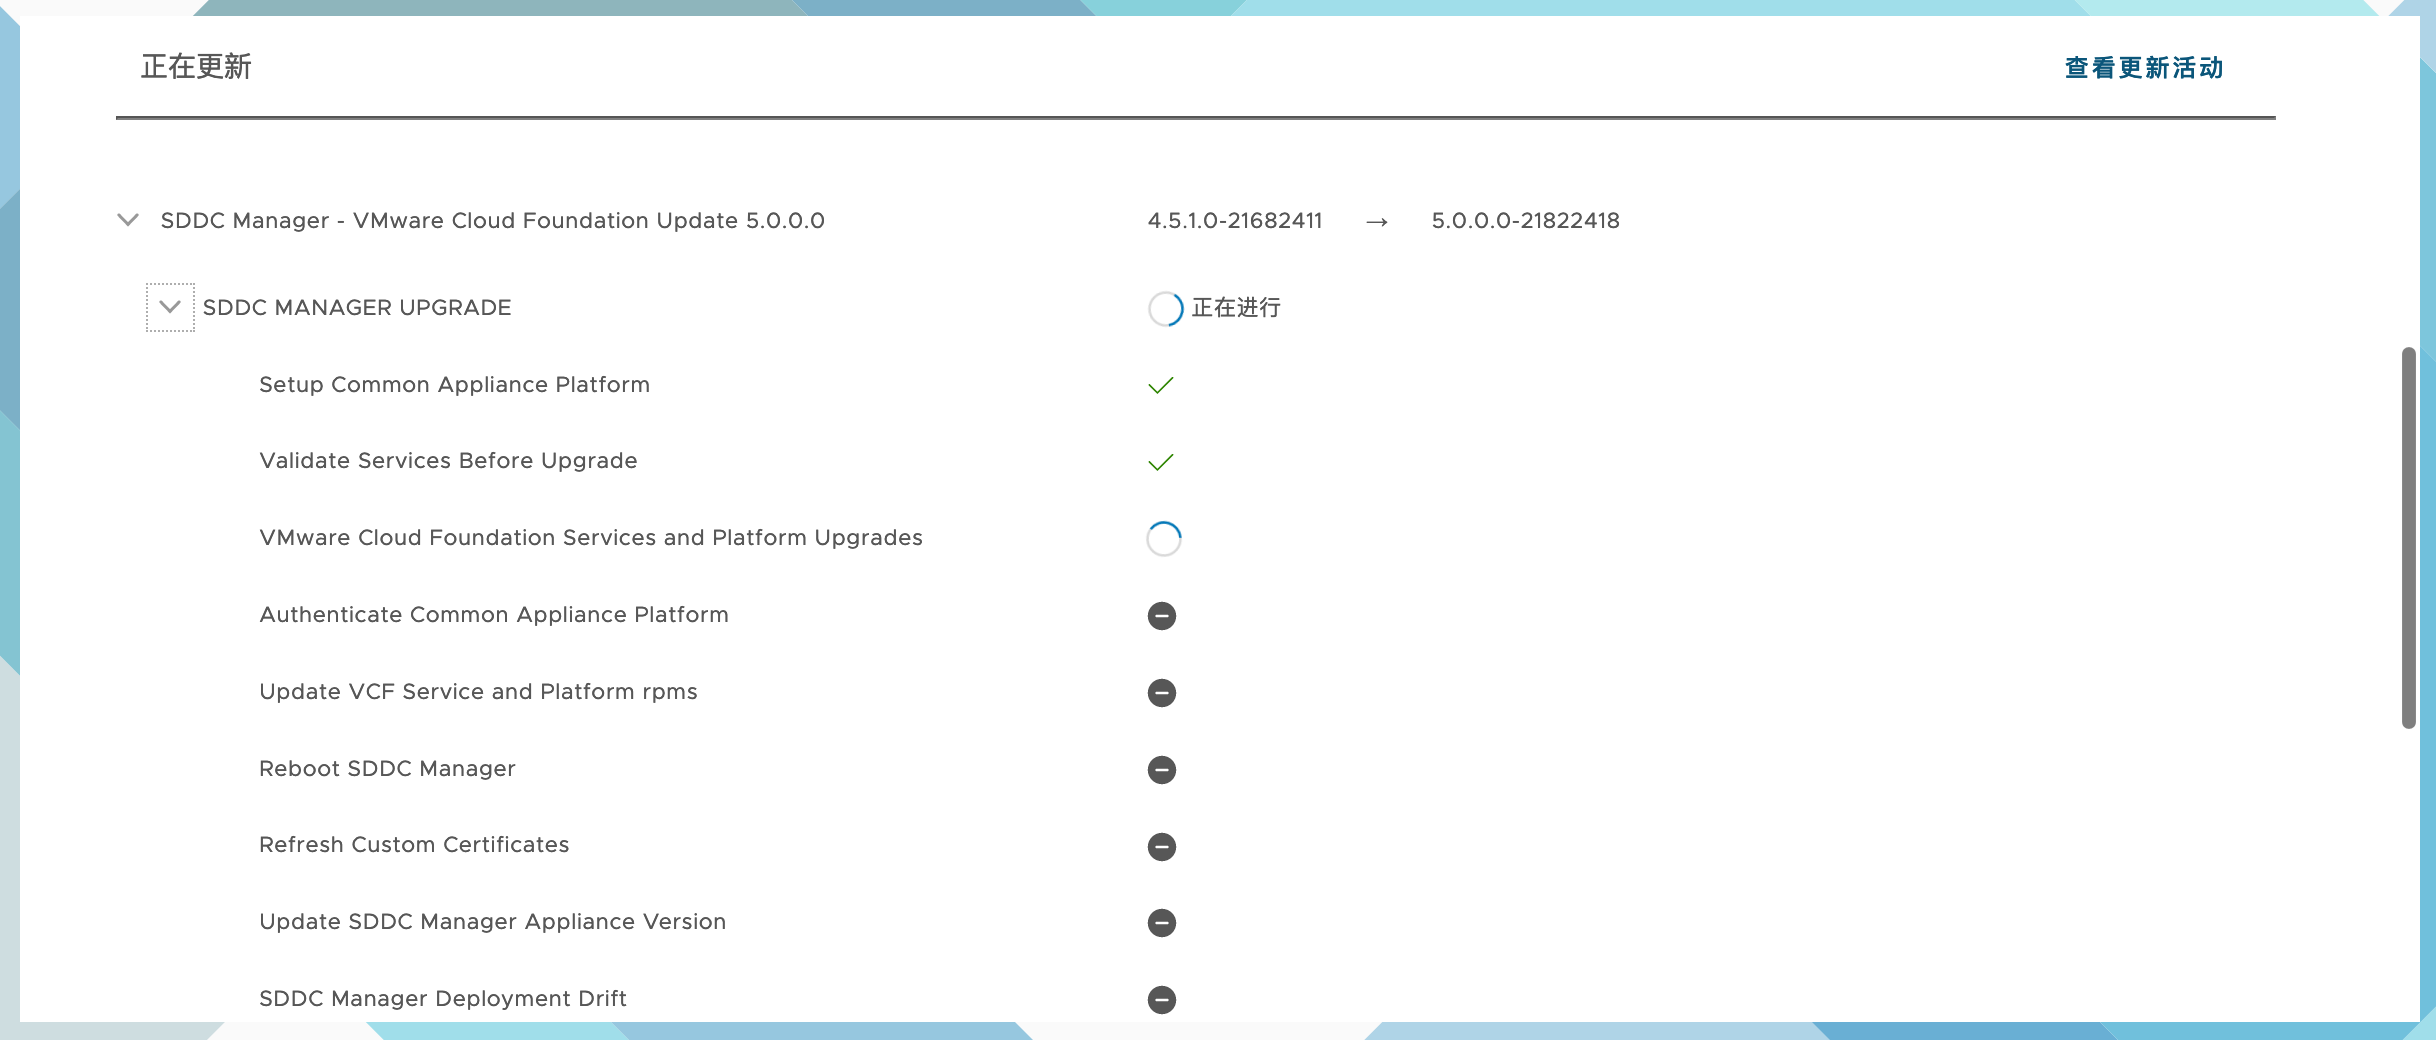
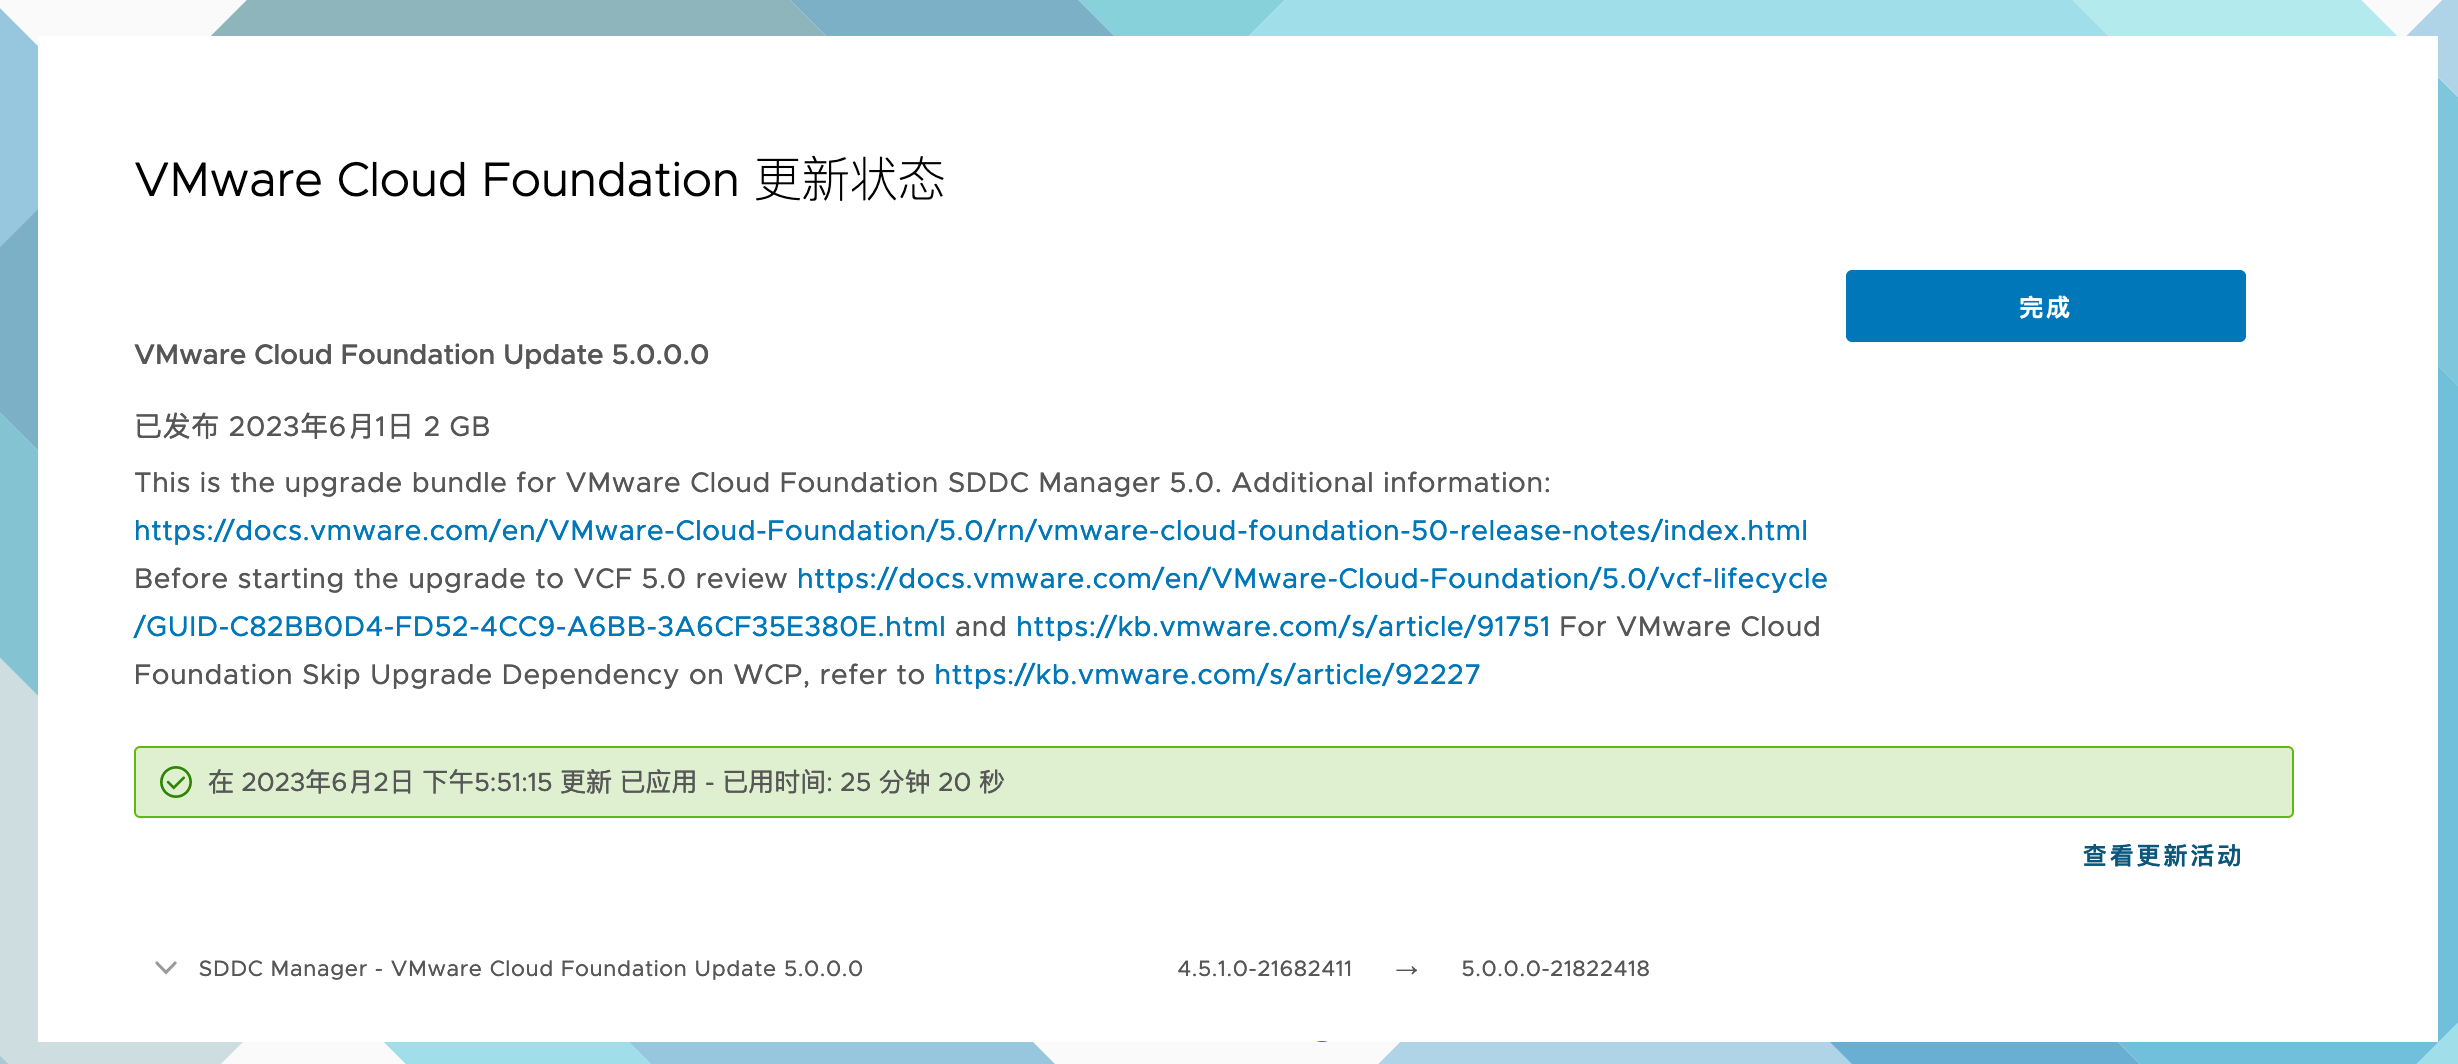
点击立即更新,然后出现下列界面:
2.2. 升级其他组件

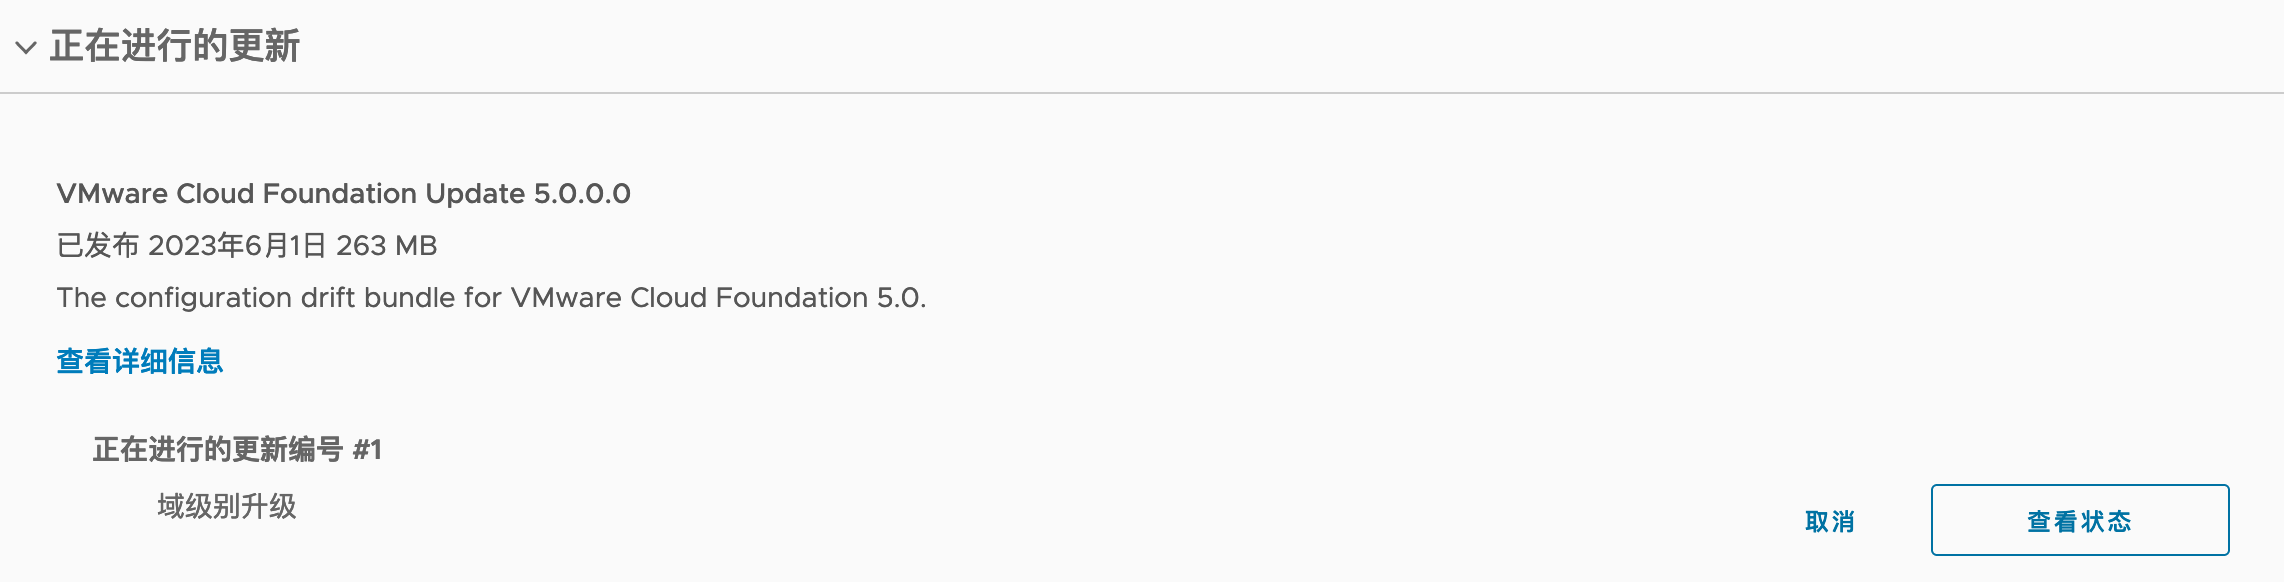
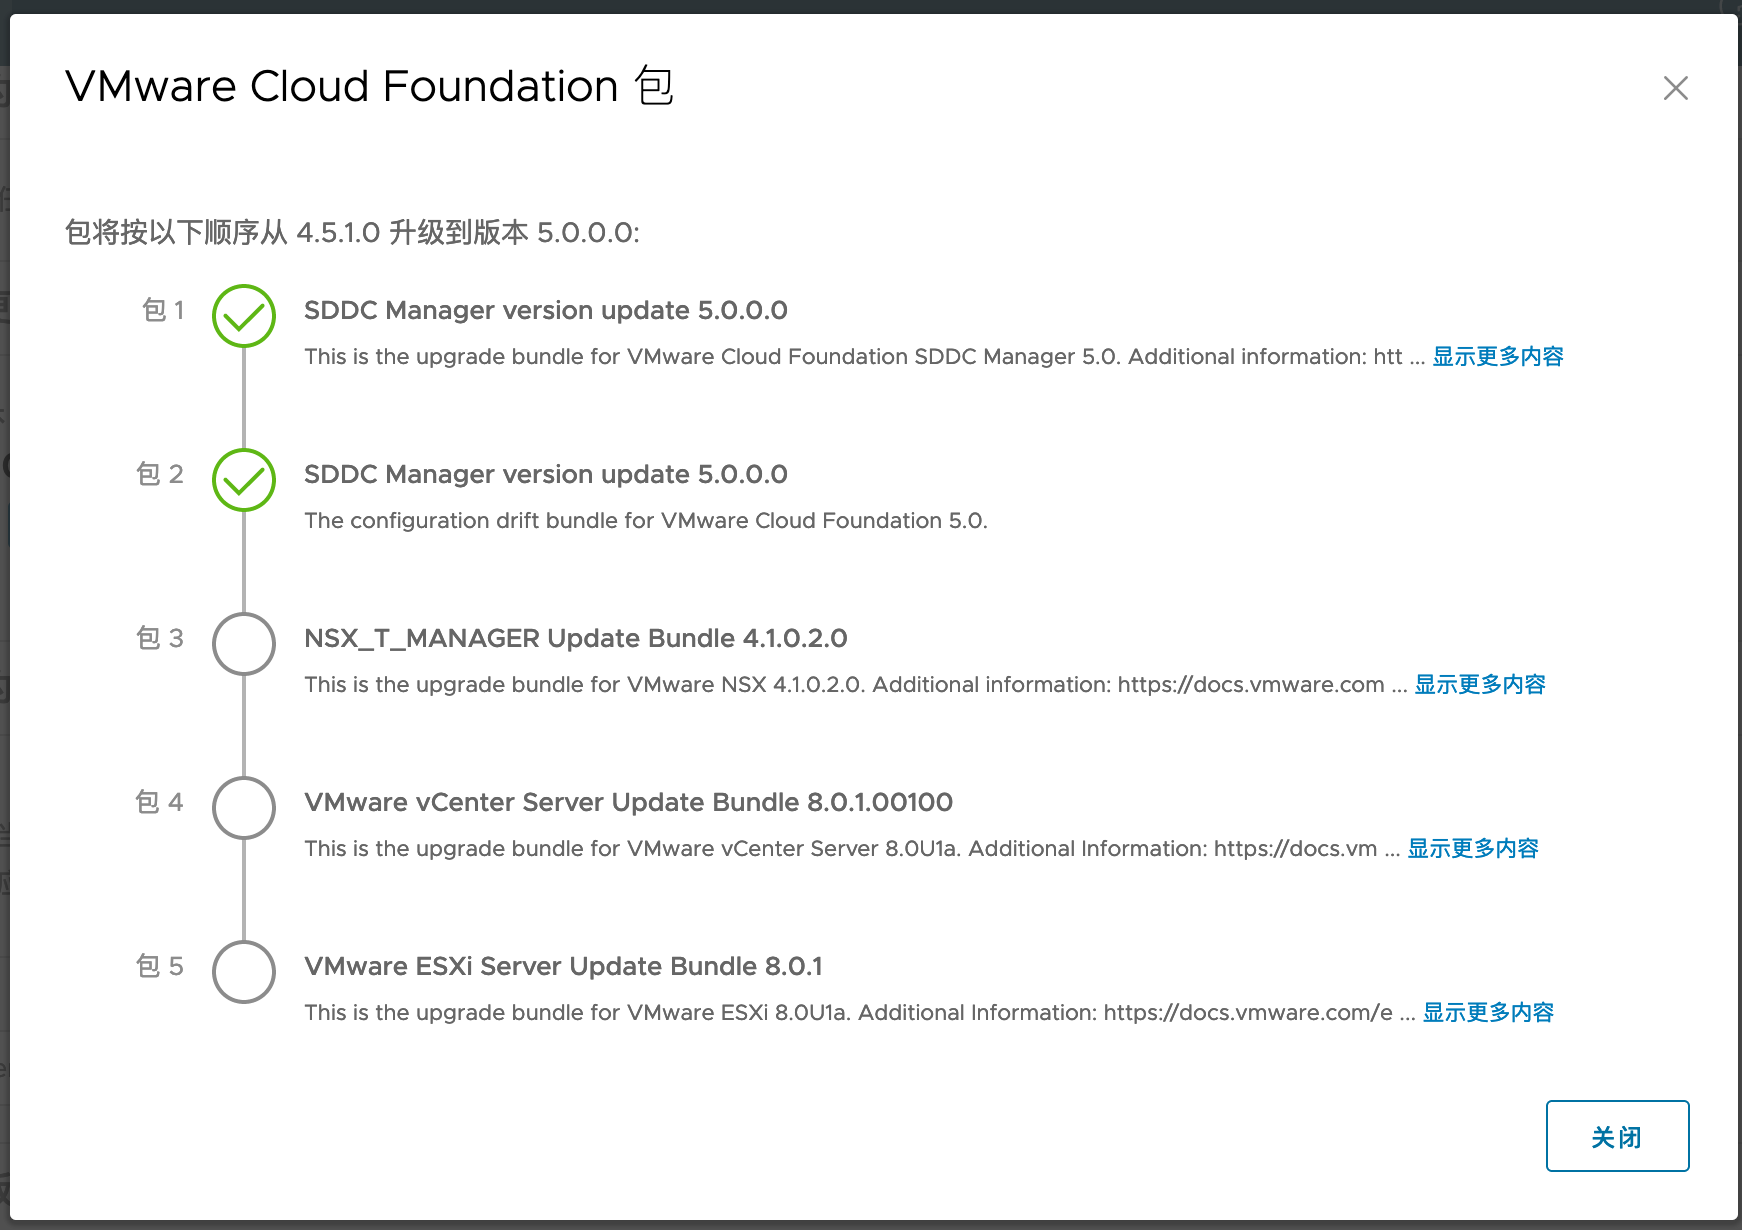
更新第二个包:

3. 排错
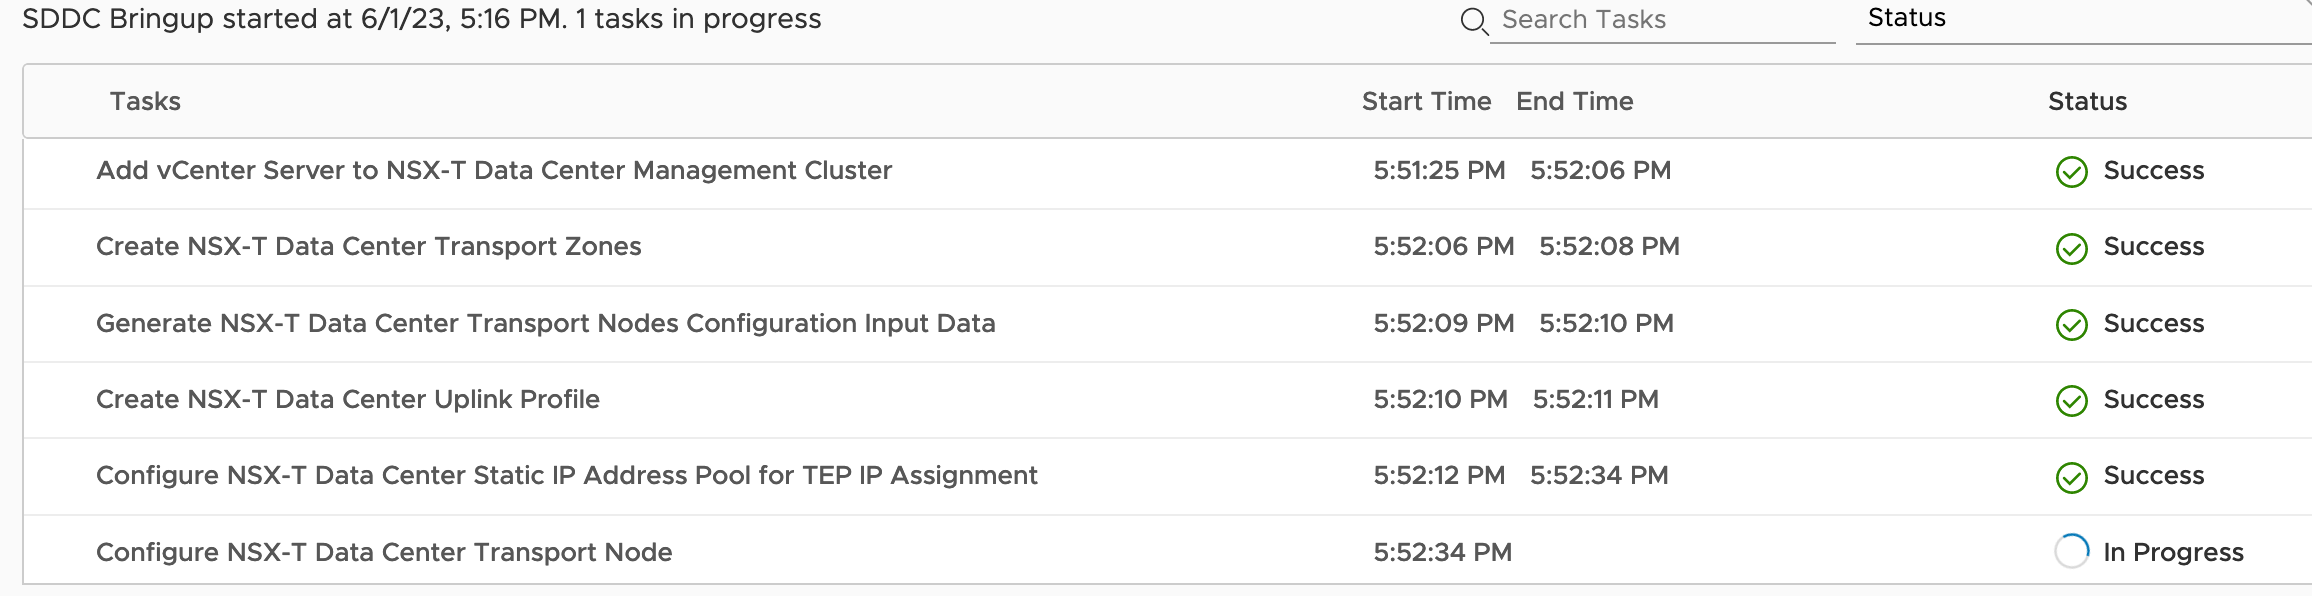
通过下列日志查看bring up的详细过程:
tail -f /var/log/vmware/vcf/bringup/vcf-bringup-debug.log
