Avi 与 Windows AD 进行对接
目录
Windows AD集成
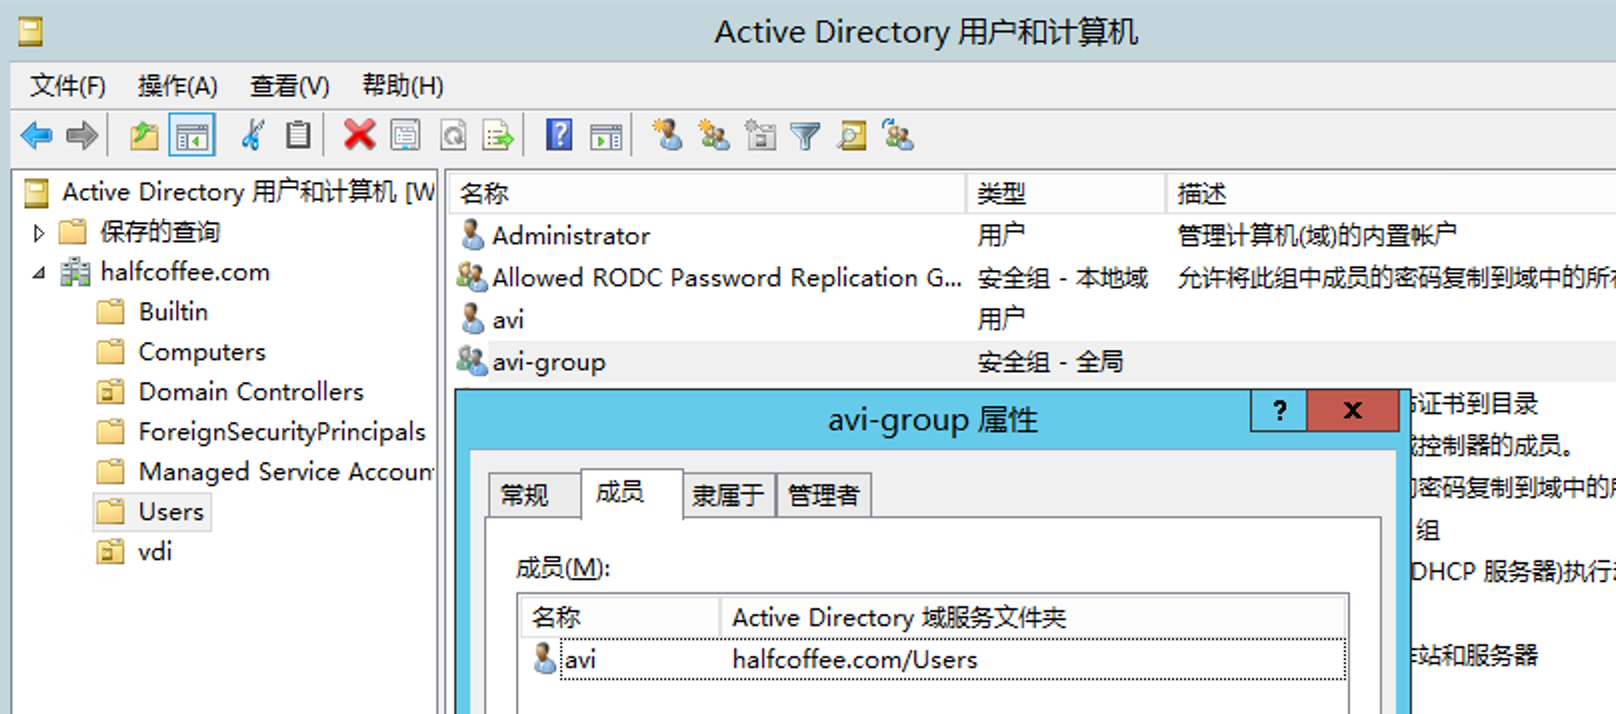
1. AD用户及用户组准备
准备一个名为 avi 的用户,并将其加入 avi-group 组中:
2. Avi侧配置
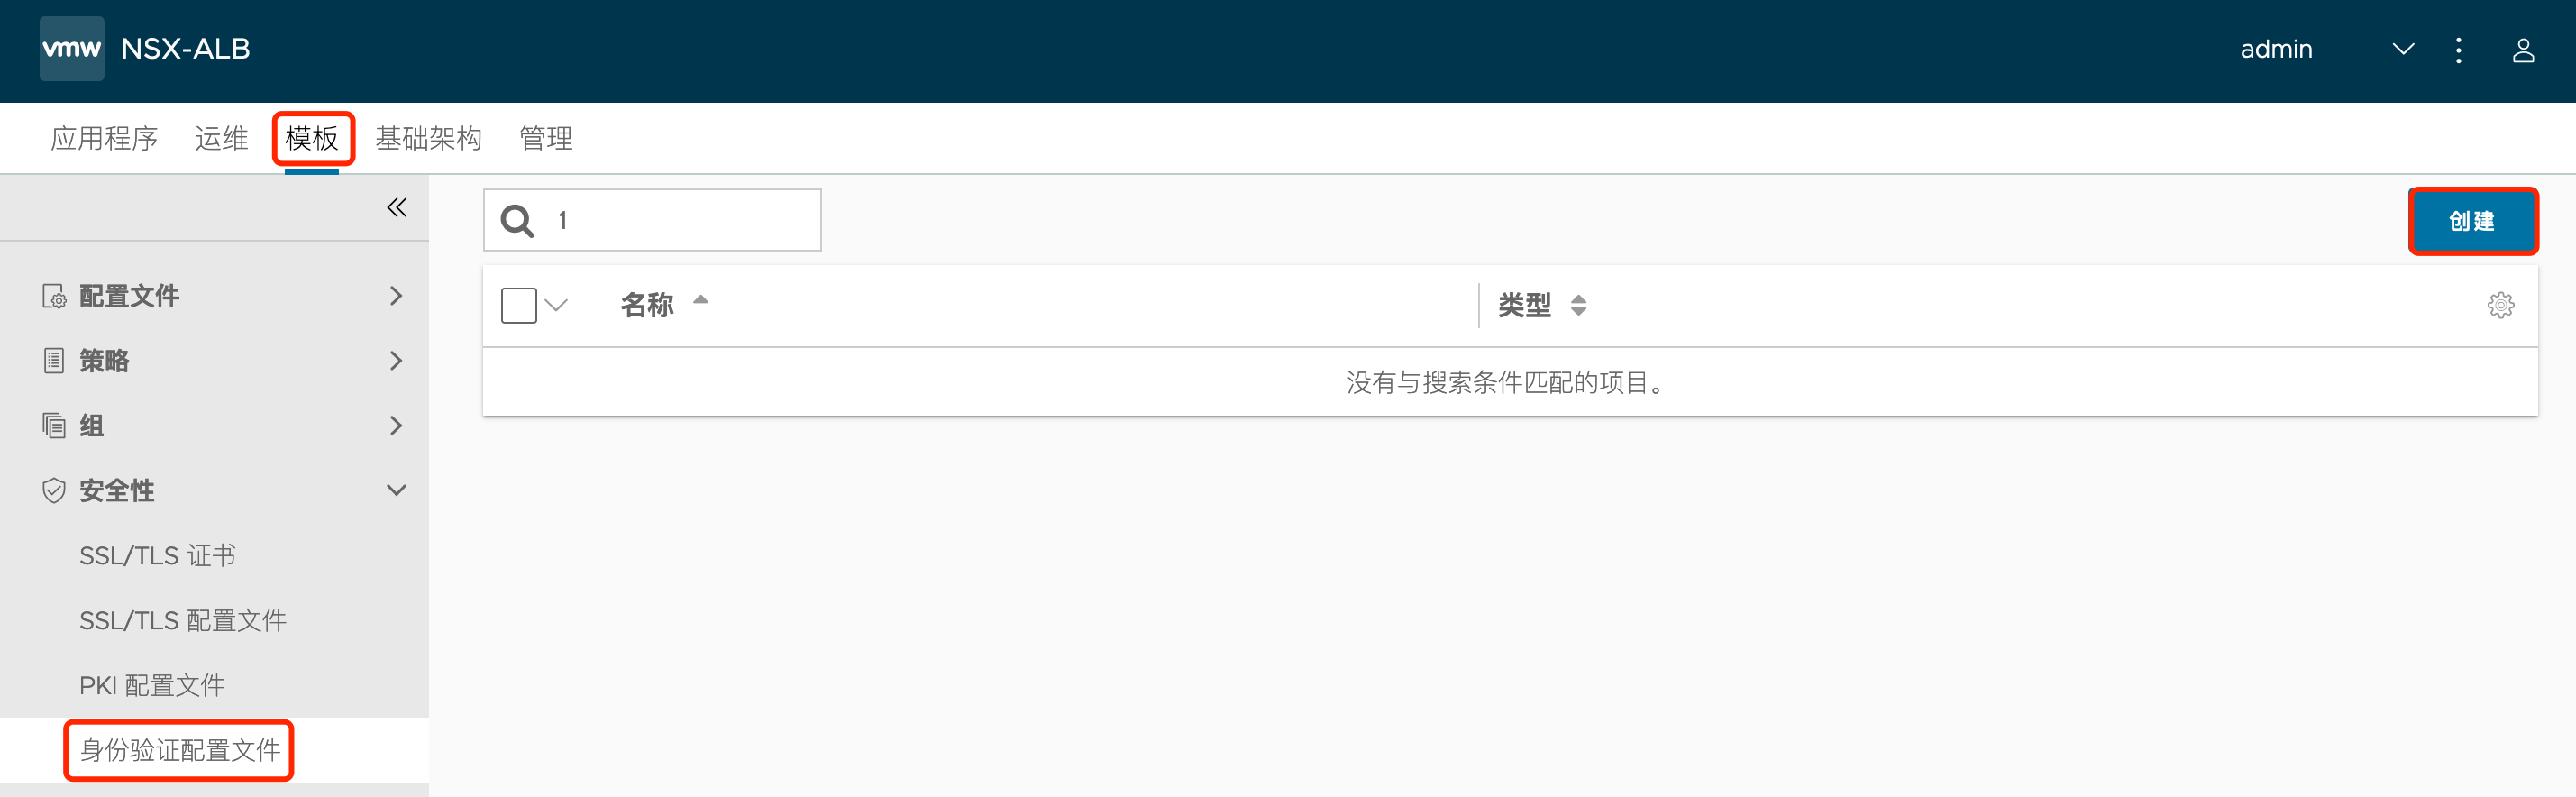
在下列位置添加“身份验证配置文件”:
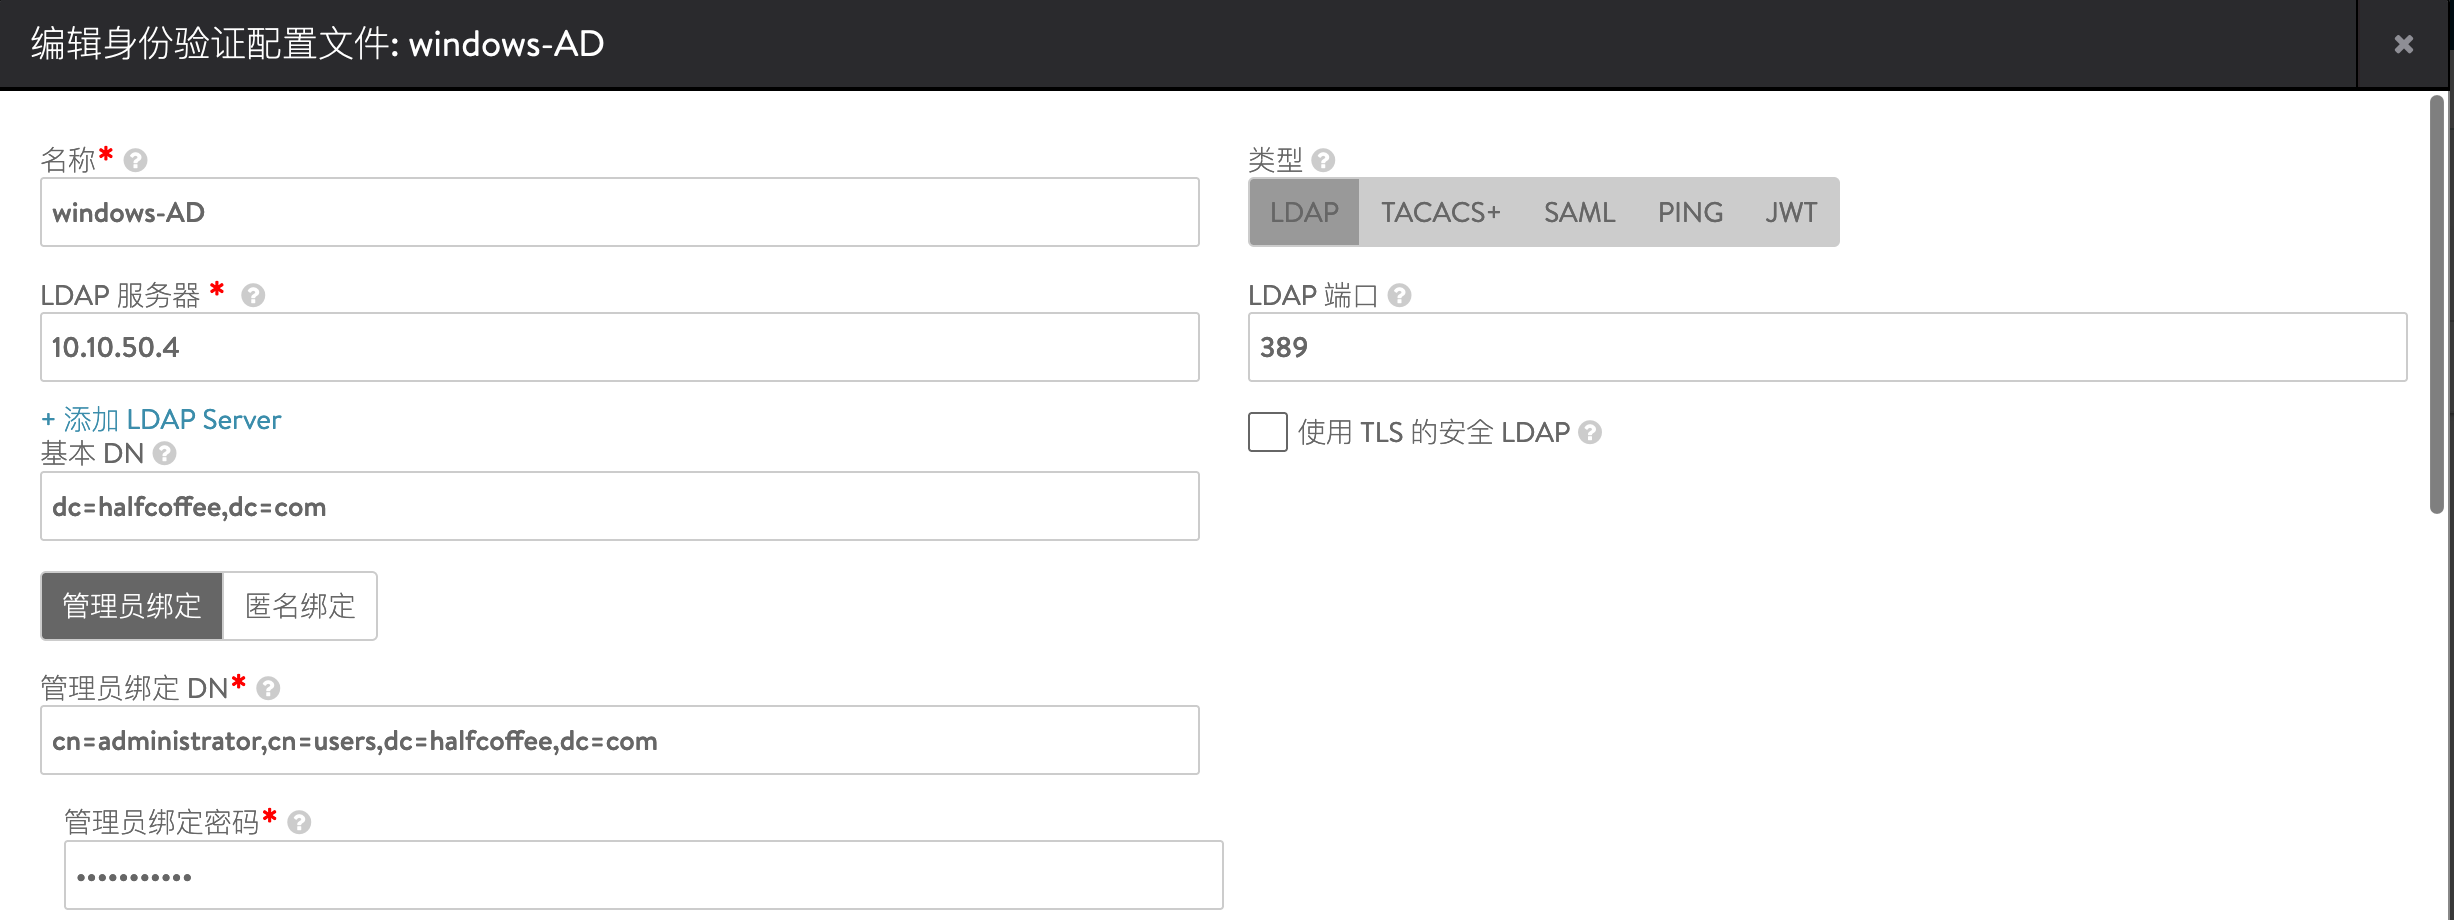
填写 Windows AD IP、端口、基本 DN、管理员 DN 及密码等信息:
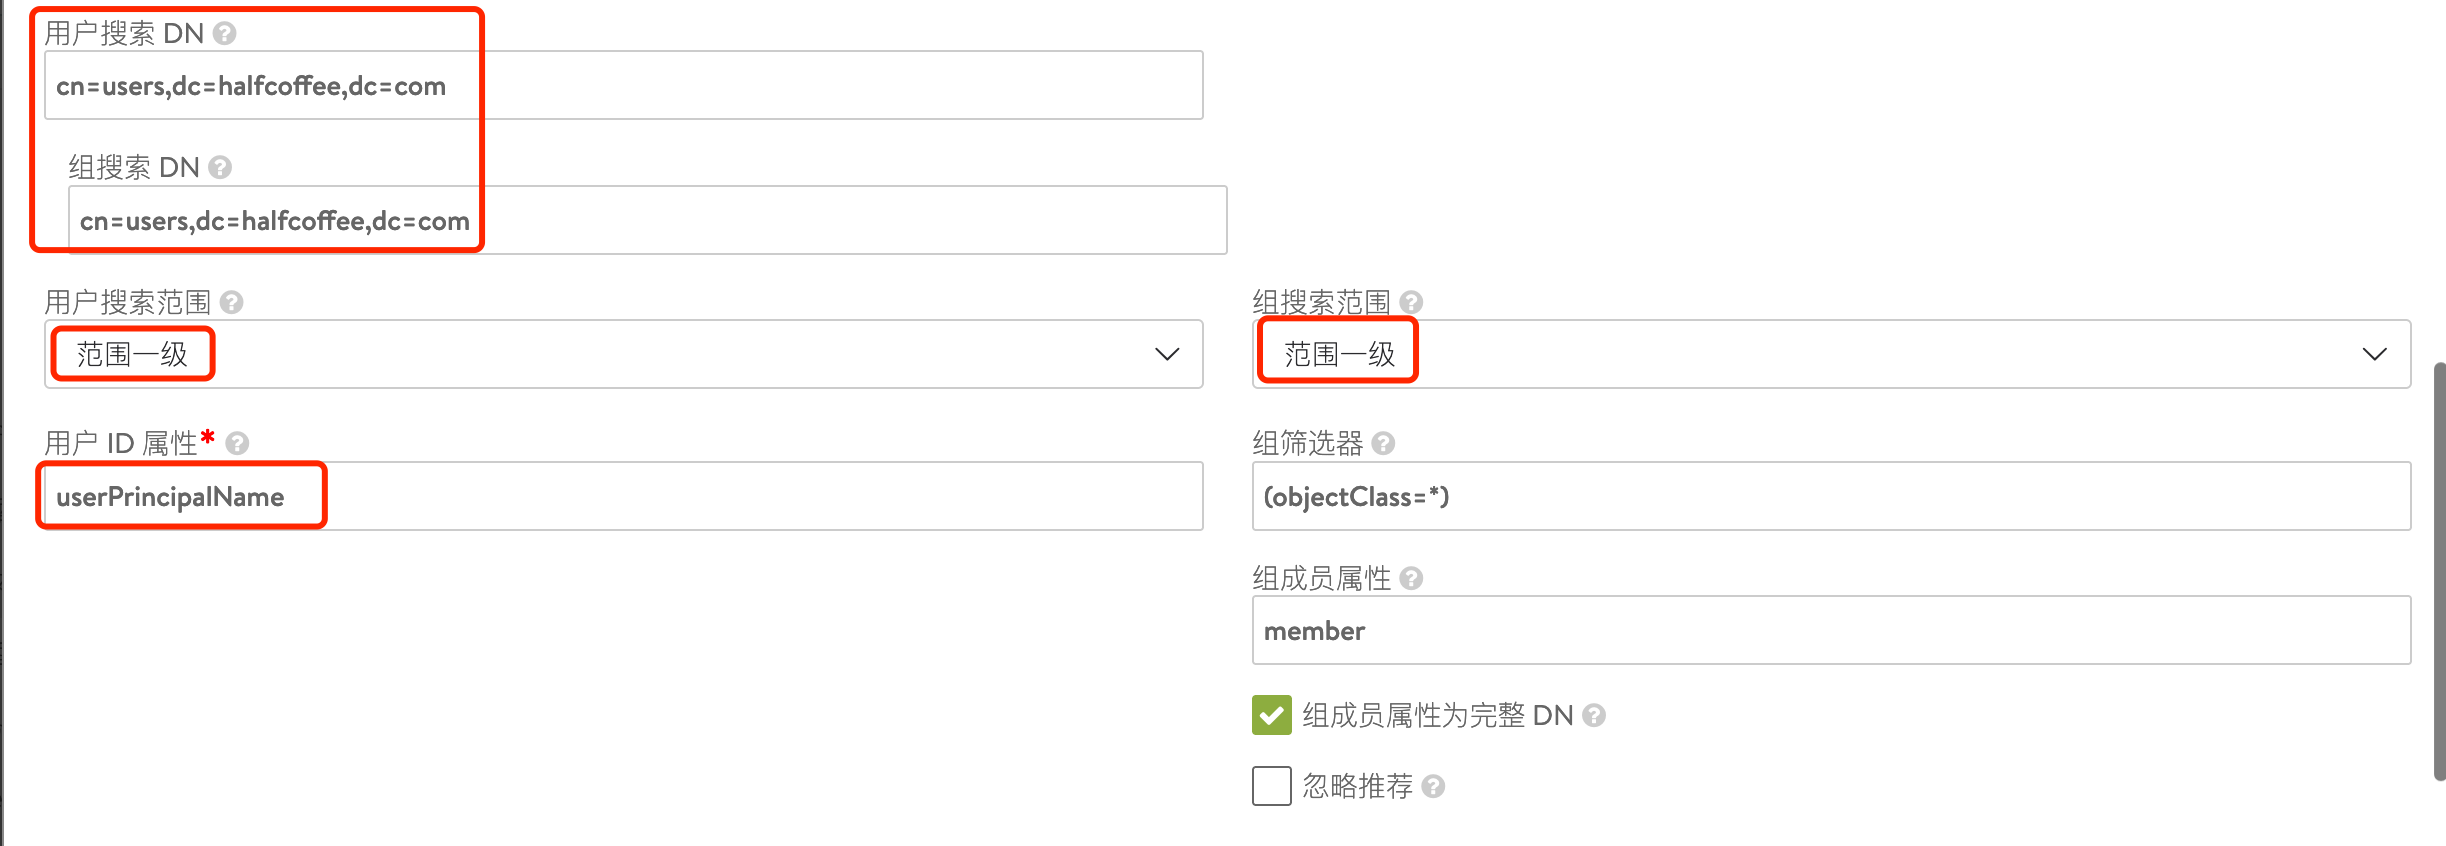
填写用户 DN 位置,在本文中所有用户和组均在 Users 中:
配置完成后点击保存,然后点击策略右侧的问号图标:

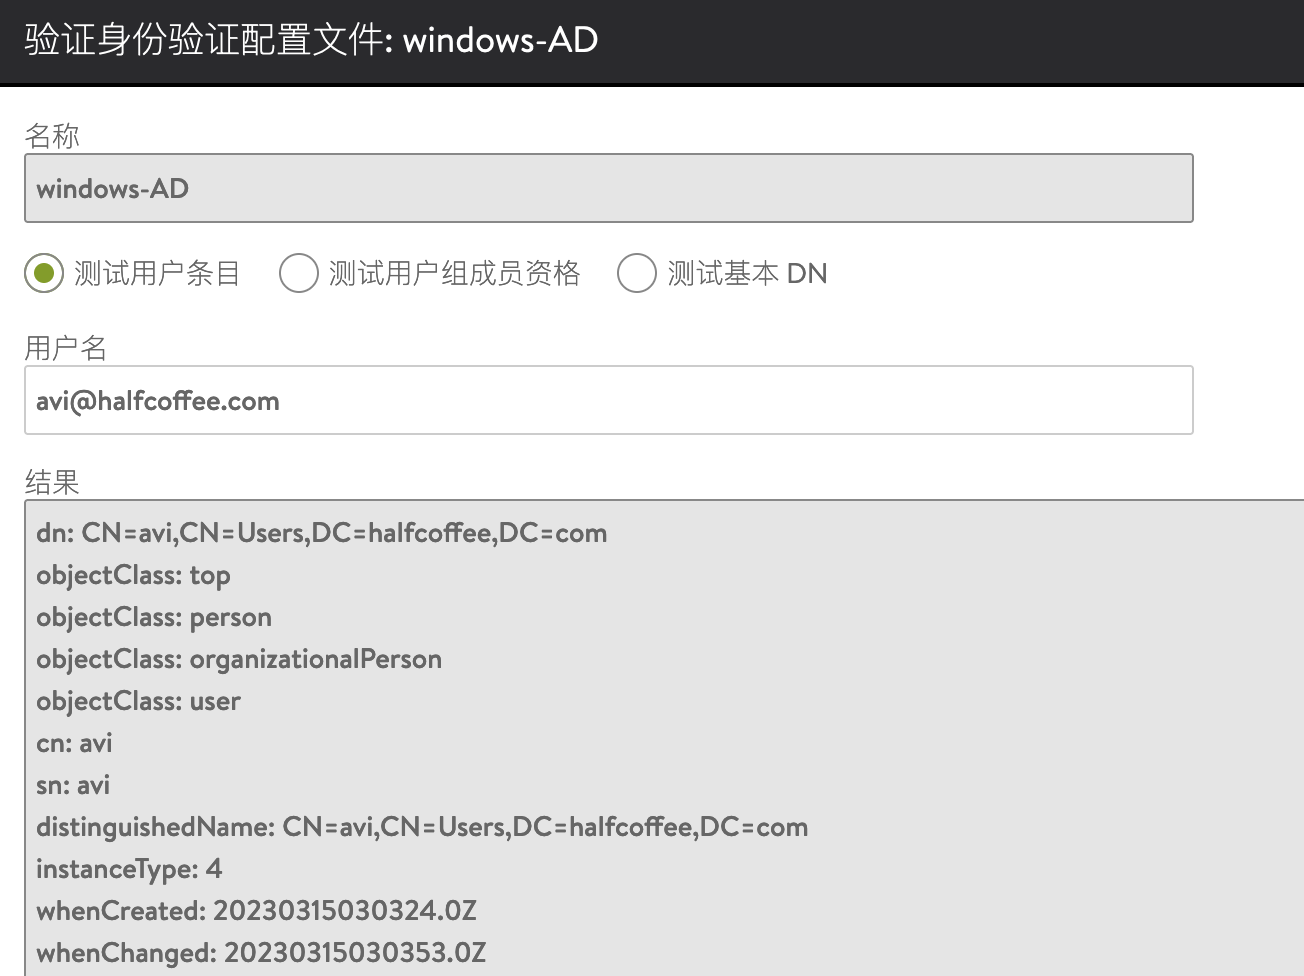
输入完整的用户名进行测试,确保可以正常返回信息:
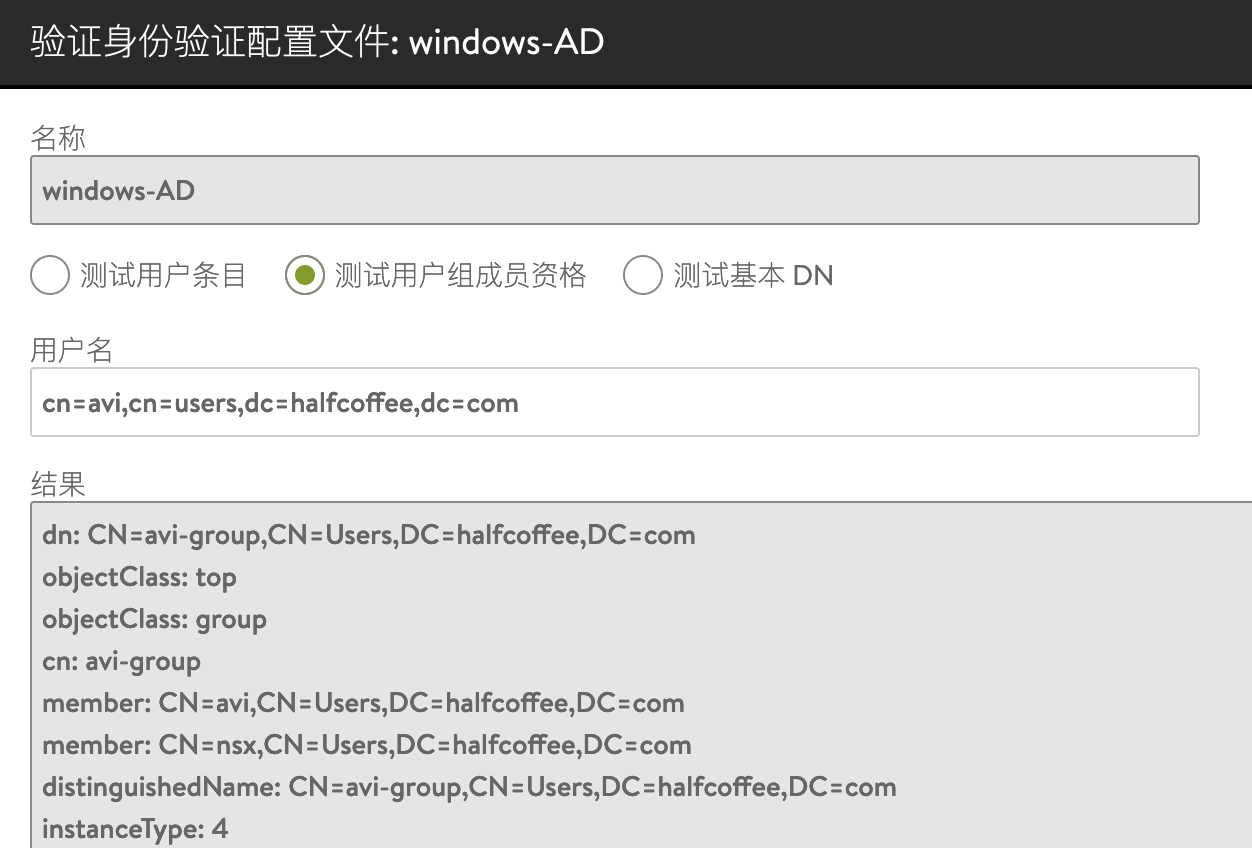
输入完整的组 DN 进行测试,确保可以正常返回信息:
3. 开启并配置远程登录
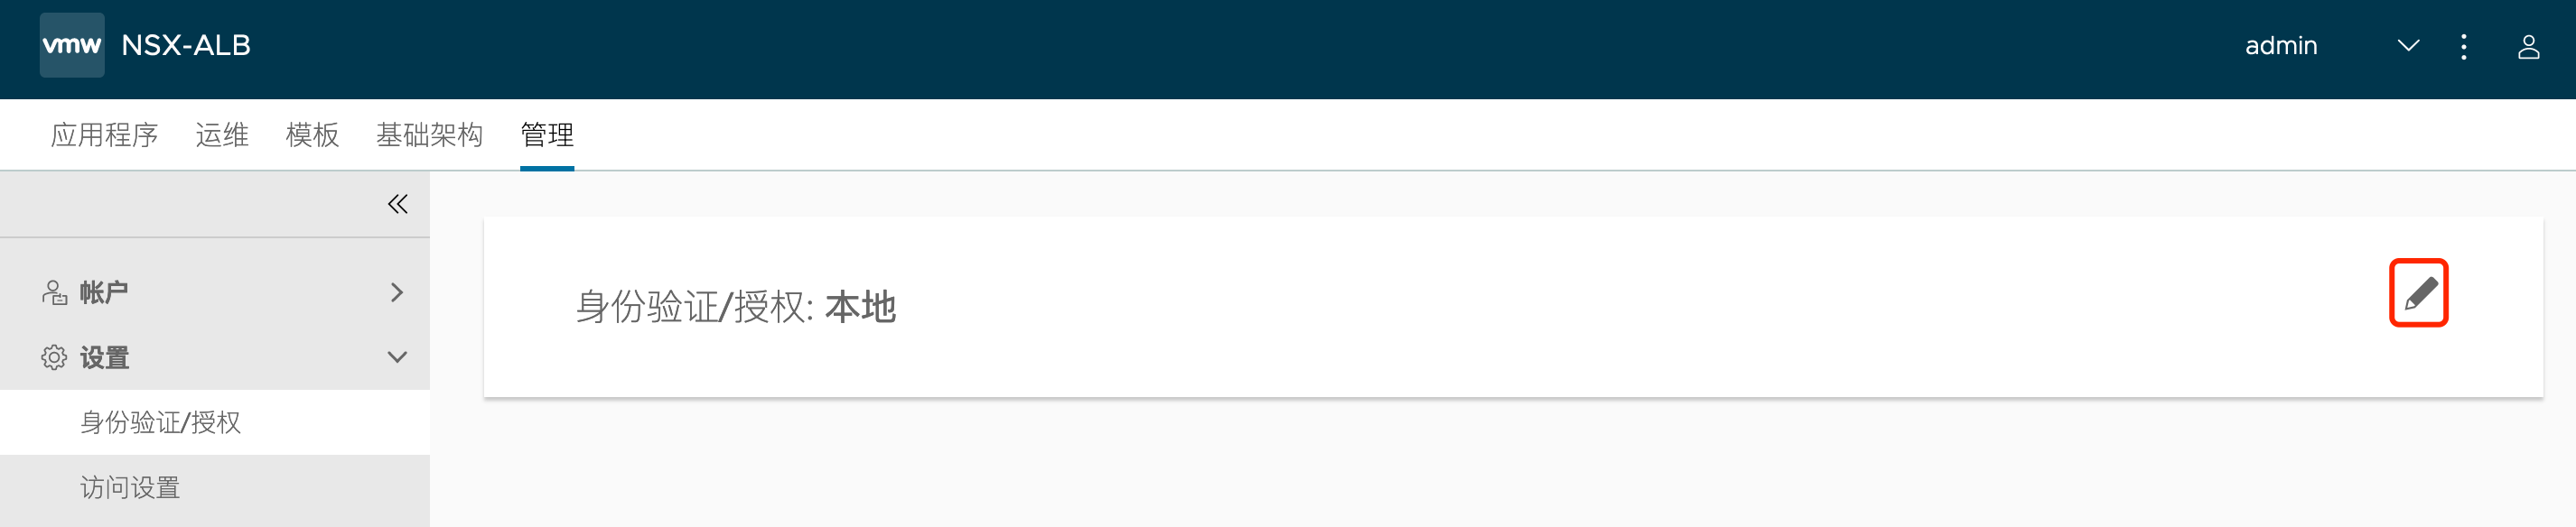
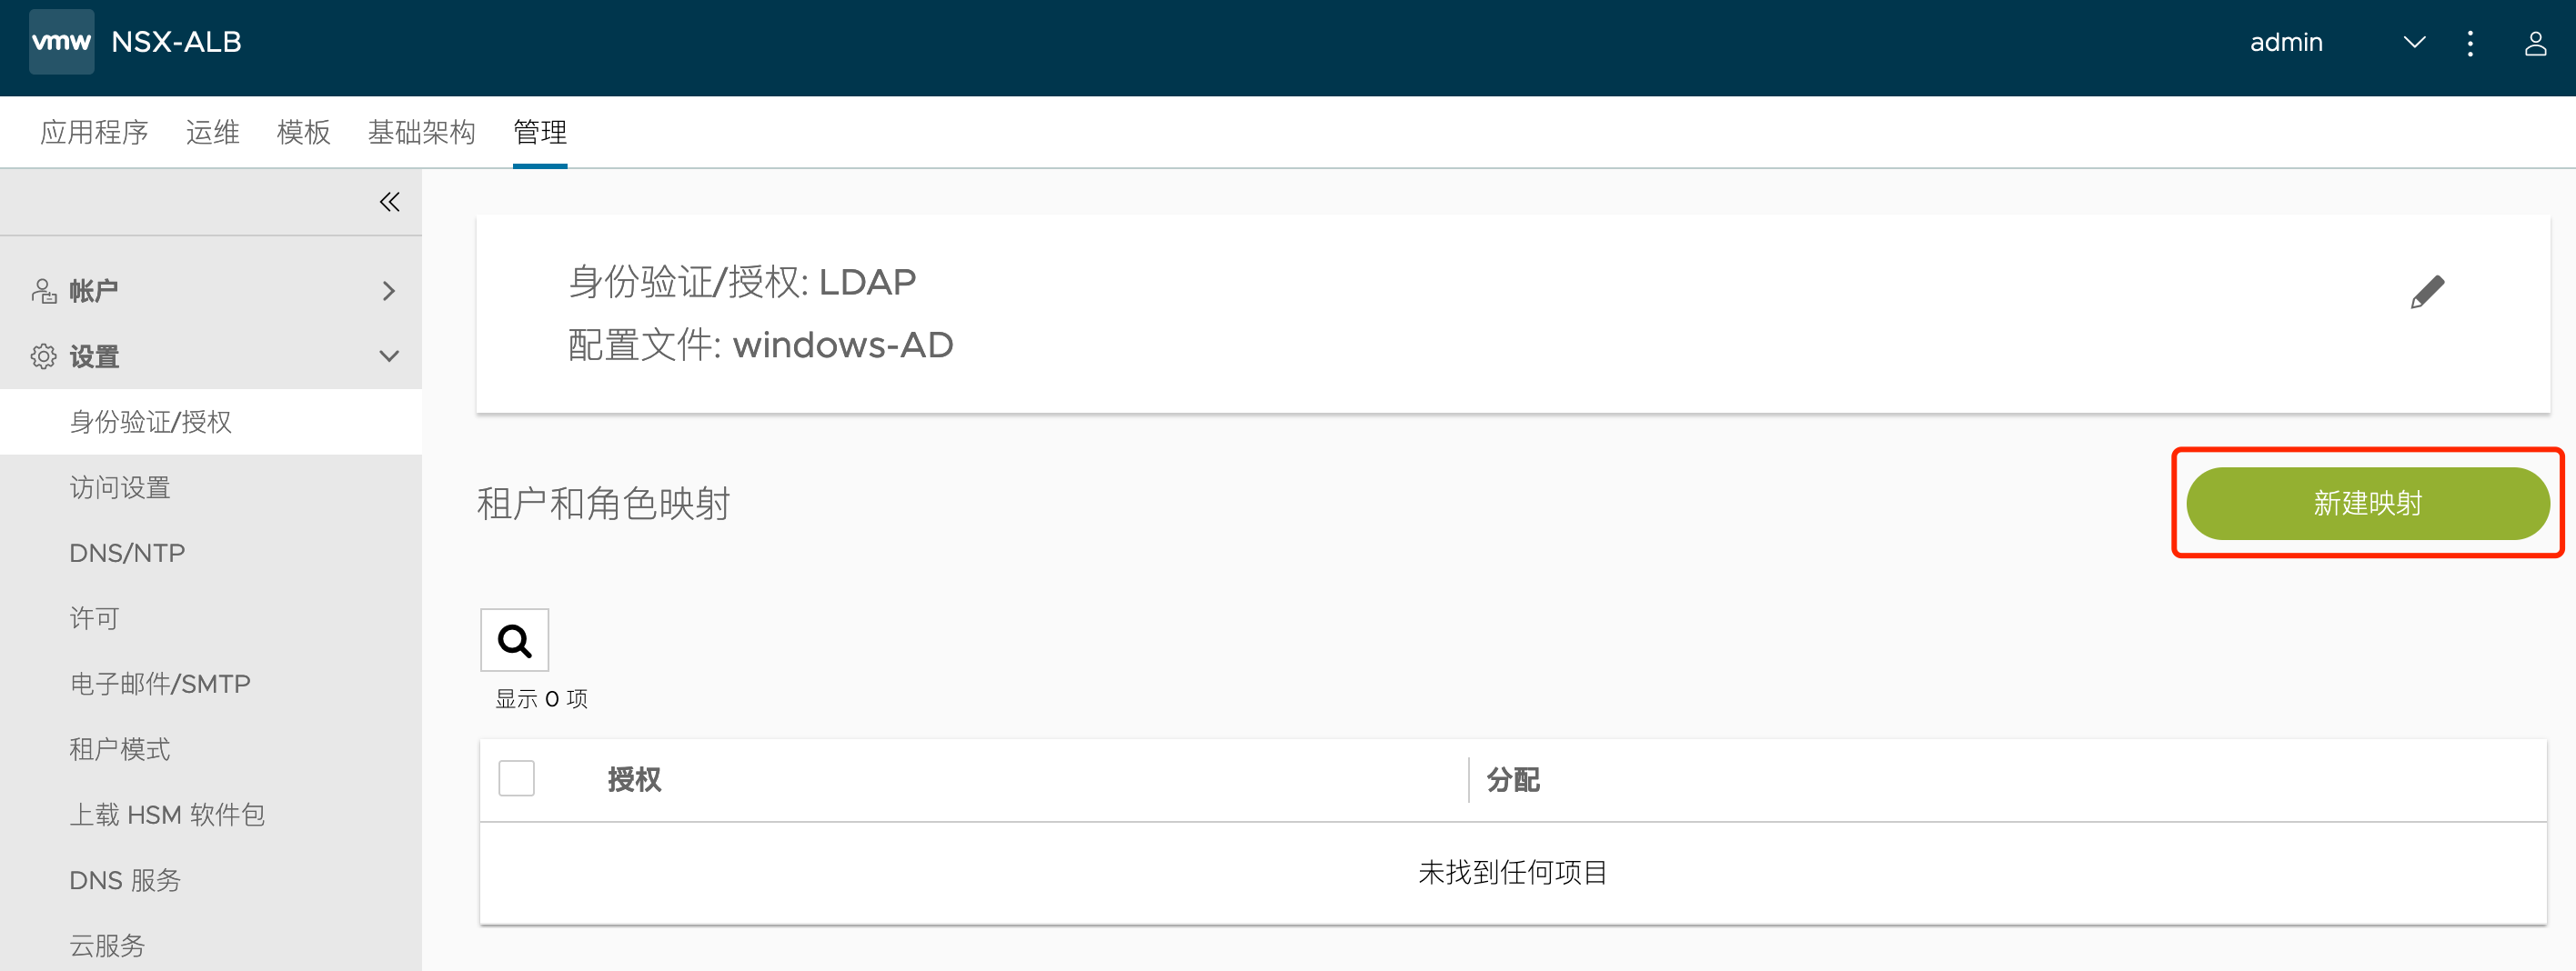
在下列位置编辑“身份验证/授权”:
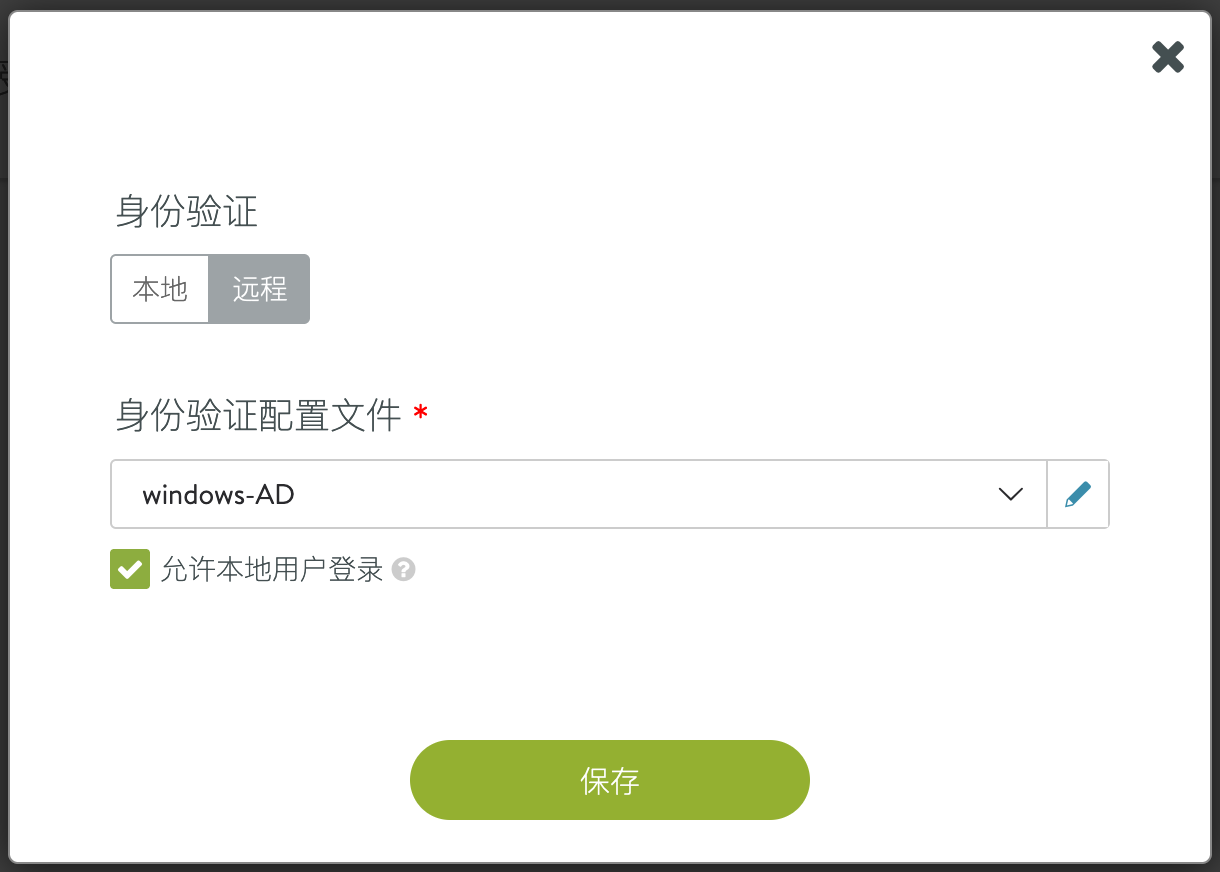
开启远程身份验证,选择上一步创建的 LDAP 配置文件,同时允许本地用户登录:
保存完成后可以看到下列界面,点击新建映射:
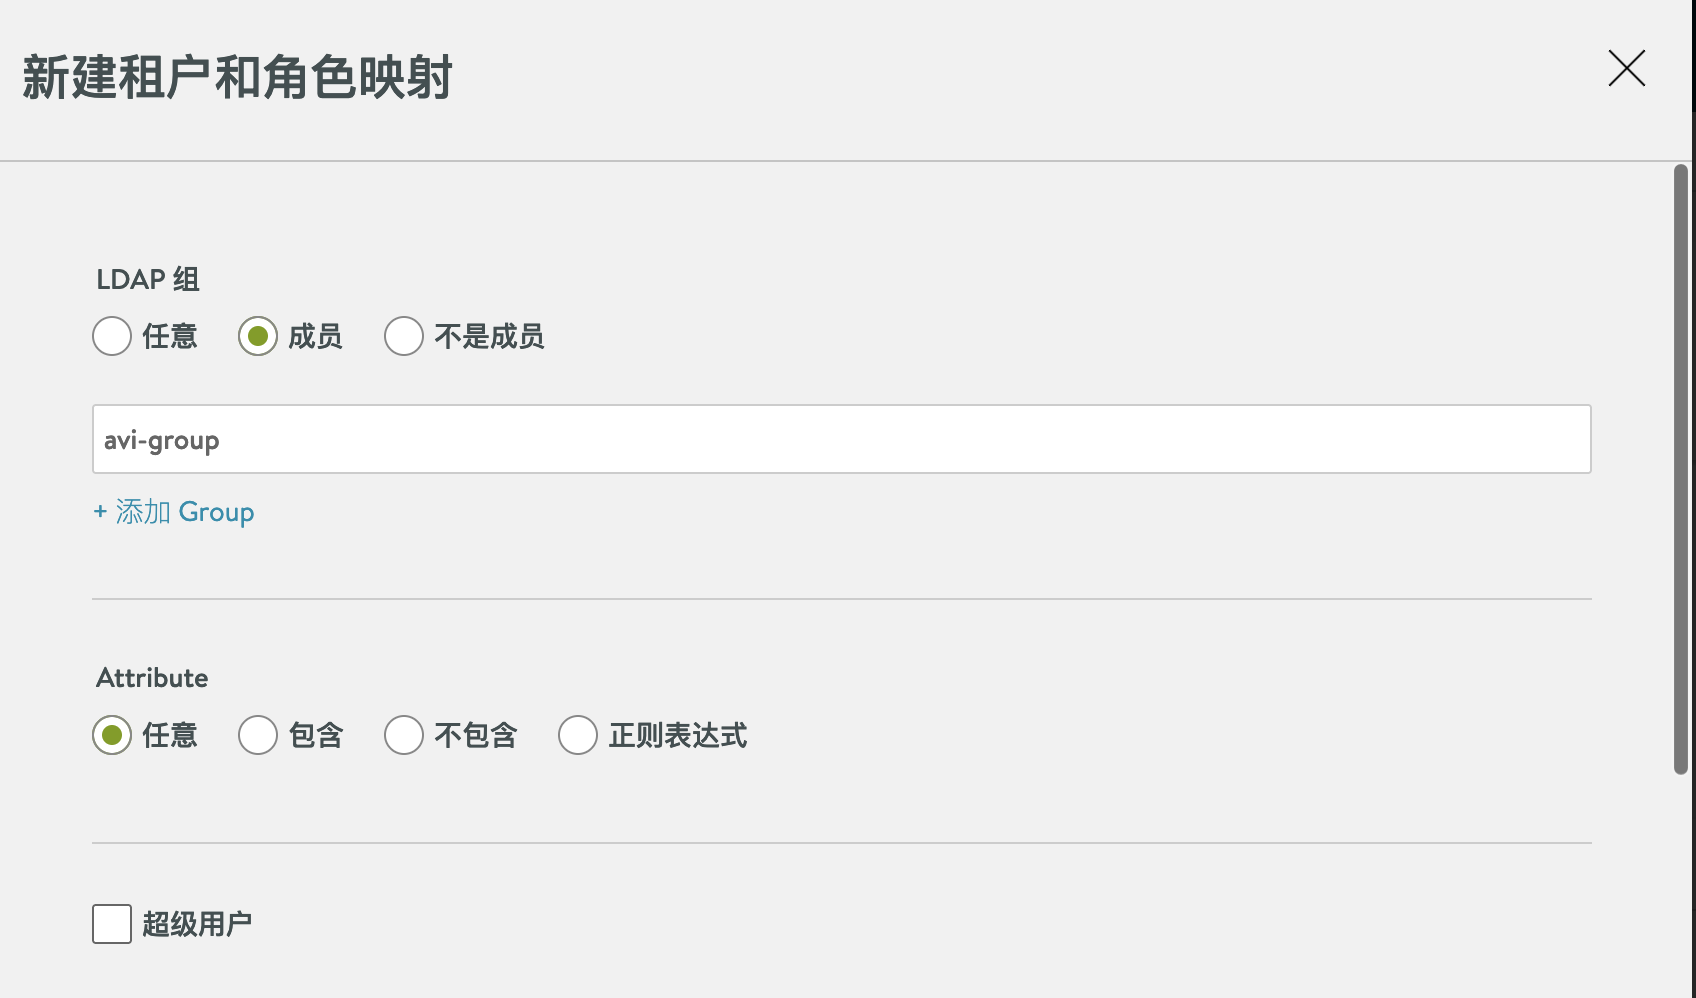
输入相关 AD 组的名称:
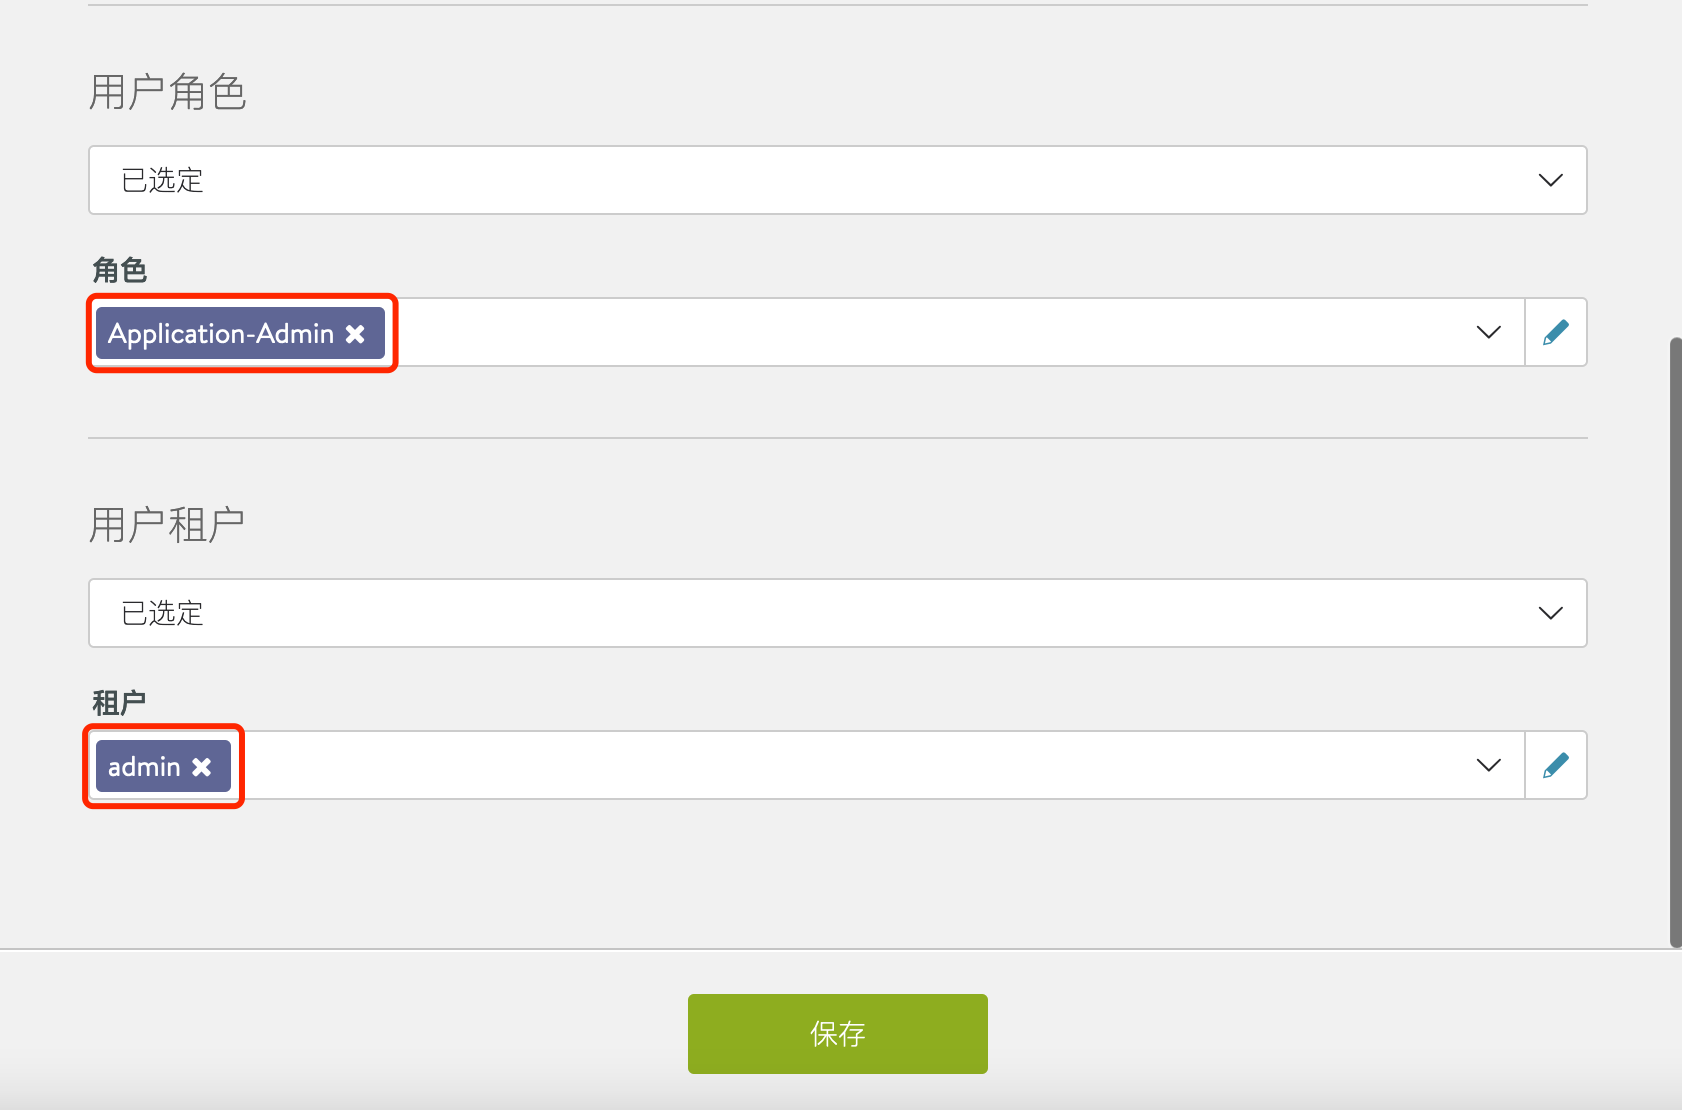
为组设置权限,此处为其指定角色为 Application-Admin,租户为 admin(即默认租户):
3.27.4. 登录测试
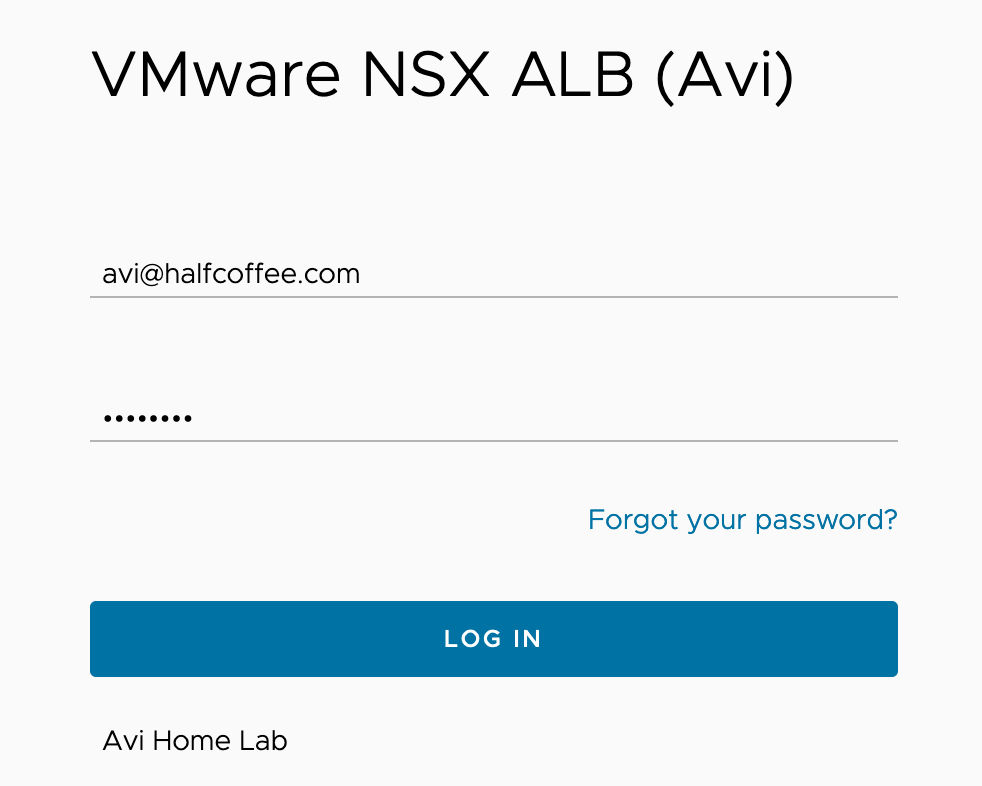
使用 AD 用户名和密码进行登录:
测试可以正常登入系统,并具备 Application-Admin 权限: